“One of the very nicest things about life is the way we must regularly stop whatever it is we are doing and devote our attention to eating.” Luciano Pavarotti
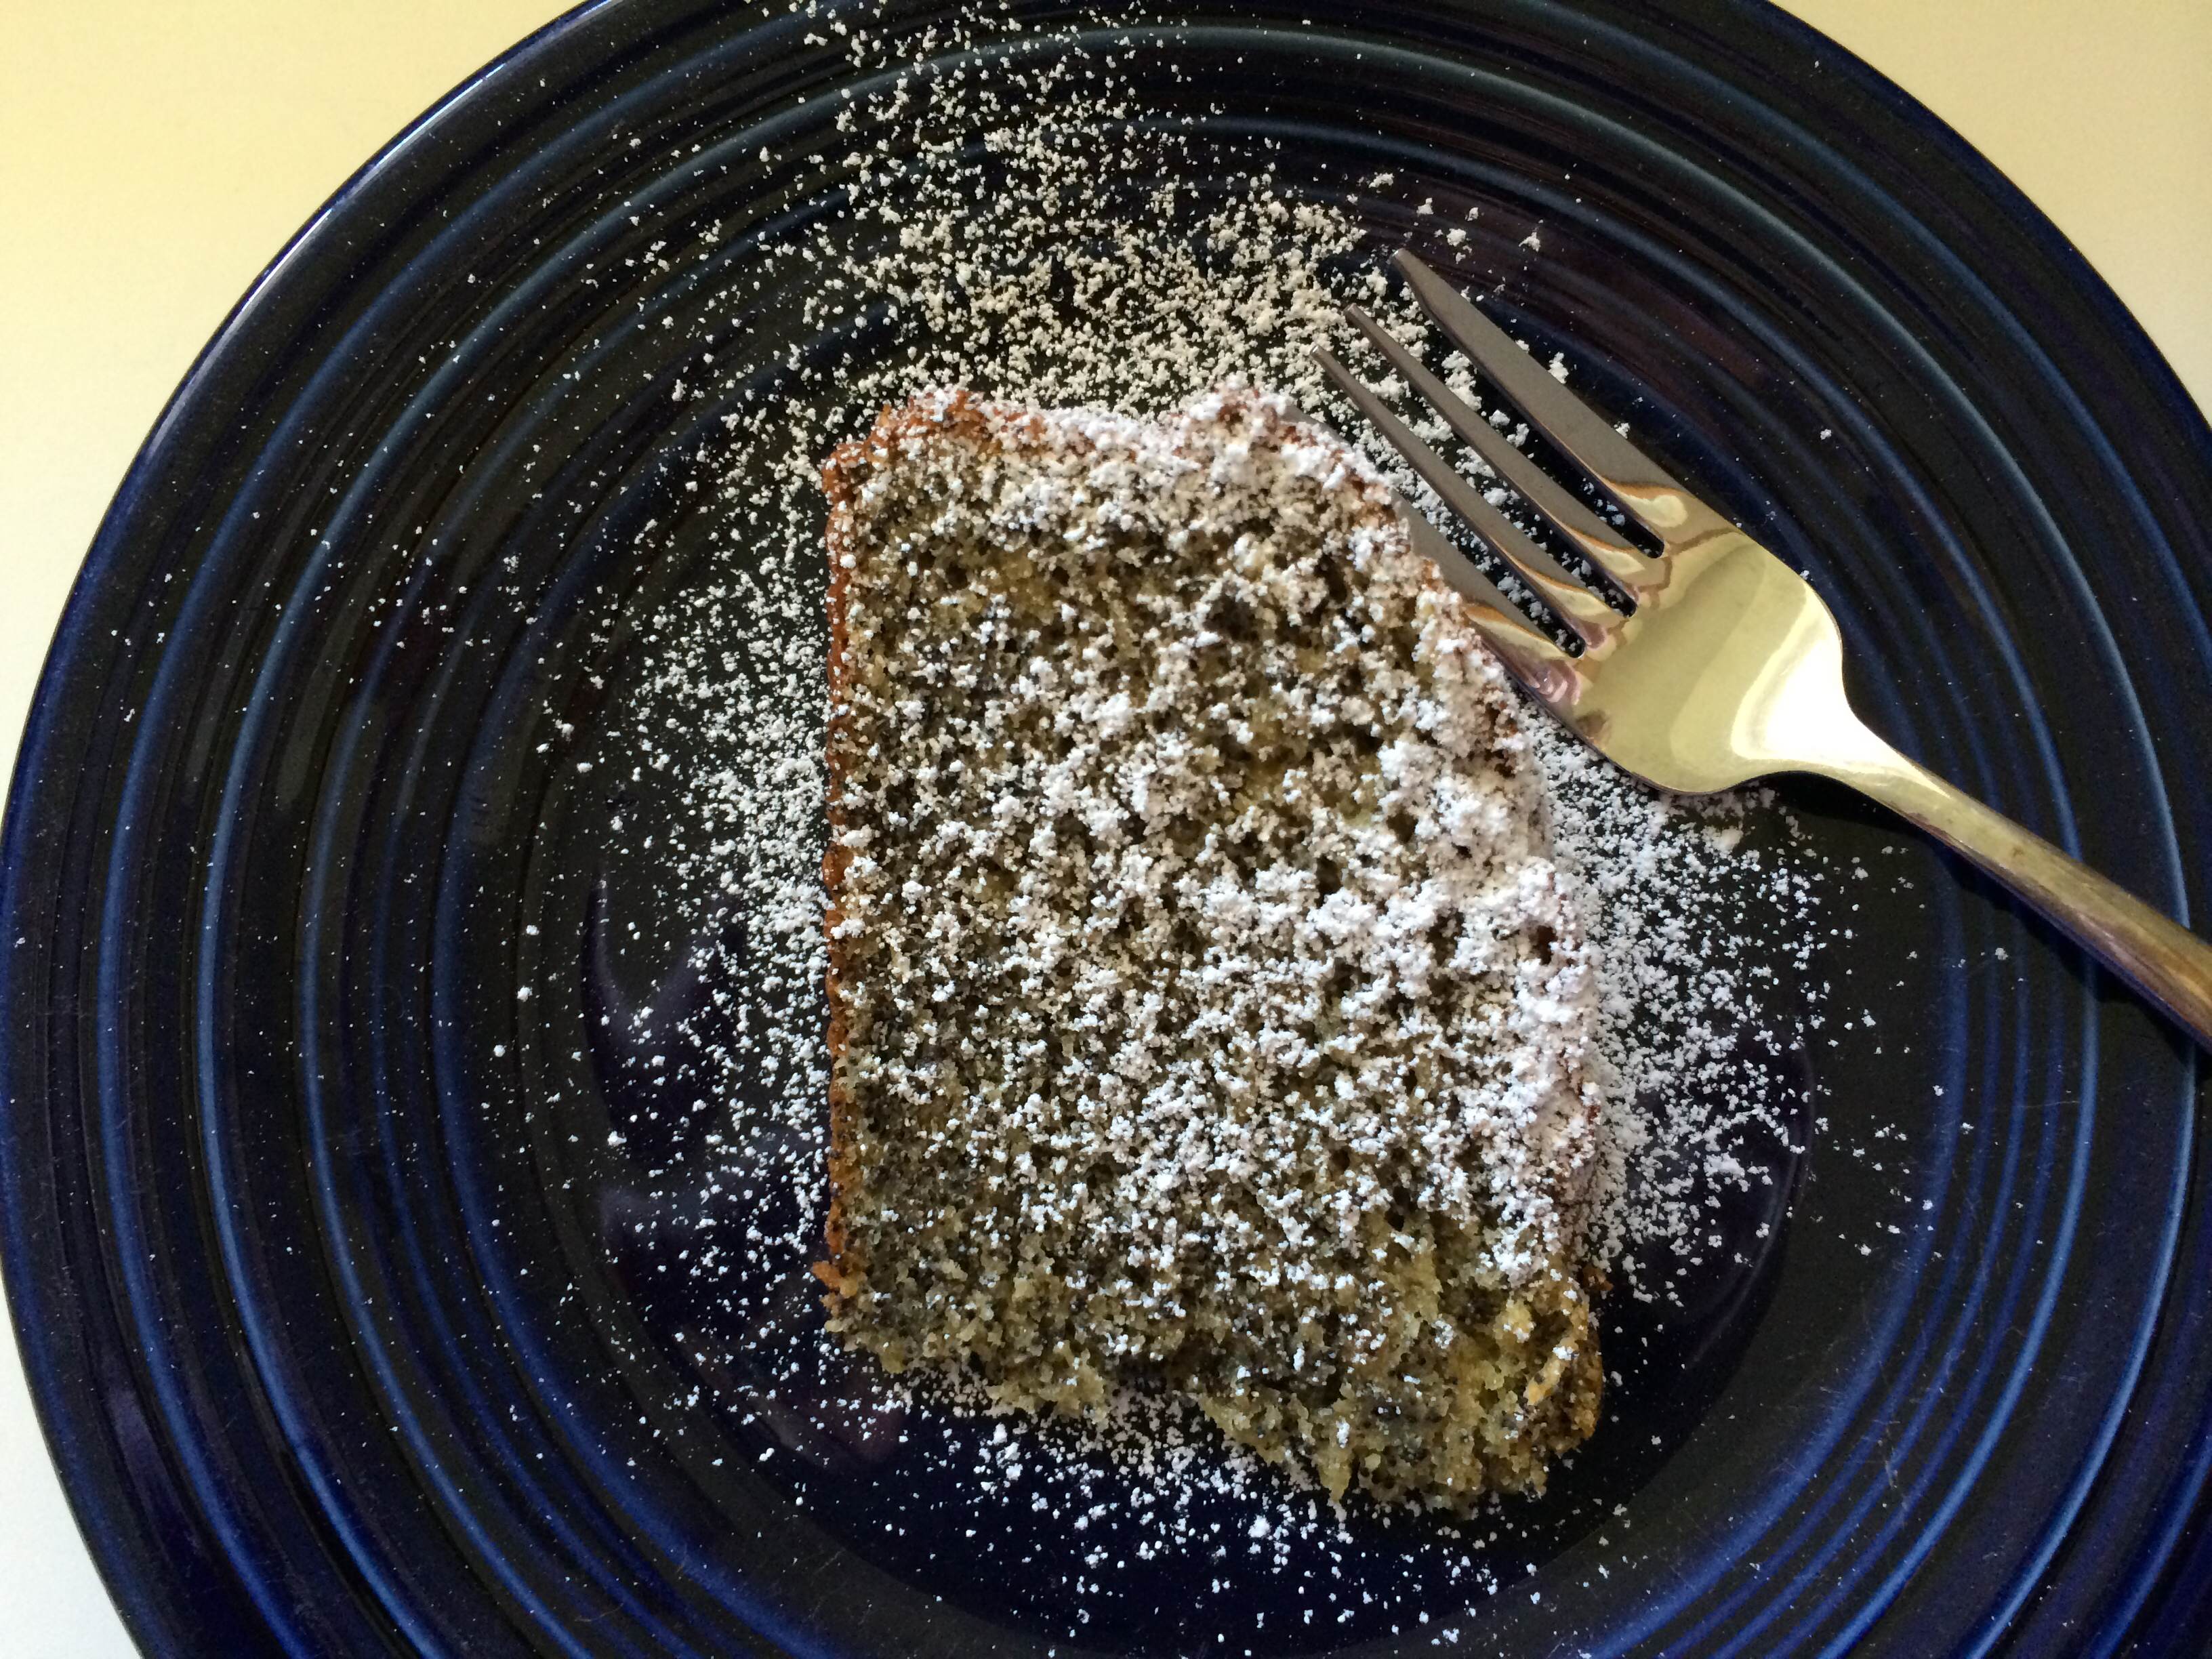
Every so many years, my birthday coincides with Father’s Day; such was the case this year. Sadly, my father passed away in 2008 and my husband’s father in 1985. We celebrated our fathers along with my birthday. Also, yesterday Maui Girl Cooks turned one year old! On Sunday, in honor of all of these events, I made a cake {it really was just my birthday cake}. Lest you think one should not bake one’s own birthday cake, it is no problem at all; I do not mind. Many foodies have been known to make their own birthday cakes. All kinds of possibilities tumbled around in my head. What should I make? I thought a lot about what kind of cake I wanted–chocolate cake with mocha frosting, Boston Cream Pie, chocolate rum cake, apple galette, this strawberry cheesecake and poppyseed cake were all in the running for the occasion {yes, I know those are not all cakes}. I finally decided on poppyseed cake with this lemon curd. Time did not allow for the lemon curd, but I will make it soon, and you will be among the first to know how it goes; I have no doubt that it will be delightful. My ideas for variations on this poppyseed cake are many and I will share the results with you when I make them. I baked this cake once before, sometime within the last year I think {last year’s birthday cake too maybe??}. It was excellent, but I tweaked it just a bit this time, reducing the sugar a tad and adding lemon zest. Next time I will add more lemon zest. It was a fine birthday cake!
1 cup poppyseeds stirred into 1/2 cup hot milk {when ready to use, drain off any unabsorbed milk}
2 cups {10 oz.} whole wheat pastry flour
1 tsp baking powder
1 tsp baking soda
3/8 tsp salt
3 large eggs, separated
1/2 cup unsalted butter, diced and softened
1 cup sugar minus about 1 tbsp {5 3/4 oz}
2 tsp vanilla
1 cup sour cream or buttermilk {I had neither, so I used 1 tbsp white vinegar with milk to make 1 cup}
Zest of 1 lemon, preferably organic {next time I will use 2 lemons}
Set the poppy seeds aside to soak in the milk until needed {if you have time, soak the seeds for a couple hours}. Preheat the oven to 375 degrees Fahrenheit. Lightly butter and flour {or spray} a 9-inch springform pan. Mix the dry ingredients together and set them aside. In a medium bowl, beat the egg whites until they form firm but moist peaks and set aside. In a large bowl, cream the butter with the sugar until light and fluffy. Add the vanilla, then beat in the yolks one at a time until smooth. Scrape down the bowl, then stir in the sour cream or buttermilk, drained poppy seeds and lemon zest. Add the dry ingredients in thirds. If using a mixer, this can be done on low speed. Scrape up the batter from the bottom of the bowl to make sure it’s well mixed, then stir in a quarter of the beaten egg whites before folding in the rest. Smooth the batter into the pan, then bake until golden, firm. and beginning to pull away from the sides of the pan, about 50 minutes. Remove from the oven, set the cake on a rack, and gently remove the rim so that the cake can cool. We have always enjoyed this cake with a dusting of powdered sugar, but it would be delicious with fresh strawberries and softly whipped cream, as Madison suggests. Makes 1 9-inch cake, serving 10-12.
“The smell of good bread baking, like the sound of lightly flowing water, is indescribable in its evocation of innocence and delight.” – M.F.K. Fischer
This slideshow requires JavaScript.
I’ll start by apologizing for my finished bread looking burned; it was not burned. No matter how I aimed my camera, part of the loaf looked black, which is why the picture is cropped. Sometimes a photo just doesn’t do justice to its subject. Now that that is out there, let’s move on.
I love baking yeast breads because I find it relaxing and therapeutic. Not that I’m necessarily in need of therapy when I decide to bake some crusty, yeasty and delicious loaves. It’s just that it feels good to get your hands in the dough and feel the magical transformation from wet sticky dough to dough that is silky and elastic, and a pleasure to touch. Homemade bread actually engages all of your senses-
~There is the smell . . . yeasty fragrance wafting up from the bowl of blooming yeast. “Blooming yeast” sounds like a British expression; in this case it means to put the dry yeast into warm water to dissolve and begin activating, so your bread will rise properly.
~ The tactile nature of bread dough is that it goes from sticky to silky, shaggy to supple
~ Visually appealing is your bread when it emerges from the hot oven, golden and brown, like it just spent the day on a glorious tropical beach {Maui??}
~ If you were able to achieve a nice crisp crust, you will hear that crust shatter when you tear or cut into your beautiful bread. Maybe it’s the kind of crust that sends pieces of toasty shards over the edge of the counter to the floor when it’s cut.
~ Last but not least is the taste . . . yeasty, whole wheat flavor {or maybe rye} made better with thin slices of good butter. Or perhaps you have chosen a smear of fresh goat cheese, or a dip in some fruity extra virgin olive oil showered with freshly ground salt, pepper & herbs. My dear readers, it doesn’t get any better than this!
For tips on baking yeast breads {proofing the yeast, shaping the loaves, etc.} click here.
This recipe produces a bread that is dense, chewy and slightly sweet, with a crisp crust when toasted. We had a turkey sandwich on it a couple days ago, and it was most excellent.
Whole Wheat Oatmeal Honey Bread
adapted from Honey Oatmeal Bread from Bread Winners {Mel London, 1979}
*1 cup/110 grams ground oats {uncooked rolled oats processed in a food processor until you have 1 cup}
1 cup raw sunflower seeds
*I wanted my bread to taste more of oats, so one of my adaptations was to add a cup of ground oats in place of 1 cup of whole wheat flour. Feel free to use all whole wheat flour, or other flour of your choice.
Glaze: Honey
Uncooked rolled oats
In a large bowl, stir together boiling water, honey, butter, salt and rolled oats. Let stand for 1 hour.
In a small bowl, dissolve the yeast in the lukewarm water. Add to the oat mixture. Stir in the flour, 1 cup at a time and beat well. I start with the ground oats, and then add whole wheat flour until the dough is not super sticky. Stir in the sunflower seeds before the dough gets too stiff. It will be a little sticky, but that will be remedied as you flour your counter to knead the bread.
Turn out the dough onto a lightly floured surface and knead until dough is smooth and elastic {about 10 minutes}. If necessary, add enough flour to keep dough from being too sticky. Wash the big bowl you just used, rub some olive oil around the bottom and sides and add your ball of dough. Turn the dough to coat all the sides. Cover the bowl with a towel or damp cloth. Place in a warm spot and allow to double in bulk-about 1 1/4 hours. I turn on my oven for a minute or 2 to get it slightly warm, and that is where I put my dough to rise.
Turn out onto floured counter, knead for 1-2 minutes, shape into 2 loaves and place into well-greased loaf pans {9” x 5”}. Cover and place in a warm spot until almost doubled in bulk {about 45 minutes}.
Bake at 350 degrees for 40 to 50 minutes. Tops should be well browned and the bottoms should sound hollow when rapped with your knuckles. I look for a temperature of 200 degrees when I insert the instant read thermometer in the bottom of the loaf.
For a delicious glaze, brush tops of bread with honey that has been slightly warmed, then sprinkle with oats. It looks pretty with the honey & oats on top, but I must say that the oats don’t stick very well. Maybe I don’t use enough honey!
As hard as it might be, you should cool the bread completely on a wire rack before slicing. We {or I should say my husband} often finds it difficult to do this! Enjoy the rewards of your efforts!
“Fermented foods help people stay healthy,” Sandor Katz author of New York Times best-selling book “The Art of Fermentation.”
Before we get to the heart of the matter of cultured foods, here is a photo of yesterday’s sky. I was at the pool and the sky was so beautiful I had to take a picture. The picture doesn’t do it justice, but you get the idea.
My husband and I do a good job of learning about what constitutes a healthy lifestyle in terms of eating and exercise, and then we implement what we have learned to the best of our abilities. Our latest foray into healthy eating is fermented {cultured} foods. Please understand that in no way do I consider myself an expert on cultured foods; I am far from an expert, and know just enough to be dangerous. We have been eating cultured foods for years, because we enjoy them, but have intentionally added more into our diet because of the health benefits. Here are some of our favorite cultured foods, all of which we buy at Mana Foods, for those of you on Maui: ~ Yogurt– Nancy’s Yogurt {contains 11 different culture strains} has been a staple for more than a decade. ~ Sauerkraut and Fermented Pickles- We have recently started purchasing sauerkraut that is raw and unpasteurized, so that the beneficial microbes are available to us. One of our favorite brands is Sonoma Brinery. Farmhouse Culture makes fantastic sauerkraut as well. I LOVE their Smoked Jalapeno Kraut; I don’t find it at all smoky, but perfectly spicy! My husband prefers the Ginger Beet flavor, which I also like, but not as much as the Smoked Jalapeno. Both of these companies offer excellent products that are reasonably priced. If you want sauerkraut, these are a must try! ~ Kombucha– We drink a little kombucha most days. Our kombucha comes from Maui Kombucha. ~ GoodBelly Probiotic Drink– This is a delicious nondairy nectar-like drink. My favorite flavor is Mango. If you sign up for their Goodbelly Challenge, they will email you some coupons! ~ Sour Cream- We often spoon a bit of cultured sour cream on our quesadillas. Sour cream is always a yummy addition to a spicy dish. ~ Tempeh– Tempeh is a fermented soy product from Indonesia. Our current favorite way to eat tempeh is seasoned with freshly ground salt and pepper and sautéed in a bit of coconut oil until golden brown. Eat with ketchup and you have something that resembles French fries. A heavy drizzle of Sriracha Sauce is a great addition, if you like a little mouth burn, like I do. We also make a delicious sandwich that we call a “TLT” meaning Tomato, Lettuce and Tempeh. It is fantastic on toasted ciabatta bread. Our tempeh is in the freezer until we are ready to eat it, and then it thaws very quickly. ~ Miso- I like kale salad with Outstanding Miso Sesame Dressing. There is also miso soup, which is delicious!
Here are a few of the cultured foods we’ve enjoyed in the last few days:
This slideshow requires JavaScript.
Tempeh Sautéed in Organic Coconut Oil
Slice tempeh into approximately 1/2 inch slices. Spray skillet {we use cast iron} with pan spray, then melt about 1 tbsp. of coconut oil. When the oil is hot, add the tempeh slices. Season with freshly ground salt and pepper to taste. Sauté, turning occasionally, until golden brown. Serve hot with ketchup and Sriracha Sauce, or whatever you like.
This slideshow requires JavaScript.
Yogurt with Pineapple, Peach and Cranberry Preserves
Put some yogurt in a bowl, and top with homemade preserves, and your choice of any or all of the following toppings: unsweetened coconut, maple syrup {the real stuff please, preferably Grade B}, good quality honey, cinnamon, cacao nibs, nuts, hemp seeds, ground flax seeds, Buckwheat Chia Crunch or anything else you’d like.
Pineapple, Peach and Cranberry Preserves
**This is really more of a guideline than a specific recipe. You can adjust everything to your taste, including changing the fruits to what you have available.
1 Maui Gold pineapple
1 quart chunked fresh or frozen peaches
2 cups fresh or frozen cranberries
1 cinnamon stick
approximately 1 tbsp. good quality honey
Juice of 1/2 a juicy lemon
Grind of salt
Get a Maui Gold pineapple if you can {we buy ours at Costco, maybe Mainland Costco sells them also-I think they do}, otherwise a “regular” fresh pineapple will do. Cut up the pineapple into chunks {see previous pineapple blog post}. Put all of the pineapple chunks into a wide-mouthed saucepan {for better evaporation of the liquid}. Add 1 quart of peach chunks {we used the peaches we froze in August} and 2 cups fresh or frozen cranberries. You can certainly use a different berry if you are not a cranberry fan, but you can’t really identify them as cranberries as far as taste goes . Squeeze half a lemon and add the juice, and then throw in a cinnamon stick and a grind of salt. Spoon in some good quality honey to taste. We used about 1 tbsp. Bring to a boil, and then turn down the heat and simmer on low until thickened. The timing will depend on how juicy your fruit is. The preserves will thicken as they cool.
These preserves are meant to be made and eaten within a week or so; they are not preserved, so will not keep.
These preserves also taste great with one of our new favorite breads, from 101 Cookbooks. I have made several of her bread recipes, and we have loved them all.
Photo from 101 Cookbooks
Easy Little Bread from 101 Cookbooks 1 1/4 cups / 300 ml warm water (105-115F)
2 teaspoons active dry yeast (one packet)
1 tablespoon runny honey
1 cup / 4.5 oz / 125 g unbleached all-purpose flour
1 cup / 5 oz / 140 g whole wheat flour
1 cup / 3.5 oz / 100 g rolled oats (not instant oats)
1 1/2 teaspoons fine grain sea salt
2 tablespoons butter, melted, for brushing
In a medium bowl, sprinkle the yeast onto the warm water and stir until the yeast dissolves. Stir in the honey and set aside for a few minutes, until the yeast blooms and swells a bit – 5 – 10 minutes.
In the meantime, mix the flours, oats, and salt in a large bowl. Add the wet mixture to the dry and stir very well.
Brush an 8-cup loaf pan {9″x5″} generously with some of the melted butter. Turn the dough into the tin, cover with a clean, slightly damp cloth, and set in a warm place for 30 minutes, to rise.
Preheat the oven to 350F / 180C, with a rack in the middle. When ready, bake the bread for 35-40 minutes, until golden and pulling away from the sides of the pan. I finish things up by leaving the bread under the broiler for just a heartbeat – to give the top a bit deeper color. Remove from oven, and turn the bread out of the pan quickly. Let it cool on a rack so it doesn’t steam in the pan. Serve warm, slathered with butter.
We don’t get a lot of rain where we live in Pukalani, so today’s rain was welcome. The morning sky was a mix of blue, gray clouds & sun breaks; the wind was soft. Bigwinds are a frequent occurrence in Pukalani, winds so big it’s a wonder that plants have any foliage & that any of us have a hair left on our heads. But they aren’t the sustained winds that come with a storm. We are waiting for Flossie, the Tropical Storm that is currently headed for Maui, to arrive. Right now, the rain is falling a little harder & the palm fronds are swaying gently. A few birds are chirping here & there, but we aren’t hearing the usual afternoon bird symphony of chirps & tweets. We hear an occasional cock-a-doodle-doo from a neighborhood chicken.
We spent the morning preparing for Flossie. The smart thing to do if you think you may lose power is to make some food so you are ready if it happens. Having lived in the Pacific Northwest for over 20 years, we are experts at getting ready for a power outage; we experienced many. A big difference is that when the power goes out on Maui, it isn’t freezing cold outside. We have plenty to eat, so I just prepared a few things to make our day just a little tastier. I made cornbread using Bob’s Red Mill Blue Cornmeal, which I hear is more nutritious than yellow cornmeal, these oatmeal muffins and Passato of Vegetables , one of our favorite soups {good hot or cold}. Today is cool enough to enjoy the soup hot, and warm enough to eat it cold, should we be sans power. Fingers crossed that the power stays on!
Blue Cornbread {adapted from Moosewood Cookbook} 1/4 cup honey
1/4 cup melted unsalted butter
1 cup buttermilk
1 large egg
1 cup blue cornmeal {of course you can use yellow}
1 cup whole wheat pastry flour
2 tsp baking powder
1/2 tsp baking soda
1/2 tsp kosher salt
Whisk together honey, buttermilk, egg & butter. In a large bowl, whisk together the dry ingredients. Add wet ingredients to dry & mix well.
Bake in a greased 8″x 8″ pan at 425 degrees for 18 minutes or until toothpick comes out with a few moist crumbs. I love it with butter & molasses.
More rain has arrived, along with thunder! And now there is lightning! Time for hot soup.
One of life’s great pleasures is the aroma of yeasty bread dough in the oven, transforming itself into a beautiful, delectable, crusty loaf of bread. If you have never baked homemade yeast bread, you are in for a treat. It really doesn’t take a lot of time; you can have delicious bread from start to finish in 3 hours or less, depending on the bread. Much of that time is rising time, so you can be doing something else, like making soup or salad to accompany your freshly baked bread.
It isn’t just the smell that is enticing though. Bread dough feels good in your hands. Not so much at the beginning, when it is a sticky, shaggy mass of dough…
but when your mindful kneading transforms it into a silky, supple ball of dough, it is a pleasure to behold. I find kneading bread to be therapeutic and calming.
I have been making yeast breads by hand for many years, although I am certainly not an expert on the subject. I will say that I am not a fan of bread machines. Perhaps I had a bad experience with one. My mother-in-law had a bread machine when they first came out, and she made some tasty breads. She enjoyed hers so much that she gave one to us. I used it a few times. It was nice to wake up to freshly baked bread courtesy of the bread machine, but it had a hole in the middle of the cylindrical loaf. I could live with that, but the outside of the bread was slightly burned when the inside was undercooked. So I decided to try letting the bread machine do the kneading, and I would bake off the loaf the “old fashioned” way. Doing that deprived me of the pleasure of getting my hands into the dough and experiencing that lovely change in texture from rough to silky smooth. Bread machine?? Not for me, thank you very much! I gave ours away to an appreciative uncle.
This slideshow requires JavaScript.
Whole Wheat Rye Potato Bread
1 medium sized potato
reserved potato cooking water
2 packages dry yeast
2 tbsp butter, cut into small chunks
2 tbsp honey
1 tbsp kosher salt
1 cup warm milk {low fat is fine}
3-4 cups whole wheat flour
2 cups dark rye flour
3 tbsp coarse cornmeal + 3 tbsp ground flax seeds + whole wheat flour to make 1 cup
3tbsp caraway seeds {or fennel, anise or a combination of them}
Peel & dice the potato. Cover with water & boil until potato is tender, about 15-20 minutes. Save 1 cup of the potato water {add hot tap water if you do not have enough}. Mash the potato & set aside.
In a large bowl, mix together 3 cups whole wheat flour, rye flour & cornmeal/flax seeds/whole wheat flour mixture. Keep the additional cup of whole wheat flour in case you need to use it.
Pour the {not too hot} potato water in another large bowl, then sprinkle in the yeast & stir with a wooden spoon. Add the butter, honey, caraway seeds and salt, and then stir in the mashed potato {approximately 1 cup}, warm milk & 3 cups of flour mixture. When you add the yeast to the warm potato water, it will begin to activate. It will begin to get bubbly as you add the remaining ingredients & will look like this. . .
Beat until smooth, and then add enough additional flour to make a stiff dough. When it gets hard to incorporate any more flour with the spoon, turn the dough out on a lightly floured counter. Knead the dough until smooth and elastic, about 8-10 minutes. Wash the bowl in which you mixed the dough, butter it and then place the dough back in the bowl, turning to coat all sides with butter. Cover with a clean kitchen towel & let rise in a warm place until doubled in bulk. This should take 45-60 minutes. I like to turn on the oven for 2 minutes, turn it off and then put my bowl of dough in the toasty warm oven to rise. Don’t forget to turn off the oven or you will bake your bread prematurely! I have heard that the pilot light in a gas oven has enough warmth to be a good place to let bread rise, but I have never had a gas oven, so can’t vouch for that one.
How do you know when your dough has doubled in bulk? It is difficult to “eyeball it” so there is a little test you can use. Poke 2 fingers into your dough after it has risen for 45 minutes; if the indentations remain, your dough is ready for the next step. If not, cover it back up for 15 more minutes & repeat the test.
When doubled, punch the dough down, cover and let rise again in a warm spot for 20 minutes.
Turn the dough out onto a lightly floured counter & knead for 1-2 minutes.
Now you are ready to shape your loaves! Divide the dough into 2 equal pieces {I use my kitchen scale to do this} & shape. You can either sculpt the dough into a loaf with your hands, or you can do it jelly roll style, as shown in the slideshow {right before the recipe}.
Note about yeast: When you are adding warm liquids to yeast, make sure the temperature of the liquid is between 100 & 115 degrees Fahrenheit. If your liquid is too hot, you risk killing the yeast & your bread will not rise. Be sure to check the expiration date on your yeast to verify that it is not outdated. It may still work. . .or it may not.
Enjoy the kinesthetic, aromatic & flavorful joys of baking your own yeast bread. . .and don’t forget the butter!
If you are a banana nut bread lover, you must try these muffins. They are dense, moist, banana-y, and just plain delicious. I have put my own spin on them to make them healthier and even tastier than the original recipe. The list of ingredients is perhaps a little longer than most muffin recipes, but they go together quickly, and are definitely worth your time.
As far as I’m concerned, any banana bread or muffin must contain walnuts & be eaten with butter; preferably the bread is cool enough so that the butter just sits on top so you can really taste it. There is something special about the flavor combination of sweet banana bread, crunchy walnuts & creamy butter. Another “must ingredient” for me in these muffins is cacao nibs. Cacao nibs are one of my favorite ingredients. As you can see from the package, they are a Mayan Superfood, with antioxidants, iron & magnesium! Don’t expect to snack on them from the package, because they have no sweetening, so aren’t like popping chocolate chips. I buy these from Amazon:
Cacao nibs are a nice addition to banana breads because they add a little punch of chocolate flavor in every bite. What’s not to like about that?
The original recipe calls for strong coffee & suggests water if you don’t have coffee. I highly recommend using coffee, even if you are not a coffee drinker, because it adds a layer of flavor that you can’t detect as coffee; it’s just good. I buy the Starbucks Via packages from Costco when they go on special.
Wet Ingredients:
2 ripe bananas
1 large egg
1/3 cup melted unsalted butter
1 1/2 tsp vanilla
2 tbsp. strong coffee {you can use water, but I highly recommend the coffee}
Milk, buttermilk or coconut milk-enough to make 2 cups TOTAL wet ingredients {if you use 3 bananas you may only need a few tablespoons; if you use one banana, you may need to add 2/3 cup or more}
Dry Ingredients:
1 1/2 cups whole wheat pastry flour
1/2 cup sugar
1/2 cup flaked unsweetened coconut
1 tbsp. ground flax seed {preferably grind your own from whole flax seeds}
2 tbsp. hemp seeds
2 tbsp. raw cacao nibs
1 tsp kosher salt
1/2 tsp baking soda
1/2 tsp baking powder
1/2 tsp cinnamon
1/8 tsp ground nutmeg {I use whole nutmeg, freshly grated on a rasp. Definitely worth it!}
1 cup broken walnuts
Preheat oven to 350 degrees. Be sure to put the muffins in a fully preheated oven.
In a small bowl, put all of your wet ingredients-make sure you mash the bananas thoroughly with a fork. Stir in the egg with the fork, and then add the remaining wet ingredients.
In a large bowl, thoroughly mix your dry ingredients. I always put the measured baking soda & baking powder in my hand & smash any lumps; it’s not pleasant to bite into a lump of baking soda in your muffin.
Add the wet ingredients to the dry ingredients. Stir gently {12-14 quick strokes}. Do not over mix-this will result in tough muffins. Who wants tough muffins? There may be a few streaks of flour but that is ok.
Spray your muffin tins with coconut oil spray {or Pam}, or grease them with butter. Lightly spoon in your batter {don’t pack it in}. You can fill the tins up to the top.
Put the muffin tin into the preheated oven & bake for 20 minutes {I always start checking at 18 minutes}. They are done when a toothpick comes out with a few moist crumbs.
Leave the muffins in the tins for 5-10 minutes, and then remove them to a wire rack. Enjoy with butter!
“One of the very nicest things about life is the way we must regularly stop whatever it is we are doing and devote our attention to eating.” Luciano Pavarotti
“One of the very nicest things about life is the way we must regularly stop whatever it is we are doing and devote our attention to eating.” Luciano Pavarotti
“One of the very nicest things about life is the way we must regularly stop whatever it is we are doing and devote our attention to eating.” Luciano Pavarotti
“One of the very nicest things about life is the way we must regularly stop whatever it is we are doing and devote our attention to eating.” Luciano Pavarotti
“One of the very nicest things about life is the way we must regularly stop whatever it is we are doing and devote our attention to eating.” Luciano Pavarotti
“One of the very nicest things about life is the way we must regularly stop whatever it is we are doing and devote our attention to eating.” Luciano Pavarotti
“One of the very nicest things about life is the way we must regularly stop whatever it is we are doing and devote our attention to eating.” Luciano Pavarotti
“One of the very nicest things about life is the way we must regularly stop whatever it is we are doing and devote our attention to eating.” Luciano Pavarotti
“One of the very nicest things about life is the way we must regularly stop whatever it is we are doing and devote our attention to eating.” Luciano Pavarotti
“One of the very nicest things about life is the way we must regularly stop whatever it is we are doing and devote our attention to eating.” Luciano Pavarotti