Maui Girl Cooks

“One of the very nicest things about life is the way we must regularly stop whatever it is we are doing and devote our attention to eating.” Luciano Pavarotti


9 Comments

Savory Yogurt

My husband and I are not vegetarians, but we eat a plant based diet most of the time. We enjoy food of all kinds, preferring food that is good for us, but happy to indulge in delicious food that may not be particularly healthy, on occasion.  Our philosophy is that it’s what we do most of the time that really matters.

My dad was in the Air Force, and did a tour of duty in Korea for a year when I was in the fourth grade, so my mom and I moved to Harrisonburg, Virginia, in the beautiful Shenandoah Valley. My family is from Harrisonburg, so we moved from San Antonio, Texas to be closer to family. Those Virginia kids told me I “talked funny.” What!? I don’t recall, but I probably thought they “talked funny” too. But I digress. For some reason, that was the year I decided to dabble in “vegetarianism,”  in quotation marks because I didn’t know the meaning of the word at the tender young age of 9.  I don’t know where I got the idea that mom and I should be vegetarians, because I’m pretty sure there weren’t many of them in the Valley at that time.

As adults, the beginning of my exploration into vegetarian food lies with a friend I worked with at Stanford Medical Center, where I worked on the oncology floor before returning to school full time for my teaching degree.  Actually, I went back to get a degree in nutrition, but changed my mind and became a teacher. I’m sure I would have been happy in either field, but I have no regrets with the path I took. Erika was a vegetarian, and she introduced me to one of my favorite cookbooks, Laurel’s Kitchen.

We have been eating plain yogurt for a long time at our house. It started when I learned about falafel, from Erika and Laurel’s Kitchen. I can’t remember if my first falafel was from a local restaurant that served fried falafel balls, or the baked falafel I made from Laurel’s Kitchen, but they were both delicious. I’ll post a falafel recipe in the future, but for now, I’d like to say how delicious plain yogurt is, and how it can be the main focus or a tasty garnish. It’s probably safe to say that it is an acquired taste, and in my opinion, one worth acquiring.  Here are a few favorite ways I like to eat plain yogurt.  They are all seasoned with freshly ground salt, freshly ground black pepper and extra virgin olive oil-fresh herbs are always a welcome addition.

Try this for breakfast or lunch…you can make it however you like.


This slideshow requires JavaScript.

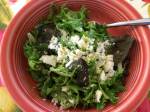
Or this. . . Can you tell the orange bowl is my favorite??

yogurt with preserved lemons, tomatoes, kalamata olives and sprouts

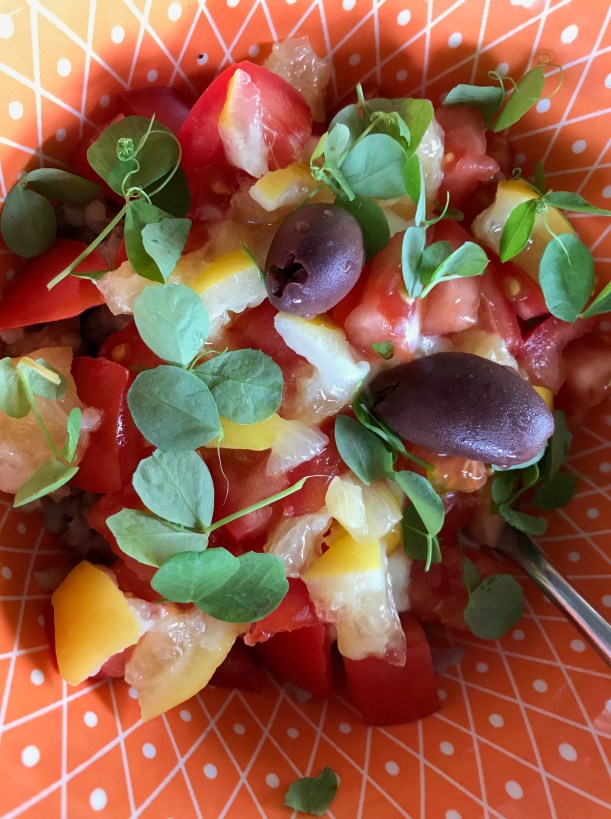
Yogurt, tomatoes, preserved lemons, kalamata olives and sprouts

How about this one?  Today’s lunch. . .

Yogurt, herring, diced beets, capers and sprouts

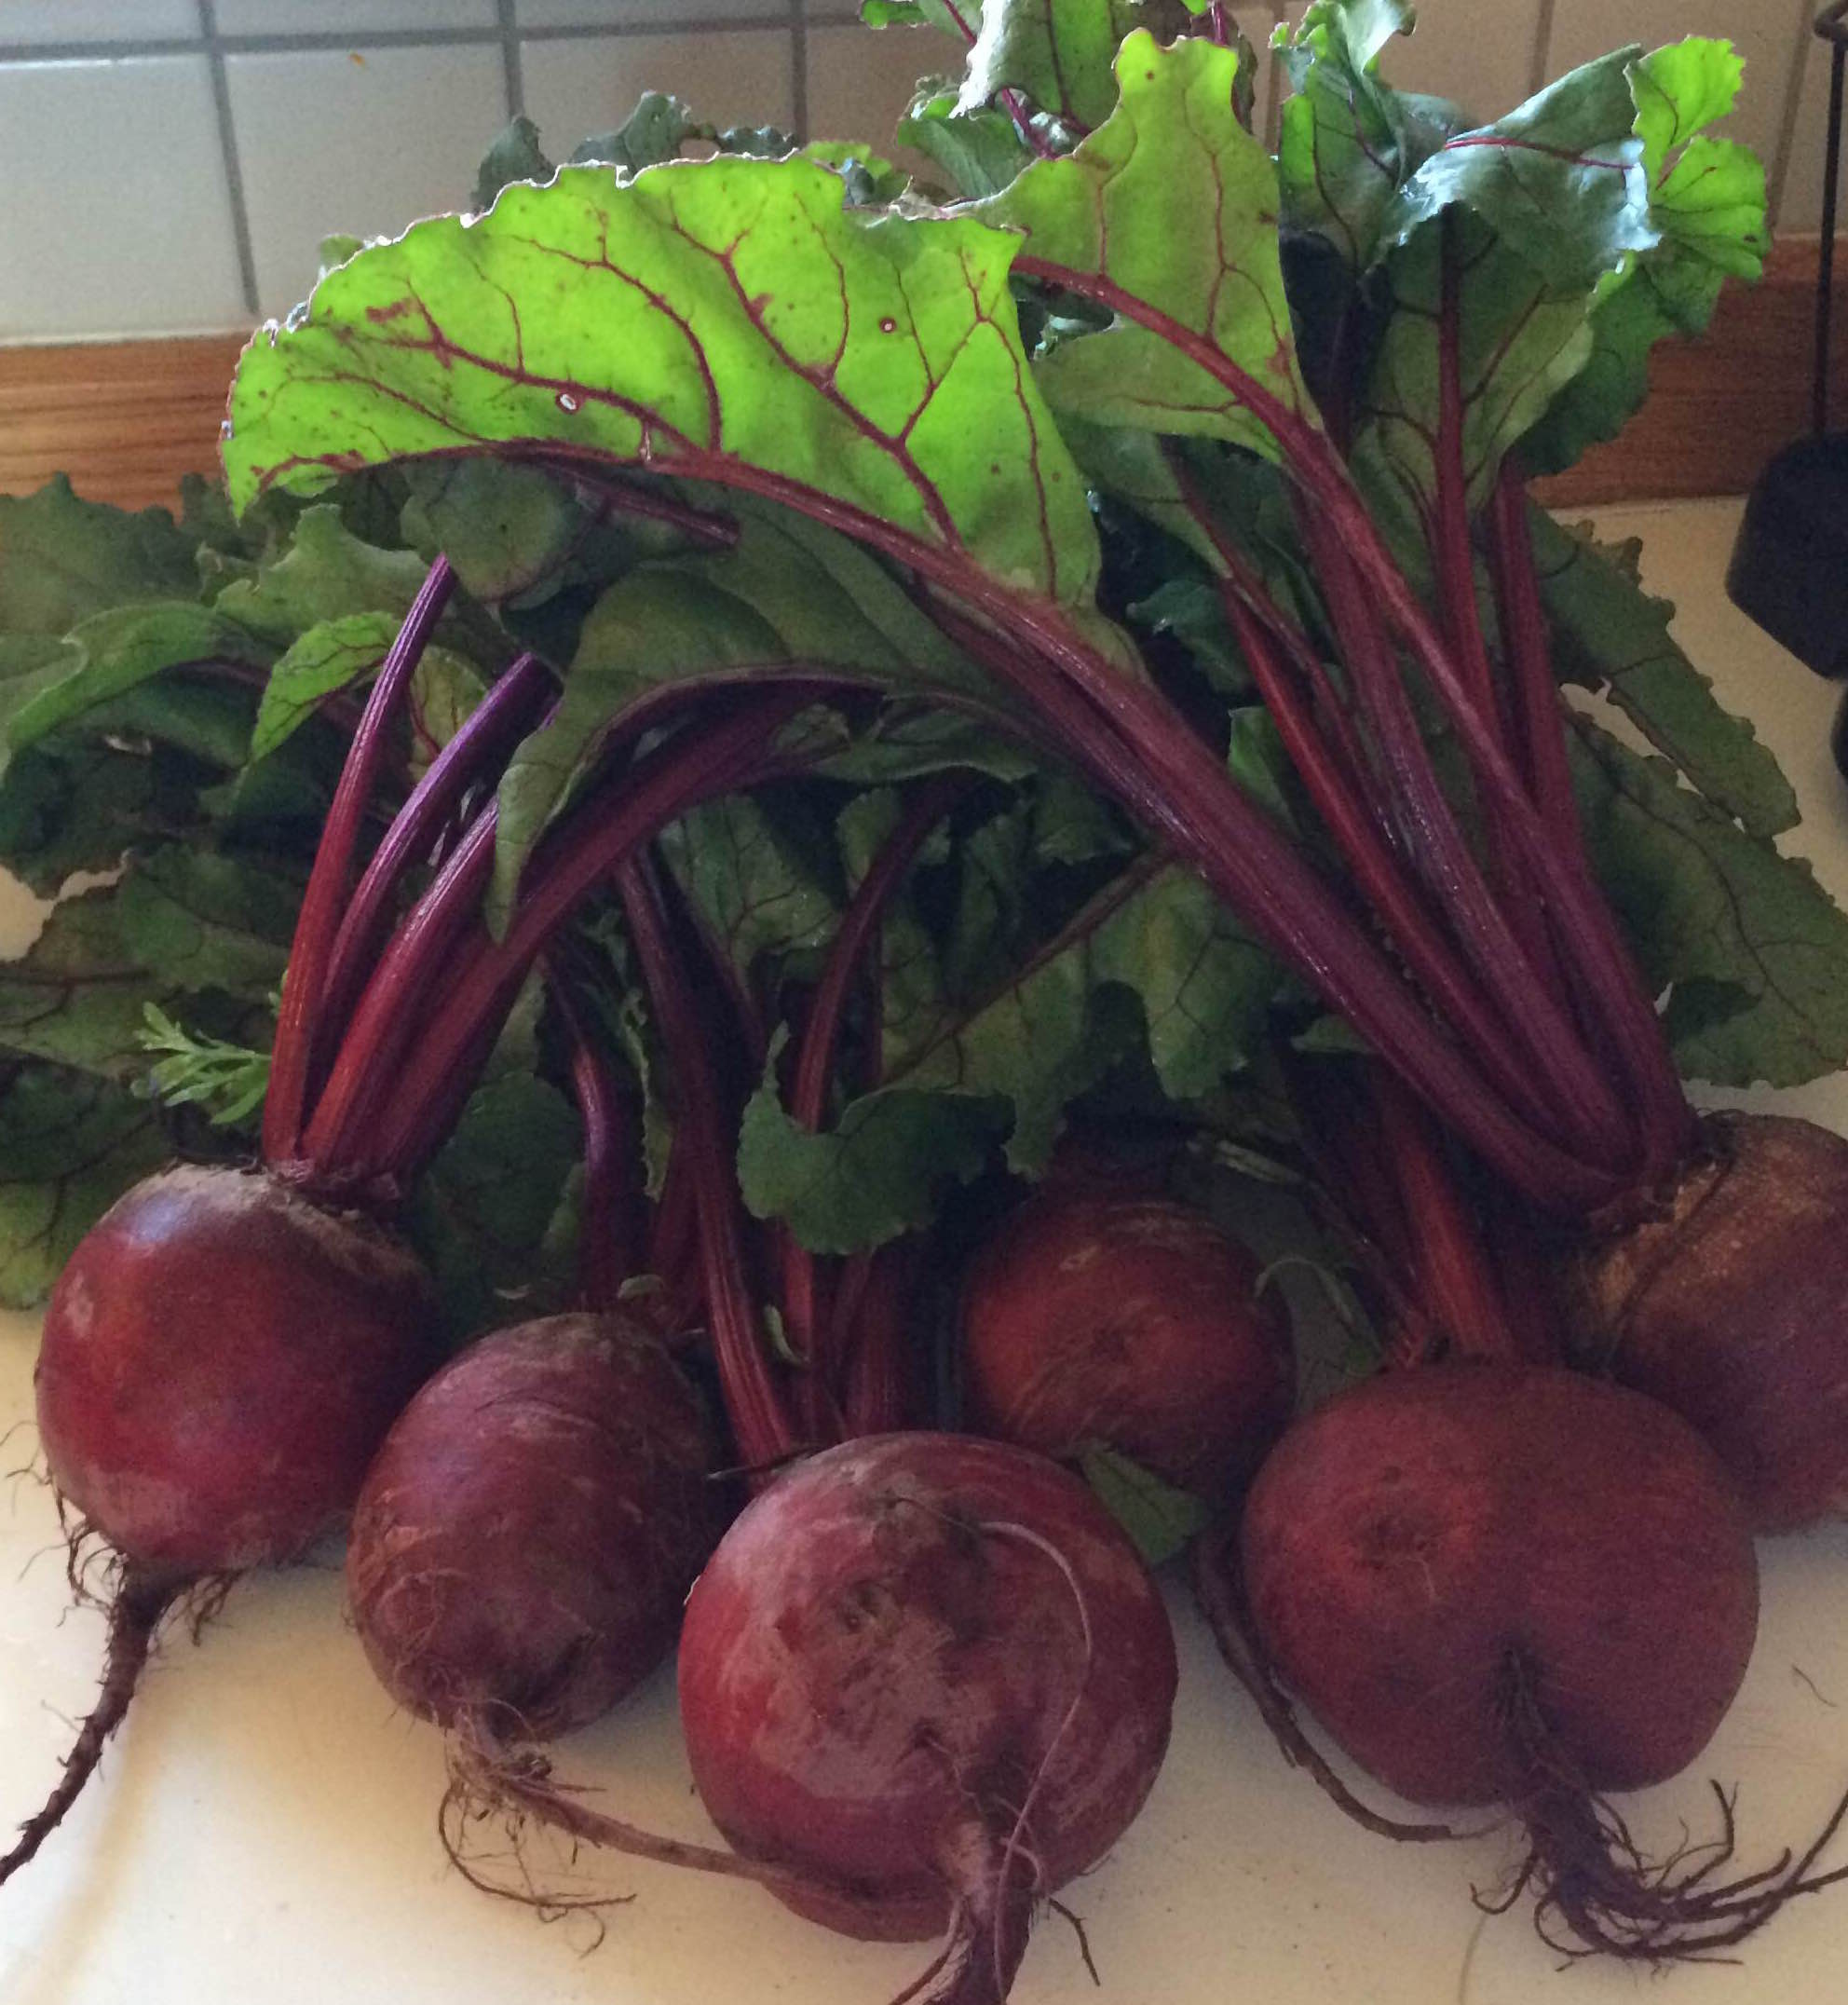
Yogurt, pickled herring, steamed beets, rinsed capers & sprouts

Yogurt Bowl with Cilantro Blossoms

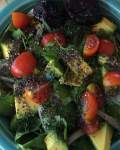
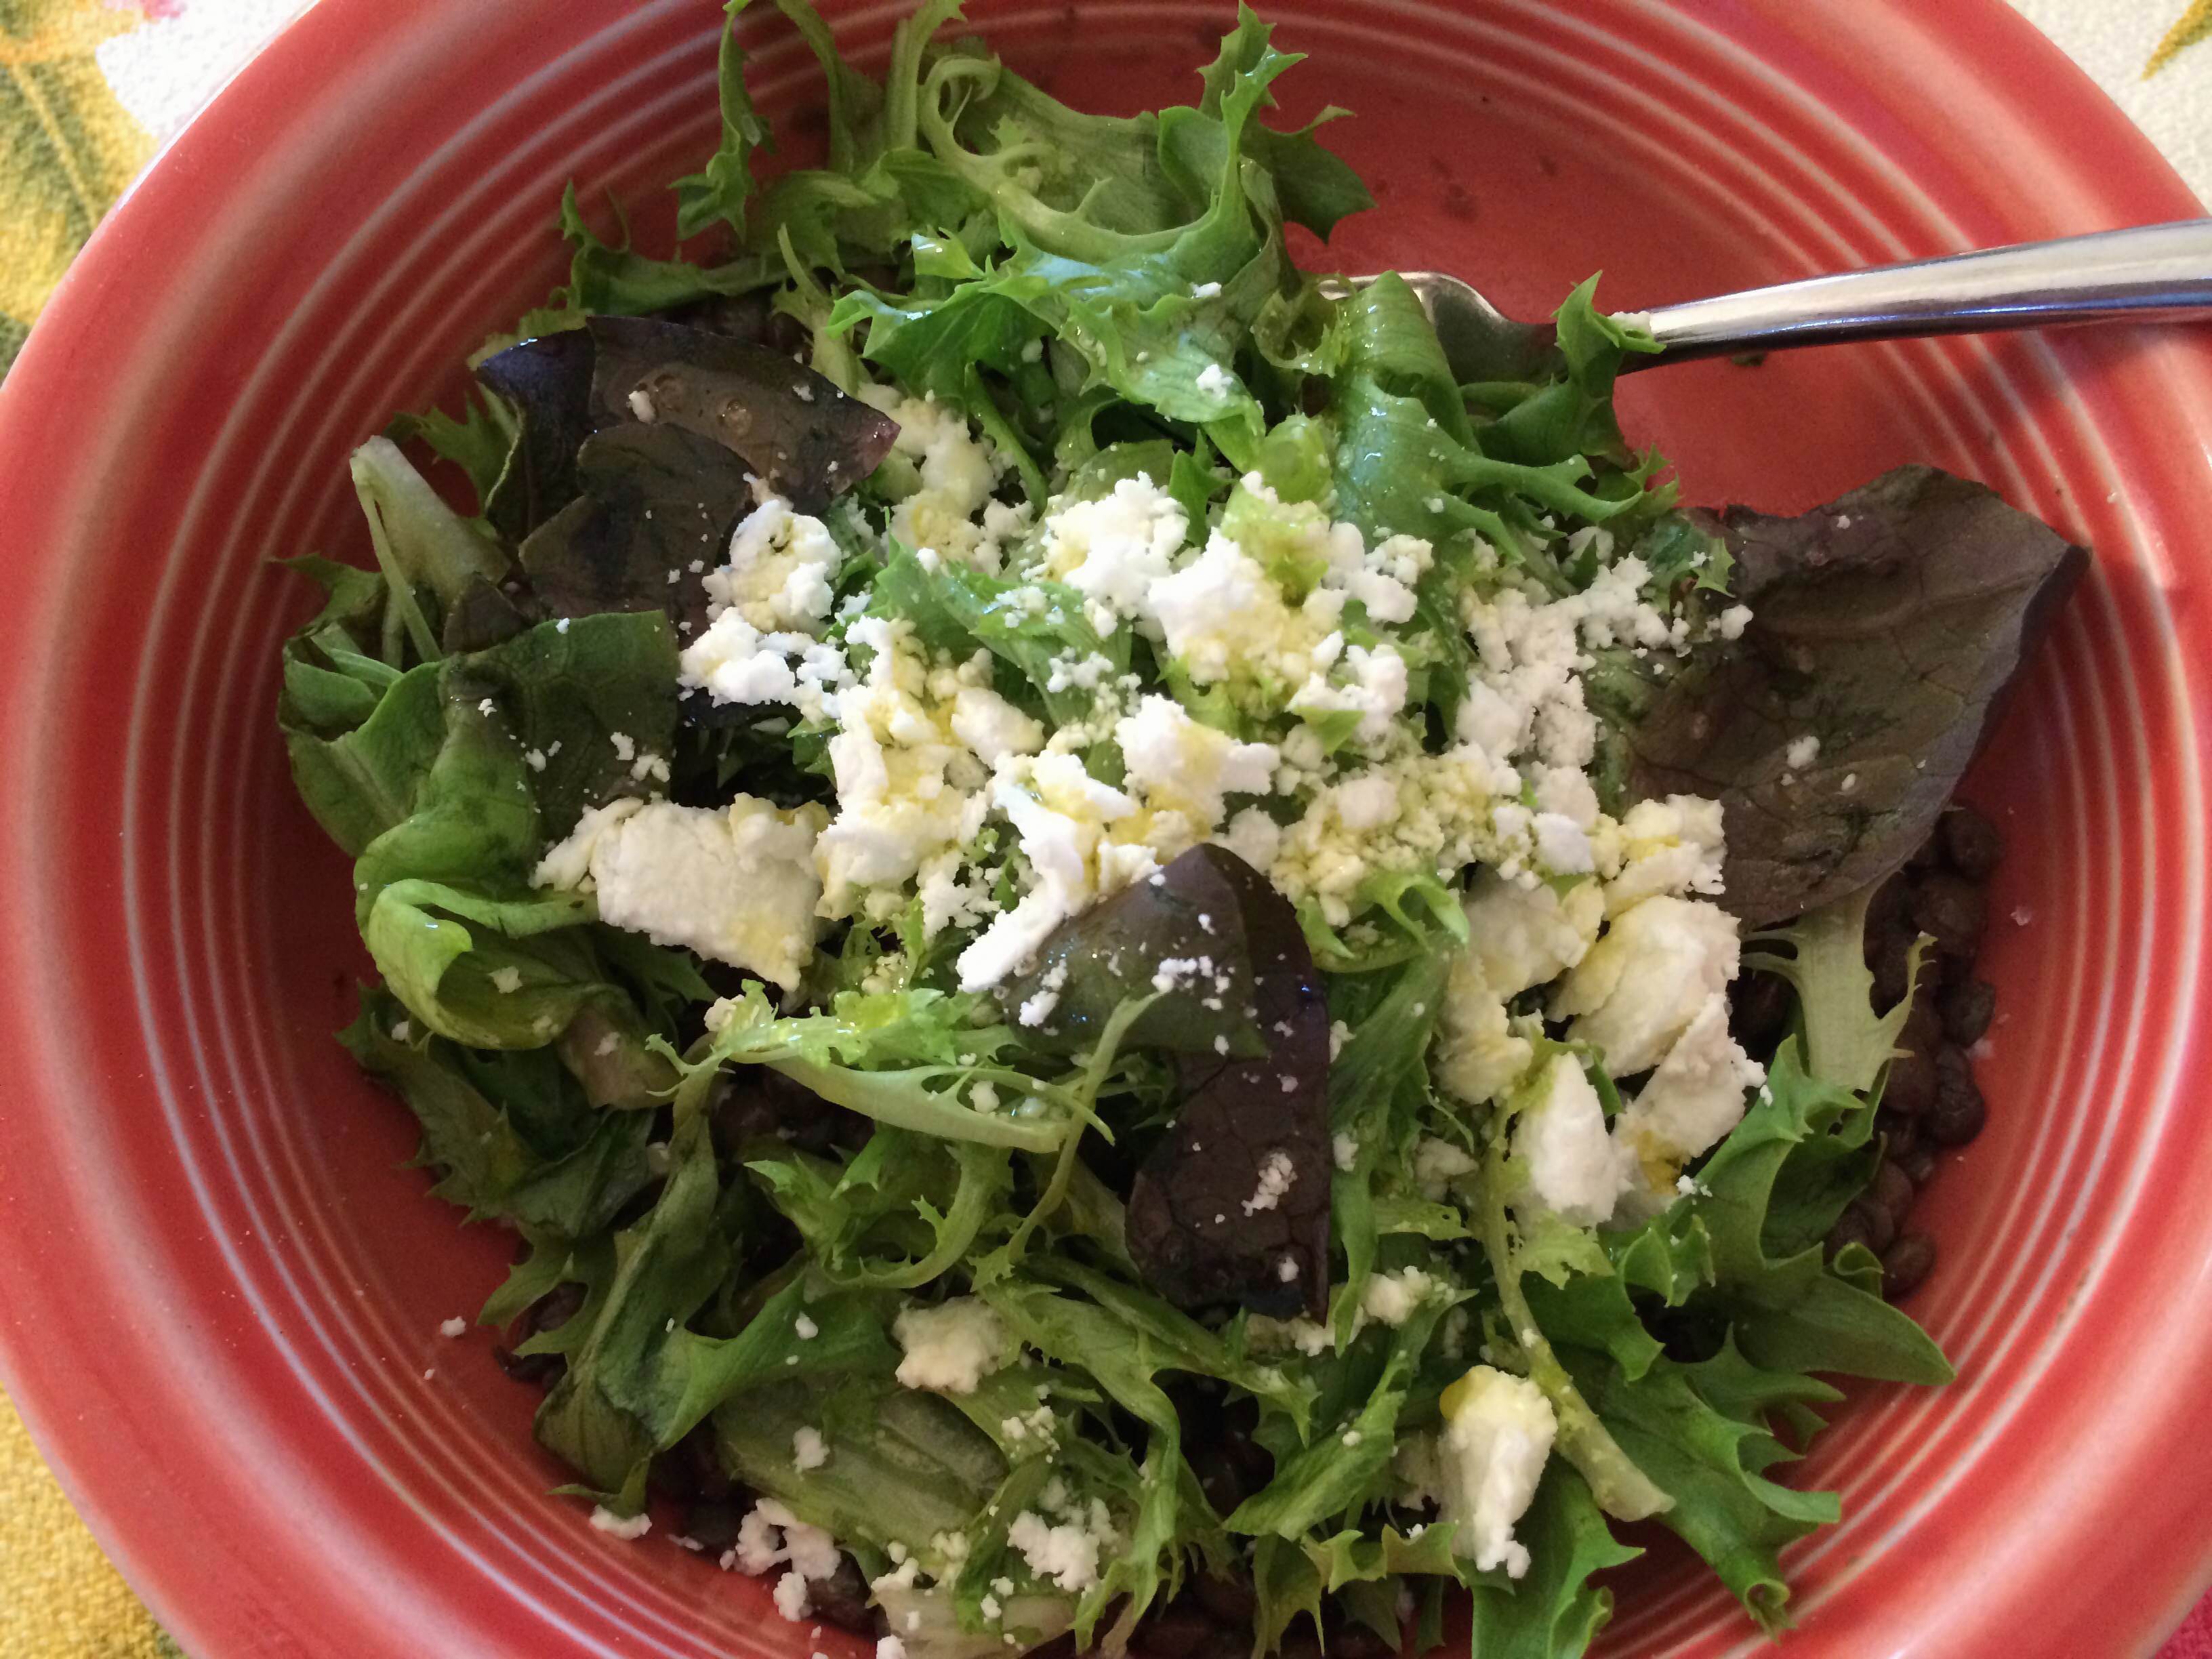
Yogurt with Avocado, Baby Lettuce, Cilantro Blossoms, Olive Oil & a Splash of Red Wine Vinegar

What will you put on your plain yogurt?  I hope I’ve given you some ideas!


Leave a comment

Salad for breakfast? Yes, please!

I’m fairly certain that I have endorsed salad and other “non-breakfast foods” elsewhere on my blog.  But if you missed it, here it is again.  I can and will happily eat most anything.

I like to start my day with healthy & delicious food.  Getting a head start on the day’s vegetables isn’t a bad idea either.

Today, I had one of my favorite breakfast salads, including an ingredient I’ve never used on salad.  Actually, I haven’t used a lot of chia seeds, but I am trying to incorporate them into our food more often.  Not sure I can get into the gelatinous texture that chia provides when allowed to sit and gel, but they were great on my salad.

You’ll need a fork and a spoon for this dish-a fork for the salad on top, and a spoon to scrape up the delicious yogurt at the bottom of the bowl.  The yogurt mingles with your dressing, and any other flavors that make their way downward.

You can build a breakfast salad any way you like, including adding an egg on top, which I didn’t do this time, but it is delicious.  This is the salad I created this morning…

Breakfast salad, green tea, ry-vita

Yogurt on the Bottom Breakfast Salad 

Nancy’s Whole Milk Plain Organic Yogurt- a few spoonfuls, no more than 1/4 cup

Salad greens-I used curly green leaf & baby beet greens

Onion- thinly sliced pole to pole {my favorite cut for salad}

Tomatoes- I used cherry tomatoes from my lanai garden

Avocado- as much as you like

Fresh herbs- I used tarragon, dill & cilantro from my lanai garden

Fruit- I used 2 dried plums {a.k.a. prunes}

Freshly ground salt & pepper

Red wine vinegar {or your favorite vinegar}

Extra virgin olive oil

Plop a few spoonfuls of yogurt at the bottom of your bowl-if you put too much, it can overwhelm your salad.

Add greens, onion, tomatoes, avocado & fresh herbs.  Season with freshly ground salt & pepper.  Drizzle red wine vinegar and olive oil over all.  Garnish with a few prunes, admire your creation & enjoy with toast, or a Ry-Vita buttered with organic pasture butter and tea as I did.

Bottom of bowl yogurt breakfast salad

Bon appetit!


Eggplant Tricolore

Leave a comment


“Gleaming skin;  a plump elongated shape;  the eggplant is a vegetable you’d want to caress with your eyes and fingers, even if you didn’t know its luscious flavor.”  by Roger Verge

Although it is a vegetable {actually, it is a fruit, but that’s another discussion} with varied preparations, eggplant parmigiana is the quintessential eggplant dish for many, however it is not one of my favorite ways to enjoy eggplant.  My mom used to sauté eggplant slices until they were golden brown, and I loved eating them with catsup {not a kid thing…I still love catsup & so does my husband}. Sometimes I roast thick slices of eggplant & happily enjoy them dipped into organic catsup.  I prefer Italian Globe eggplants, over the other slender varieties {Thai, Indian, Japanese, etc.}.

Eggplant is one of those foods that, I suspect, prompts strong feelings.  While I have not researched this matter, I think people tend to love or hate eggplant.  The Flavor Bible {have you seen this book yet?} describes eggplant’s taste as “bitter,” a taste which does not have as many fans as sweet, salty, sour, etc.

Many years ago, Erika, a friend & coworker, introduced me to vegetarian food by way of Laurel’s Kitchen, a book from which I prepared & enjoyed many dishes.  In fact, it was my “go to” cookbook for a long time.  I made Laurel’s falafel recipe & had my first taste of Middle Eastern food, which I now consider the cuisine I most want to eat.  Which brings me back to eggplant.  One of my new favorite ways of enjoying eggplant comes from Yotam Ottolenghi’s cookbook Plenty.  It is quick to make, stunning on a platter & super delicious.  Regardless of your feelings toward eggplant, I am of the opinion that you should make this recipe; just try it.  I think Eggplant Tricolore may have the power to turn you into a lover of eggplant.  Perhaps the dressing balances the eggplant’s inherent bitterness, which makes this a dish that goes down easily, like a fine wine.  My husband & I can polish off 2 eggplants in one sitting!

If you make this, snap a photo & send it with a comment on how you liked it.

Eggplant slices ready for roasting

Eggplant Slices Ready for Roasting

Roasted eggplant slices

Roasted Eggplant Slices

Eggplant Tricolore 2

Eggplant Tricolore

Eggplant Tricolore {and more}
adapted from Plenty {Ottolenghi}

2-3 medium eggplants {preferably Italian globe variety}

olive oil

Maldon sea salt & black pepper

1 yellow bell pepper, cut into 3/8” dice

10 cherry tomatoes, quartered

1 tbsp red wine vinegar

3 1/2 tbsp capers, plus 1 tbsp of the caper brine

5 oz. top-quality buffalo mozzarella

1 cup picked coriander {cilantro} leaves

Preheat oven to 375 degrees.  Cut the eggplants widthwise into 3/4-inch-thick slices.  Place the slices on a baking sheet lined with parchment paper or aluminum foil.  Brush them generously on both sides with plenty of olive oil and sprinkle with salt and pepper.  Roast in the oven for 25”-35,” or until the eggplants are soft and golden brown.  Allow to cool down.

Mix together the bell pepper, tomatoes, vinegar, capers, caper brine and 2 tbsp of olive oil.  Set aside for at least 30” {the mix can be kept refrigerated for several days; the flavors will deepen over time}.

To serve, arrange the eggplant slices, slightly overlapping, on a serving dish {a meat platter is the perfect size for 2 medium eggplants}.  Break the cheese up and scatter on top.  Spoon over the dressing and scatter with the cilantro.  Enjoy!

Notes:

  • I always use extra virgin olive oil
  • I always use freshly ground pepper
  • Maldon salt is worth seeking out, but you can substitute another crunchy salt such as Fleur de Sel
  • yellow or orange peppers work best color-wise, but use what you have
  • I have used tomatoes other than cherry tomatoes, with excellent results
  • The eggplant can be roasted up to a day ahead and refrigerated
  • I have always used lebni {Lebanese kefir cheese} instead of mozzarella & it is delicious.  Soft goat cheese would also be delicious!
  • Salting eggplant for 30” or so is supposed to draw out the bitterness, but I usually do not do this.  Possibly this is valuable for older eggplants with large seeds, but ours come from the farmers’ market and are recently picked.
  • You can use fresh basil instead of cilantro if you desire
  • This is great with a glass of red wine!

Eggplant Tricolore 1

Bon appetit!

This gallery contains 5 photos


Leave a comment

Chiles Stuffed with Crusty Beans

Growing up, I remember having stuffed green peppers for dinner fairly frequently.  Stuffed peppers weren’t one of my favorite dinners, because I wasn’t a fan of the stuffing {or meatloaf either}, which was probably just ground beef with onions and seasonings.  Mashed potatoes were always one of the accompaniments, and they were always a hit with me.  Who doesn’t love mashed potatoes?  I remember making a deal with my mom on Stuffed Pepper Nights. . . I gave her my stuffing, and she gave me her green pepper case.  Score!  I love peppers, and green peppers are my favorite, even though red, yellow and orange are supposed to be healthier.  Green peppers rank high on my list of favorite vegetables, in cooked or raw form.  They have a wonderful green flavor that I love.  On a hot day, a refreshing snack is half a cold green pepper sprinkled with sea salt; when you bite into the pepper, cool spray mists your face and it tastes oh so delicious . . .and then you eat the other half!

I have been making my own version of stuffed peppers, using chiles from the Upcountry Farmers Market.  I’m not sure of the variety, but they are a sweet pepper, so no worries if you aren’t into a good mouth burn, which I happen to love.  You can use any chiles you like; poblanos are a particular favorite of ours.  The stuffing here is not meat, but what we call Crusty Beans.

I would describe the texture of kidney and black beans to be moist and creamy.  Once they are cooked up as Crusty Beans, while still moist on the inside, the outside has a bit of crust, from cumin and chili powder; they are delicious.  Even though I prefer cooking dry beans, canned beans make this delicious dish quick and easy to make.  Crusty Beans are great for any meal, and are a fabulous accompaniment for eggs and toast, if you aren’t stuffing them into peppers.

This slideshow requires JavaScript.

Crusty Beans

2 15-oz. can kidney or black beans, rinsed and drained {or about 2 cups cooked and drained beans}

1/2 medium onion, diced about 3/4 cup

5 cloves garlic, minced

Olive oil 4 T

Butter 2 T

Ground cumin 6 t

Chili powder 3 t {click here if you’d like to try my homemade chili powder}

Red pepper flakes 1/2 T or 1 minced jalapeño

Salt

Pepper

Over medium-medium high heat sauté beans, cumin and chili powder for about 5”.  Add onions, garlic & jalapeños.  Season with salt and pepper to taste.  Cook, stirring occasionally, for about 5” more.  The onions will still have a bit of crunch to them, because they were added after the beans were sautéed.

Makes 4-6 generous servings.

Now let’s talk about the peppers.  Select a pepper that you like, that has room for some stuffing.  You will need a lot of Crusty Beans if you decide to stuff them into bell peppers, but poblanos or the sweet peppers shown here take about 2-3 tbsp of filling.

Raw Sweet Peppers

Chiles Stuffed with Crusty Beans

8 chiles {poblanos, sweet long peppers, or other variety}

Sea salt

Crusty Beans

Soft goat cheese {or another good melting cheese that you like}

Minced jalapeño for garnish, if desired

Preheat broiler to high.  Adjust oven rack to second position from the top.  Wash and dry the peppers, and place them on a foil lined baking sheet.  There is no need for oil or seasoning for this step.  Broil peppers, turning when each side gets charred.  You can position peppers right next to each other to prevent them from rolling over, if necessary, so all sides can get charred.  When all sides are charred, remove baking sheet from the oven and fold the peppers up in the foil for about 15”.  The peppers will steam and the skins will loosen up for easy removal.  The peppers will be delicious, but the skins are papery and not pleasant to eat, so you will want to remove them when they are cool.

This slideshow requires JavaScript.

Once the skins have been removed, cut peppers on one side from the pointy end to the stem end {leave the stem end on}; kitchen shears are great for this.  They can be a little slippery, but just take your time.  Remove the seeds and membrane from the peppers; if you carefully snip the stringy white membrane close to the stem, it is more easily removed.  A few seeds won’t hurt, but try to get most of them.  I have heard conflicting opinions on whether the seeds should be removed by running the peppers under water, which certainly makes quick work of this task.  For years, I avoided rinsing the peppers, but the last couple of times I’ve made them, I let the water do most of the work, and the peppers tasted great.

Sprinkle the insides of the peppers with a little sea salt.  Now it’s time to stuff your peppers! The roasted peppers are fragile, so be careful not to tear them while stuffing.  I’m ok with overstuffed peppers; it’s fine if you can’t close the peppers.  Spray an 8×8 baking dish with pan spray. Nestle the unstuffed peppers together in the dish, stuff them and then cover the dish with foil.  Bake at 350 degrees for 20 minutes, then remove the foil and sprinkle liberally with goat cheese.  Bake for another 10 minutes so the cheese is soft.  Shower with minced jalapeño and eat hot.

This slideshow requires JavaScript.

Click here for some info on the health benefits of peppers!

Bon appetit!


4 Comments

An Abundance of Deliciousness

First, I would like to say that I realize that the way my husband and I do things will not work for everyone.  Our lifestyle literally revolves around what we eat and cook.  It sounds kind of funny to say that, but it is true, and I know that most people probably do not have that luxury.  That being said, I hope that you will find an idea or more that you can implement in your kitchen to streamline your meal preparation.

If you are like my husband and me, a trip to the farmers market, or even the grocery store, sends you home with an abundance of beautiful fresh delights; sometimes even more than you can reasonably eat.  I mean, how can you resist gorgeous heads of crisp freshly picked lettuce, deep magenta beets freshly dug with greens as proud as a peacock, and the plethora of other super fresh and healthy fruits and vegetables?  Really, how can you?  The farmers market is like a candy store to us {my wonderful husband is actually the one who leaves the house a little after 6 am every Saturday}, so Saturday mornings offer many opportunities to prep, cook and figure out how in the world it will all fit into the refrigerator.  It can be overwhelming and a bit frustrating, because the sheer quantity of vegetables makes it extremely difficult to navigate the refrigerator.  Do you know how much space greens, particularly unprepped greens, take up?  Lots and lots!  I wrote about this very subject last year, and told you what we did with our market bounty everyday for 1 week {some photos appear to be missing for some reason; sorry about that}.

Beets with Greens

This is $4 worth of beets & greens!


Today I have some more tips for how we manage what comes home from the farmers market.  Before we moved to Maui, most of our produce came from Central Market, my favorite grocery store in Washington State.  The farmers market was only a few months of the year, and more often than not I did not have the willpower to get up early on a Saturday morning after teaching all week.  So I went to the store, and was unable to resist the bountiful displays of fresh fruits and vegetables, and I am sorry to say, we wasted some of that food now and then.  I was teaching full time plus {no teacher I know only works full time} and even with the best intentions to cook the Swiss chard, or the butternut squash I didn’t always get to it, and sometimes. . .sometimes. . .we threw food away {gasp!}.  Such a sad tale, but it happens to the best of us.

I am happy to report that since we have moved to Maui, we waste very little food.  There are a variety of reasons for this.  The main reasons are that we both know what’s in the refrigerator, and we prep some foods so they are ready to eat.  When you are busy, it’s easy to reach for something quick instead of taking the time to wash the greens, or cut up the broccoli, etc.  Sound familiar??  If you have a refrigerator full of fresh produce, but none of it is prepped, when pressed for time you will probably go for what’s quickest to prepare, while what was beautiful on Saturday languishes, until it is thrown away.  We did the same thing, and still do, although not nearly as often these days.  Another reason is that we have more time for food than we ever had, and for that I am grateful.

  • My husband is the primary food shopper & I am the primary “put the food in the refrigerator” person.  We both know what’s in the refrigerator, so we don’t tend to forget what we have, even if it gets pushed to the back {which it inevitably does in our smaller size refrigerator}.
  • We try to eat the more perishable food toward the beginning of the week, so we aren’t tossing food because it’s lost its appeal or integrity.  So, the spinach, broccoli {before it goes yellow}, arugula, tender lettuces and Swiss chard get eaten first. . .most of the time. . .we aren’t perfect.
  • We try to prep many foods before they go into the refrigerator.  For instance. . .
    • Wash & steam or roast your beets; don’t even put them in the refrigerator until they are cooked.  You can peel them when they are done & store them for use throughout the week, on salads or as a hot or cold vegetable.  If you want to make pickled beets, make a super quick pickling liquid while they steam.
    • If your beets came with greens, cut the stems off.  Wash the greens well, spin dry then store in a ziplock bag.  Beet greens are usually on the sandy side, so you may need 3 changes of water to get them squeaky clean.  They are pretty sturdy, so you don’t have to cook them right away.  Here’s a recipe for cooking beet greens, which I think are my favorite cooked greens {I love cooked greens!}.
    • Wash at least a couple days’ worth of lettuce, spin dry and store in ziplock bag with 10 little holes poked in it.  Read why you should do this here.
    • Wash enough arugula for 1 or 2 meals and eat it soon; it shows signs of wear and tear even right after you clean it.  We love it simply dressed with thinly sliced onion, lemon juice, extra virgin olive oil and salt & pepper.  The beets you prepared are good here too!  And crumbled goat cheese!
    • You can wash & trim green onions ahead of time so they are quick & easy to use in a stir fry, salad or a healthy nibble on your plate.  This was a pleasant surprise to me;  I tried it one week, and they stayed fresh beautifully for the whole week.
    • Remove the outer leaves of cabbage, wash and store in a zip lock bag.
    • Trim celery, separate into stalks and wash.  Store in a ziplock bag for easy use.  Good to eat with a little salt, peanut butter {!!!}, in tuna salad, soup, pimento cheese, goat cheese, cream cheese, etc.
    • Wash, seed and halve peppers-green, red or yellow.  They will keep just fine in a ziplock bag for several days.  Just reach into the bag for a crunchy snack!

Bon appetit!


2 Comments

A Double Rainbow and a Delicious Salad

Our morning began with the required glass of Freshly Pressed Ginger Kombucha, then a relaxing stroll on Baldwin Beach in Paia, which is about 15 minutes down the slope of Haleakala from our home.  Lifeguards were not yet on duty, and we shared the beach with fewer than two dozen early risers who wished to start their day with a soundtrack of gentle waves crashing and then receding into the vast Pacific.  The temperature was somewhere in the high 70s, with the perfect level of skin caressing breeze.  A double rainbow spanned the western sky, although the second one was camouflaged by clouds.

double rainbow at Baldwin

Of course, there were the usual dogs running willy nilly, some playing in the salty ocean, and others happily chasing each other in the sand {How did I not photograph the dogs??}.  My husband spotted one of those fluorescent green tennis balls in the sand, which he donated to a lucky dog who passed by at just the right moment; the dog, whose mannerisms reminded us of our dog Max {an Australian shepherd who passed away a few years ago}, was delighted by his good fortune.  It’s a little over two miles to walk the entire beach. . .I highly recommend it if you are in the neighborhood.

Looking north at Baldwin

After our walk, we went for coffee at Maui Coffee Roasters in Kahului.  My husband has a number of free drinks on his card, so that was the perfect way to top off our walk.

Next stop was home for breakfast.  I’ve shared my breakfast salads with you before, and for those of you who are okay with eating salad for breakfast, this one is a winner.  My husband bought some gorgeous beets from the farmers’ market last Saturday, so those definitely had a place in the salad.  There are blueberries in the freezer, which play nicely with beets and goat cheese, so in they went.  And there is more. . .

This is more of a guideline than a recipe, so play around with ingredients & make it your own.  For me, the key components are the beets, berries, goat cheese and nuts.  The black currant balsamic adds a lovely fruitiness which I highly recommend, if you can get your hands on some.  This shouldn’t be difficult, because it seems that olive oil and vinegar tasting stores are cropping up all around.  I read about such a place here on Maui, Wailea to be exact, several months ago in our local paper.  The first one I visited, however, was in Port Townsend, WA.  We moved to Maui in the summer of 2011, but I had not gone back to visit until this year, when I went twice in two months.  What fun I had!  Anyway, in Port Townsend, there it was, this fabulous store {Lively Olive} that had kegs of extra virgin olive oils and vinegars begging to be tasted.  I love vinegar and olive oil, so I was thrilled to stumble upon this place.  I brought home a bottle each of Blenheim apricot white balsamic and black currant balsamic.  I thought the black currant would be great with the blueberries and it did not disappoint.  After returning home, I thought I should visit the store in Wailea {Fustini’s Oils and Vinegars}.  The sales people were offering up all kinds of deliciousness in the form of taste combinations:  coconut balsamic + Persian lime extra virgin olive oil was the one I was particularly smitten with, so I purchased the coconut balsamic.  I decided I would make my own lime olive oil, and make some kind of salad that involved soft Manoa lettuce, sweet onion and mango, among other things.  If you are a Hawaii resident, Fustini’s offers a kamaaina discount!  Feel free to use another vinegar if you can’t find black currant balsamic. . .I’m sure your salad will be delicious!

plate salad with beets, goat cheese

Beet, Blueberry & Goat Cheese Salad with Black Currant Vinaigrette

Salad greens, washed & thoroughly dried {I used kale and romaine}

Beets, cooked, peeled and diced

Blueberries, fresh or frozen, thawed if frozen

Onions, thinly sliced

Fresh herbs, torn or julienned {I used basil and mint}

Soft fresh goat cheese, crumbled

Walnuts, toasted & broken

Eggs, prepared however you like them, optional

Extra virgin olive oil

Black Currant Balsamic

Salt & freshly ground pepper

I like to build meal size salads on a dinner plate, but you can use whatever you like.  The lettuce goes down first, and is topped by the fresh herbs.  Add beets, blueberries, onions and goat cheese.  Top with walnuts, salt and pepper.  Drizzle salad with black currant balsamic and olive oil.  If you are putting an egg on your salad, add it right now.  Enjoy!

plate salad with eggs

Bon appetit!


Leave a comment

French Green Lentils with Greens, Goat Cheese & Red Wine Vinegar

There are occasions when I just don’t know what I want for breakfast.  This phenomenon does not occur for lunch or dinner; just breakfast.  My husband doesn’t understand it; he eats the same yogurt most mornings, except the days when we make eggs or maybe hot cereal.  I’ve never been one to eat the same thing everyday for any meal; there is too much delicious food out there to limit oneself to the same meal all the time.  Lately I have not been into what most people call “breakfast food.”  Any food qualifies as breakfast food as far as I’m concerned, the exception being cold pizza.  I don’t know what percent of the population loves cold pizza, but I am not in their company.  The draw to cold pizza, with its cold, solidified cheese escapes me.  Anyway, one of my new favorite breakfasts, a meal which will also make appearances at lunch and dinner, is this salad of French green lentils topped with greens, goat cheese & wine vinegar.  The only improvement I could have made would be the addition of a delicious slice of chewy, whole grain bread with butter {of course!}.

Lentils are quick cooking and healthy.  French green lentils are my lentil of choice, because they are shiny green and gorgeous and they hold their shape after cooking.  This makes them a great choice for salads because they do not become mushy.  Note:  “This just in from David Lebovitz’s wonderful food blog. . .”  Check out David’s take on Lentilles du Puy, the caviar of lentils.  During the writing of this post, I decided to find out if there is a difference between French green lentils and lentils du Puy, and according to David Lebovitz, whom I trust implicitly, there is indeed a huge difference.  I’m thinking that I may not have the caviar of lentils here in my kitchen, but instead their less desirable cousin.  Still delicious, I will use them up and then buy the real Mccoy.  No worries!

This salad goes together quickly if you have a bowl of already cooked lentils in your refrigerator.  And as you are eating it, you have the delightful surprise of finding warm, delicious and buttery lentils under those crispy greens!

closeup lentils 2

French Green Lentils

1 1/2 cups French green lentils, or lentils du Puy, sorted and rinsed {make sure there are no rocks or bad lentils}
2 bay leaves
1 tsp salt

Put lentils into a medium saucepan with bay leaves and salt.  Bring to a boil & then lower heat to a simmer.  Cook, uncovered, until the lentils are tender, but still hold their shape.  If you prefer, drain off any water that is not absorbed during cooking, but I usually keep it with the lentils as it is a tasty broth.  Lentils cook quickly, and will be tender in about 25 minutes.


French green lentil salad 2

French Green Lentils with Greens, Goat Cheese and Red Wine Vinegar

Warm cooked lentils
Butter
Freshly ground pepper
Greens, washed and spun dry
Fresh herbs {basil, parsley or whatever you like and have on hand}
Soft fresh goat cheese
Extra virgin olive oil
Red wine vinegar
Freshly ground salt and pepper

Put some warm lentils in a bowl {I used about 3/4 cup lentils for myself}.  Add a pat of butter and freshly ground pepper.  Stir to melt and distribute the butter.  Top with greens and herbs.  Season with salt and pepper.  Crumble some soft goat cheese over and drizzle with red wine vinegar and extra virgin olive oil.  Eat now. . .yum!

French green lentil salad 3

Bon appétit!


7 Comments

A Delicious Bowl of Beans

Before getting into the nitty gritty of garbanzo beans, which I love, I want to pass along information on a couple of free online classes.  Go to Craftsy, and check out their free mini-classes.  I don’t know if these classes are forever free, or if  just a current special, but it’s worth checking into.  What I have watched of the knife skills class so far, about 30 minutes, has been interesting and helpful.  I’m also signed up for a free class called Perfect Pizza at Home, with Peter Reinhart {The Bread Baker’s Apprentice author} as the helm as instructor.  I have not started that class yet {where does my time go???}. Reinhart is also teaching a class {not free} called Artisan Bread Making, which I have started; so far it’s great!

Beans are on many people’s lists of healthy foods; they are full of fiber, both soluble and insoluble, and they taste great.  There is something very satisfying about cooking a pot of beans.  I can’t put my finger on it, but for me, it’s in the same vein as baking yeast bread.  The kinesthetic aspect of making bread isn’t present in cooking beans, but a pot of well-seasoned beans can make your house smell wonderful, and they make for some mighty fine eating.  Cooking a pot of beans can take about the same amount of time as baking bread, but it is hands-off time for the most part, which is nice.  Think of all the things you can get done while your beans are slowly simmering and bubbling away on the stove.  Many people think that beans are too much trouble because they need to be soaked overnight and their cooking time is less than speedy. . . fast food they are not.  Beans will cook faster if soaked overnight, but they do not have to be soaked.  Rarely do I think about cooking beans tomorrow.  Rather, I get up in the morning and decide to cook some beans.  The age of your beans has something to do with how quickly they cook, with fresher beans cooking more quickly.

I find all beans delicious {except maybe black-eyed peas, but I’m trying}, but my favorite bean is the garbanzo bean, also known as the chickpea.  I didn’t eat them as a kid though.  My mom used to buy canned chickpeas, and I wouldn’t touch them because I thought the name sounded gross.  Maybe that’s why I prefer calling them garbanzo beans.  I like them because they are so versatile and tasty with the flavors that I find totally irresistible {Middle Eastern flavors in particular}.  Anyway, now I eat them in a variety of ways.

  • There’s always hummus, especially with homemade pita bread or fresh fennel.
  • Garbanzos are great on top of a green salad.
  • Falafel burgers!
  • Middle Eastern Tacos!
  • You can put some beans, preferably freshly cooked & still a titch warm, into a bowl, and then drizzle with your best extra virgin olive oil, a healthy squeeze of lemon, salt and freshly ground pepper.  Don’t worry about draining the beans thoroughly, because the broth is delicious and mingles nicely with your dressing.  Some diced avocado would be great here too.  Simply delicious!

My favorite way to enjoy garbanzo beans just may be this recipe from Deborah Madison’s Vegetarian Cooking for Everyone.  I love pretty much everything I’ve made from this cookbook, and this dish is right up at the top.  It’s one of my husband’s favorite things I make, and he would rather have a pot of pinto beans than garbanzo beans, so that’s saying a lot.  First, you will need some cooked garbanzo beans.  I’m hoping that you will try this recipe for preparing dry garbanzo beans, as it is excellent.

Garbanzo beans, onions, garlic, fresh parsley and kombu

Garbanzo beans, onions, garlic, fresh parsley and kombu

Freshly Cooked Garbanzo Beans
adapted from Vegetarian Cooking for Everyone

1 cup garbanzo beans, cleaned & soaked {you don’t have to soak them, but they will take longer to cook}
Aromatics: 1 onion, quartered, 2 parsley sprigs, 4 garlic cloves
1 tbsp extra virgin olive oil
6” piece of kombu, or a few pinches asafetida, optional {I love to eat the cooked kombu}
1 ½ tsp salt

Cover garbanzo beans with 2 quarts fresh water & add remaining ingredients, except salt.  Add the salt when the beans have been cooking for about 30″.   Simmer until completely tender, but not mushy.  I start checking at around 45”.  Let the beans cool in the broth.  I will often leave all the aromatics in the beans, except the parsley and bay leaf.

Spicy Chickpeas with Ginger and Aioli make a delicious meal!

Spicy Chickpeas with Ginger
adapted from Vegetarian Cooking for Everyone

3 tbsp mustard oil or vegetable oil
1 large onion, finely diced
1 bay leaf
3 garlic cloves, minced
2 tbsp minced ginger
2 tsp ground coriander
2 tsp ground cumin
1/4 tsp ground cardamom
Salt and freshly ground pepper
2 tomatoes, peeled and diced {I usually use a 14.5 oz. can of diced tomatoes}
1 1/2 cups chickpea broth or water
3 cups cooked chickpeas, or 2 15-oz. cans, rinsed
Juice from 1/2 lemon

Garnishes:  diced onion, minced jalapeño, chopped fresh cilantro and diced fresh tomato

Heat the oil in a large skillet over medium heat.  Add the onion and cook, stirring frequently, until well-browned, 12 to 15 minutes.  Lower the heat and add the bay leaf, garlic, ginger, spices, 1/2 tsp each salt and pepper and the tomatoes.  Cook for 5 minutes, then add the chickpea broth and chickpeas.  Simmer until the liquid is reduced to a sauce like consistency.  Taste for salt and season with lemon juice.  Serve with the garnishes {in small dishes} or scatter them over the chickpeas.

Spicy Chickpeas with Ginger and Aioli

Hands down our favorite way to eat this dish.  In fact, I don’t think we have ever eaten it without the aioli.  All of the garnishes, particularly the aioli, make this dish fabulous, in my opinion.

Notes:

  • Make the aioli-it’s totally worth it!  The warmth of the beans accentuates the flavor and aroma of the aioli when you slip a dollop of it right in the center of your bowl of beans.  Then top with the onion, jalapeño, tomato and cilantro.  Use commercial or homemade mayonnaise for your aioli, but please do try it, at least the first time.  You won’t be sorry.
  • For the best end result, cook dry beans instead of using canned.  Even though I prefer starting with dry beans, I’m not opposed to all canned beans.  However, my experience with canned garbanzo beans is that the beans tend to have more bite than I like.  A well-cooked garbanzo bean is tender enough to be mashed between your tongue and the roof of your mouth {a good test for doneness!}.  They should be soft and creamy, not al dente.
  • Soak or don’t soak, and cook your beans using whatever method you prefer, but season them well, so they will be delicious even when they stand alone.  I like Deborah Madison’s method for producing a fantastic tasting pot of beans.  If you put the kombu {seaweed} in, it is a real treat to eat when the beans are done; I love it.  Kombu adds a lot to the beans, so I encourage you to put it in, and eat it when the beans are cooked.
  • I buy Rising Tide Kombu from Mana Foods, here in Paia.  You can purchase kombu on line, or I’m sure you can find it at Whole Foods or any good natural foods store.
  • Serve with cooked brown rice, naan or all by itself with the garnishes & enjoy!

I do hope you will give this a try, and that you love it as much as I do.  Let me know what you think!Spicy Chickpeas with Ginger and Aioli

Bon appétit!


Leave a comment

Refrigerator Confidential Day #7 & #8

Welcome to Refrigerator Confidential Day #7 & #8, the final post of this up close and personal look at our refrigerator.  I hope you have enjoyed reading about the kinds of foods we like to buy at the farmers’ market, and how we manage to eat all or most of it by the end of the week.  It is always a challenge, and does require a fair amount of effort from us, but this is how we like to eat. . .it is our lifestyle, and we wouldn’t trade it for any other way.

Friday’s Meals with Recipes:

Breakfast

Me- Oatmeal with Granny Smith Apples {recipe & photos on Refrigerator Confidential Day #5}
Green Tea
Freshly Pressed Ginger Kombucha
My husband- Peanut Butter & Arugula Wrap on a Whole Grain Tortilla

Lunch

Grilled Eggplant Moussaka
Pickled Beets {recipe & photos on Refrigerator Confidential Day #2}

moussaka & pickled beets

Layers of russet potato, zucchini, eggplant & seasoned ground beef topped with feta cheese & creamy Bechamel sauce with Pickled Beets

Our friend Molly dropped off a delicious Grilled Eggplant Moussaka yesterday, which I promptly put in the oven for our lunch.  I have never made moussaka, and I’m not sure that I have ever eaten it before, so I have nothing with which to compare it.  Comparisons are unnecessary though, because it was outstanding.  Molly has a business called Maui Go To Girl {“consider it done“}.  If you are a busy person who could use some assistance with meals, errands, moving, event planning and much, much more, please check out her website at www.mauigotogirl.com.  Her services are many and I can assure you that you are in good hands with Molly {food-wise and otherwise}!

Dinner

We went to Milagros in Paia, where you can find one of the best Maui happy hour prices we know of {$3.00 beer and margaritas-no food discount}.  We filed our taxes yesterday, so decided to go out and celebrate with Kalua Pork Nachos-yum!  After we came home, we had popcorn while we watched episode 2 of season 1 of  Twin Peaks.  We didn’t watch it when it first came out, so we are catching up on popular culture.  While it was a tasty eating day, it wasn’t stellar in terms of vegetable consumption-definitely not up to our usual standards.  It’s what you do 95% of the time that matters, according to us. . . you have to be able to eat some not-so-healthy for you foods every now and again.

Peanut Butter & Arugula Wrap on a Whole Grain Tortilla

1 whole grain tortilla {we use organic sprouted wheat tortillas}
Peanut butter of your choice {I can’t imagine not choosy crunchy.}
Arugula-lots of it
Fresh lemon juice
Salt & pepper

Spread tortilla with as much peanut butter as you want, and top with lots of arugula.  Squeeze a little fresh lemon juice over the arugula and season with salt and freshly ground pepper.  You could also drizzle a little extra virgin olive oil over the arugula.  It’s always a good thing to have something juicy on a wrap, otherwise they can be dry.

Here is what’s left from last Saturday’s purchases.  Not bad.  We consider the carrots, celery, cabbages and kabocha squash to be staples, meaning we don’t necessarily don’t intend to eat them all during the week.  Imagine adding all that to what we’ve already eaten!  So really, what’s left are 2 green onions, a half a green pepper, 2 jalapeños and a bit of kale.  We’d call this a successful eating week!  We only ate out twice-last Saturday night at Nuka {mmmm!} and yesterday at Milagros, so that was helpful.

what's left

It’s Saturday again & we have started the cycle all over again!

Here's the foundation of another week of great eating!

Here’s the foundation of another week of great eating!

Isn't this organic red leaf lettuce gorgeous?

Isn’t this organic red leaf lettuce gorgeous?

Beautiful Baby Romaine Lettuces

A Bundle of Beautiful Baby Romaine Lettuces

This slideshow requires JavaScript.

I hope your farmers’ markets are open or opening very soon!  Go out and get yourself some delectable fresh produce for your health and good eating.

Bon appétit!


Leave a comment

Refrigerator Confidential Day #6

Welcome to Refrigerator Confidential Day #6!  The refrigerator is not looking bare, because the bags of produce have been replaced by glass storage containers full of prepared food, which is a good thing.  Sometimes it does look bare by the end of the week, but that is only when we manage to eat everything.  It’s all good!

Thursday’s Meals with Recipes:

Breakfast
Oatmeal with Granny Smith Apples {recipe & photos on Refrigerator Confidential Day #5}
Green Tea
Freshly Pressed Ginger Kombucha

Lunch
Sandwich of Gruyere Cheese & Plenty of Arugula on Whole Grain Bread
Grapefruit Slices

Dinner
{Huge} Plate Salad of Mediterranean Flavors with Fresh Oregano Vinaigrette

Sandwich of Gruyere Cheese & Plenty of Arugula on Whole Grain Bread

This is my husband’s creation, and he says that you cannot have too much arugula on this sandwich.  It is a very tasty sandwich!  Cheese sandwiches were my favorite as a kid, but they were just American cheese and mayonnaise on white bread; not nearly as sophisticated as this sandwich.  I imagine most kids would not be too keen on arugula’s bitterness.  Bitter greens are good for you, so eat your bitter greens. . .on a cheese sandwich!

2 pieces of your favorite bread {we used Dave’s Killer Bread}
Gruyere cheese, thinly sliced
Arugula. . .lots
Mayonnaise
Salt & freshly ground pepper

Put cheese on 1 piece of bread {as much as you like}. Top with a big pile of arugula & sprinkle with a little salt and freshly ground pepper.  Spread mayonnaise on the other slice of bread & close up your sandwich.  Cut in a way that makes you happy & eat.

Plate Salad of Mediterranean Flavors

Huge} Plate Salad of Mediterranean Flavors with Fresh Oregano Vinaigrette 

Here is what I put on the salad. . .I’ll leave the amount of each ingredient up to you.

Kale & romaine lettuce
Sweet Maui onions
Green pepper slices
Jalapeño slices
Avocado
Cherry Peppers
Kalamata olives
Sun dried tomatoes in olive oil
Italian tuna packed in olive oil
Wakame & Ginger Sauerkraut Salad
Dusting of freshly grated Parmesan cheese
Green onions


Here is the refrigerator on Day #6

This slideshow requires JavaScript.

Bon appétit!