“One of the very nicest things about life is the way we must regularly stop whatever it is we are doing and devote our attention to eating.” Luciano Pavarotti
We don’t get a lot of rain where we live in Pukalani, so today’s rain was welcome. The morning sky was a mix of blue, gray clouds & sun breaks; the wind was soft. Bigwinds are a frequent occurrence in Pukalani, winds so big it’s a wonder that plants have any foliage & that any of us have a hair left on our heads. But they aren’t the sustained winds that come with a storm. We are waiting for Flossie, the Tropical Storm that is currently headed for Maui, to arrive. Right now, the rain is falling a little harder & the palm fronds are swaying gently. A few birds are chirping here & there, but we aren’t hearing the usual afternoon bird symphony of chirps & tweets. We hear an occasional cock-a-doodle-doo from a neighborhood chicken.
We spent the morning preparing for Flossie. The smart thing to do if you think you may lose power is to make some food so you are ready if it happens. Having lived in the Pacific Northwest for over 20 years, we are experts at getting ready for a power outage; we experienced many. A big difference is that when the power goes out on Maui, it isn’t freezing cold outside. We have plenty to eat, so I just prepared a few things to make our day just a little tastier. I made cornbread using Bob’s Red Mill Blue Cornmeal, which I hear is more nutritious than yellow cornmeal, these oatmeal muffins and Passato of Vegetables , one of our favorite soups {good hot or cold}. Today is cool enough to enjoy the soup hot, and warm enough to eat it cold, should we be sans power. Fingers crossed that the power stays on!
Blue Cornbread {adapted from Moosewood Cookbook} 1/4 cup honey
1/4 cup melted unsalted butter
1 cup buttermilk
1 large egg
1 cup blue cornmeal {of course you can use yellow}
1 cup whole wheat pastry flour
2 tsp baking powder
1/2 tsp baking soda
1/2 tsp kosher salt
Whisk together honey, buttermilk, egg & butter. In a large bowl, whisk together the dry ingredients. Add wet ingredients to dry & mix well.
Bake in a greased 8″x 8″ pan at 425 degrees for 18 minutes or until toothpick comes out with a few moist crumbs. I love it with butter & molasses.
More rain has arrived, along with thunder! And now there is lightning! Time for hot soup.
“Life is uncertain. Eat dessert first.” Ernestine Ulmer
I saw some beautiful flowers on my walk today, & couldn’t resist photographing & sharing them with you. My walk was enjoyable as always, and warm, because I didn’t leave until a little after 7:00 am. The sun doesn’t take long to “warm up” in Hawaii; it pretty much makes its appearance & is hot right off the bat. If you want a cool walk, you need to leave before the sun peeks over Haleakala, or after it dips behind the West Maui Mountains.
If you have visited Maui, or live here, you know that there are chickens all over the place. I have seen some beautiful chickens here, but the family I saw on today’s walk are about the homeliest bunch I’ve encountered.
Truth be told, I am more excited about what I made after I returned from my walk.
I made this. . .
This is a fantastic way to end a walk on a hot day!
Oops…I was so anxious to eat my dessert that I forgot to snap a photo until these two bites were left! Side-by-side with ice cream, I could certainly tell the difference. All by itself, I don’t need ice cream. We always have a stash of frozen bananas, so this is a breeze to make {& eat}.
Banana Mocha Peanut Butter Soft Serve
2 frozen bananas, sliced
1 tbsp. crunchy peanut butter
1/2 tsp instant coffee {I use Starbucks Via}
1 tsp cocoa {I use Dagoba unsweetened with bits of unsweetened chocolate}
1 tsp vanilla
Pinch of kosher salt
1/8 cup roasted, unsalted peanuts
20 dark chocolate chips {or your favorite}
Splash of milk, dairy or otherwise, if you need it for blending
I used my Cuisinart Mini-Prep food processor for this recipe. Put the bananas, peanut butter, coffee, cocoa, vanilla & salt into the processor. Process until the mixture starts to become creamy; you may need a little liquid to get it going. I used a little of my homemade almond milk. Add in the peanuts & chocolate chips & blend until they are somewhat chopped up, but not totally. Eat right away, or freeze. I prefer eating it right away, or freezing for just an hour or 2.
One of life’s great pleasures is the aroma of yeasty bread dough in the oven, transforming itself into a beautiful, delectable, crusty loaf of bread. If you have never baked homemade yeast bread, you are in for a treat. It really doesn’t take a lot of time; you can have delicious bread from start to finish in 3 hours or less, depending on the bread. Much of that time is rising time, so you can be doing something else, like making soup or salad to accompany your freshly baked bread.
It isn’t just the smell that is enticing though. Bread dough feels good in your hands. Not so much at the beginning, when it is a sticky, shaggy mass of dough…
but when your mindful kneading transforms it into a silky, supple ball of dough, it is a pleasure to behold. I find kneading bread to be therapeutic and calming.
I have been making yeast breads by hand for many years, although I am certainly not an expert on the subject. I will say that I am not a fan of bread machines. Perhaps I had a bad experience with one. My mother-in-law had a bread machine when they first came out, and she made some tasty breads. She enjoyed hers so much that she gave one to us. I used it a few times. It was nice to wake up to freshly baked bread courtesy of the bread machine, but it had a hole in the middle of the cylindrical loaf. I could live with that, but the outside of the bread was slightly burned when the inside was undercooked. So I decided to try letting the bread machine do the kneading, and I would bake off the loaf the “old fashioned” way. Doing that deprived me of the pleasure of getting my hands into the dough and experiencing that lovely change in texture from rough to silky smooth. Bread machine?? Not for me, thank you very much! I gave ours away to an appreciative uncle.
This slideshow requires JavaScript.
Whole Wheat Rye Potato Bread
1 medium sized potato
reserved potato cooking water
2 packages dry yeast
2 tbsp butter, cut into small chunks
2 tbsp honey
1 tbsp kosher salt
1 cup warm milk {low fat is fine}
3-4 cups whole wheat flour
2 cups dark rye flour
3 tbsp coarse cornmeal + 3 tbsp ground flax seeds + whole wheat flour to make 1 cup
3tbsp caraway seeds {or fennel, anise or a combination of them}
Peel & dice the potato. Cover with water & boil until potato is tender, about 15-20 minutes. Save 1 cup of the potato water {add hot tap water if you do not have enough}. Mash the potato & set aside.
In a large bowl, mix together 3 cups whole wheat flour, rye flour & cornmeal/flax seeds/whole wheat flour mixture. Keep the additional cup of whole wheat flour in case you need to use it.
Pour the {not too hot} potato water in another large bowl, then sprinkle in the yeast & stir with a wooden spoon. Add the butter, honey, caraway seeds and salt, and then stir in the mashed potato {approximately 1 cup}, warm milk & 3 cups of flour mixture. When you add the yeast to the warm potato water, it will begin to activate. It will begin to get bubbly as you add the remaining ingredients & will look like this. . .
Beat until smooth, and then add enough additional flour to make a stiff dough. When it gets hard to incorporate any more flour with the spoon, turn the dough out on a lightly floured counter. Knead the dough until smooth and elastic, about 8-10 minutes. Wash the bowl in which you mixed the dough, butter it and then place the dough back in the bowl, turning to coat all sides with butter. Cover with a clean kitchen towel & let rise in a warm place until doubled in bulk. This should take 45-60 minutes. I like to turn on the oven for 2 minutes, turn it off and then put my bowl of dough in the toasty warm oven to rise. Don’t forget to turn off the oven or you will bake your bread prematurely! I have heard that the pilot light in a gas oven has enough warmth to be a good place to let bread rise, but I have never had a gas oven, so can’t vouch for that one.
How do you know when your dough has doubled in bulk? It is difficult to “eyeball it” so there is a little test you can use. Poke 2 fingers into your dough after it has risen for 45 minutes; if the indentations remain, your dough is ready for the next step. If not, cover it back up for 15 more minutes & repeat the test.
When doubled, punch the dough down, cover and let rise again in a warm spot for 20 minutes.
Turn the dough out onto a lightly floured counter & knead for 1-2 minutes.
Now you are ready to shape your loaves! Divide the dough into 2 equal pieces {I use my kitchen scale to do this} & shape. You can either sculpt the dough into a loaf with your hands, or you can do it jelly roll style, as shown in the slideshow {right before the recipe}.
Note about yeast: When you are adding warm liquids to yeast, make sure the temperature of the liquid is between 100 & 115 degrees Fahrenheit. If your liquid is too hot, you risk killing the yeast & your bread will not rise. Be sure to check the expiration date on your yeast to verify that it is not outdated. It may still work. . .or it may not.
Enjoy the kinesthetic, aromatic & flavorful joys of baking your own yeast bread. . .and don’t forget the butter!
If you are a banana nut bread lover, you must try these muffins. They are dense, moist, banana-y, and just plain delicious. I have put my own spin on them to make them healthier and even tastier than the original recipe. The list of ingredients is perhaps a little longer than most muffin recipes, but they go together quickly, and are definitely worth your time.
As far as I’m concerned, any banana bread or muffin must contain walnuts & be eaten with butter; preferably the bread is cool enough so that the butter just sits on top so you can really taste it. There is something special about the flavor combination of sweet banana bread, crunchy walnuts & creamy butter. Another “must ingredient” for me in these muffins is cacao nibs. Cacao nibs are one of my favorite ingredients. As you can see from the package, they are a Mayan Superfood, with antioxidants, iron & magnesium! Don’t expect to snack on them from the package, because they have no sweetening, so aren’t like popping chocolate chips. I buy these from Amazon:
Cacao nibs are a nice addition to banana breads because they add a little punch of chocolate flavor in every bite. What’s not to like about that?
The original recipe calls for strong coffee & suggests water if you don’t have coffee. I highly recommend using coffee, even if you are not a coffee drinker, because it adds a layer of flavor that you can’t detect as coffee; it’s just good. I buy the Starbucks Via packages from Costco when they go on special.
Wet Ingredients:
2 ripe bananas
1 large egg
1/3 cup melted unsalted butter
1 1/2 tsp vanilla
2 tbsp. strong coffee {you can use water, but I highly recommend the coffee}
Milk, buttermilk or coconut milk-enough to make 2 cups TOTAL wet ingredients {if you use 3 bananas you may only need a few tablespoons; if you use one banana, you may need to add 2/3 cup or more}
Dry Ingredients:
1 1/2 cups whole wheat pastry flour
1/2 cup sugar
1/2 cup flaked unsweetened coconut
1 tbsp. ground flax seed {preferably grind your own from whole flax seeds}
2 tbsp. hemp seeds
2 tbsp. raw cacao nibs
1 tsp kosher salt
1/2 tsp baking soda
1/2 tsp baking powder
1/2 tsp cinnamon
1/8 tsp ground nutmeg {I use whole nutmeg, freshly grated on a rasp. Definitely worth it!}
1 cup broken walnuts
Preheat oven to 350 degrees. Be sure to put the muffins in a fully preheated oven.
In a small bowl, put all of your wet ingredients-make sure you mash the bananas thoroughly with a fork. Stir in the egg with the fork, and then add the remaining wet ingredients.
In a large bowl, thoroughly mix your dry ingredients. I always put the measured baking soda & baking powder in my hand & smash any lumps; it’s not pleasant to bite into a lump of baking soda in your muffin.
Add the wet ingredients to the dry ingredients. Stir gently {12-14 quick strokes}. Do not over mix-this will result in tough muffins. Who wants tough muffins? There may be a few streaks of flour but that is ok.
Spray your muffin tins with coconut oil spray {or Pam}, or grease them with butter. Lightly spoon in your batter {don’t pack it in}. You can fill the tins up to the top.
Put the muffin tin into the preheated oven & bake for 20 minutes {I always start checking at 18 minutes}. They are done when a toothpick comes out with a few moist crumbs.
Leave the muffins in the tins for 5-10 minutes, and then remove them to a wire rack. Enjoy with butter!
Why should you bother making homemade almond milk? Because it doesn’t contain any of the additives or weird ingredients found in packaged almond milk & is delicious, healthy & simple to make. A regular blender can be used to whip up this luscious milk, so what are you waiting for?
I’ve been following Gena Hamshaw’s fabulous blog called Choosing Raw-Vegan & Raw Recipes {even though I am not vegan, nor do I adhere to a raw diet}, and have been contemplating making homemade almond milk for some time. I finally took the plunge & made 2 batches & am thrilled with the results! The only ingredients needed to prepare this delicious vanilla almond milk are almonds, water, agave nectar & vanilla. The first batch was served up unstrained, in all its textural {read fibrous} glory-it was very tasty but I decided to strain the second batch & I am glad I did. The resulting milk was smooth, creamy & delicious. I used cheesecloth, because I always have cheesecloth on hand. A nutmilk bag is probably in my future though, because it can be washed & reused. So far, the only thing I’ve used my almond milk for was chocolate milk, using Dagoba Unsweetened Cacao with Bits of Unsweetened Chocolate-very tasty!
“In 1911, Henry Ginaca invented the Ginaca machine that could peel and core 35 pineapples per minute, making canned pineapple much easier to produce. Before this, each pineapple had to be peeled and cored by hand. Because of this invention, Dole’s pineapple canning business exploded and other pineapple canneries soon adopted the machine.” {Eat This! http://www.healthdiaries.com/eatthis/20-facts-about-pineapples.html}
If you have ever been perplexed about how to deal with a whole fresh pineapple, just follow the pictures below. You won’t be able to do 35 pineapples per minute, like the Ginaca machine, but in less than 10 minutes, you can have a delicious pineapple cut & ready to eat, or use for smoothies, margaritas, pancakes, yogurt, ice cream topping or whatever you fancy. If you have a dehydrator, fresh pineapple is delicious when cut into pieces & dried. No sugar is required before drying, so it is less sweet than commercially dried pineapple, which I have seen crusted in sugar.
If you can get them, I highly recommend Maui Gold Pineapples, not because I live on Maui, but because they are lower in acid & are tastier. Try pineapple sprinkled with a little sea salt-it complements the sweet-tart flavor of the fruit.
Why eat pineapple? Here are a few reasons, from The 150 Healthiest Foods on Earth {Jonny Bowden, Ph.D., C.N.S.}:
* 1 cup cubed fresh fruit has almost 100% of the Daily Value of manganese, which is a trace mineral required for healthy skin.
* Pineapple has a good amount of vitamin C, plus some other vitamins & minerals.
* 1 cup fruit has about 2 grams of fiber
* Pineapple’s glycemic load {the impact of a food on your blood sugar} is relatively low.
* It tastes great!
“There is no snooze button on a cat who wants breakfast” Anonymous
This is so true! Jack has all kinds of tricks to wake us up when he thinks it is time for him to eat his breakfast. He’s just like Simon’s Cat.
It’s late, so this is going to be short. Breakfast is important because if you think about it, when you wake up, you probably haven’t had any food for 10 hours or so; it’s time to nourish your body. We had a simple, but tasty breakfast this morning. Rye toast topped with my husband Gerald’s eggs fried in a little coconut oil and pasture butter, broccolini with a bit of home made mayonnaise and a beautiful mango with freshly ground salt and pepper. And tea, of course!
“You don’t have to cook fancy or complicated masterpieces – just good food from fresh ingredients.” Julia Child
I left early for my walk this morning, though not as early as I should have. I departed at 7:30, but the sun felt sizzling hot, just like it did yesterday, although today there was a nice cloud that stole the sizzle every now and then; I like that on a hot day. The difference from yesterday’s walk is I left 3 hours earlier today, and yesterday’s walk ended up at the community swimming pool, while today’s walk ended up in the kitchen. For me, both are excellent destinations. Following is a run-down of my kitchen adventures with recipes.
Upon returning from my 3.4 mile walk, I made some freezy Banana Mocha Frozen Yogurt with Crunchy Walnuts, satisfying & scrumptious. Did I mention that it’s hot today? This little snack really hit the spot & helped me to cool off. It’s not super frozen, but more of a soft serve that tastes enough like ice cream to satisfy me. You can put it in the freezer if you want it firmer. If you leave it in the freezer until it freezes solid, you can bring it back to creaminess by whizzing it in the food processor again. I find it easier to just make it and eat it right away, or within an hour or two. My recipe is an adaptation of a tasty vegan Banana Soft Serve; find that recipe here. After you look at the Banana Soft Serve recipe, take a spin around the Choosing Raw blog; Gena has lots of fabulous recipes. You do not need to be vegan or vegetarian to enjoy her site.
Banana Mocha Frozen Yogurt with Crunchy Walnuts ¾ cup plain, unsweetened yogurt {We use Nancy’s Plain Yogurt in the 64 ounce container. Our yogurt is nonfat or low fat, whichever one has the latest pull date.}
1 ½ frozen bananas cut into small pieces {When our bananas are getting too ripe, we peel them, cut them in half and freeze them on a cookie sheet. Pop them into a freezer bag, and they are ready for banana bread, banana muffins, smoothies, “frozen yogurt” and whatever else you might fancy.}
1 tsp cocoa powder {like Hershey’s}
¼ tsp espresso powder
Grind or pinch of sea salt {brings out the flavor}
20 chocolate chips {preferably dark chocolate, because it’s healthier}
Put the yogurt, cocoa powder, espresso powder and salt in a food processor or high speed blender. I have a little Cuisinart mini food processor that works great. Pulse a few times to mix. Add chocolate chips and ½ a banana and pulse to get things going. Once the first banana is blended in, you can add the rest of the banana pieces and process until smooth. Top with crunchy walnuts or your nut of choice and enjoy.
I do not put any sweetener in this recipe, because the bananas are sweet enough for our tastes. We have been eating plain yogurt for a long time, and find the sweetened stuff way too sweet. If you need sweetening, try a little maple syrup or honey.
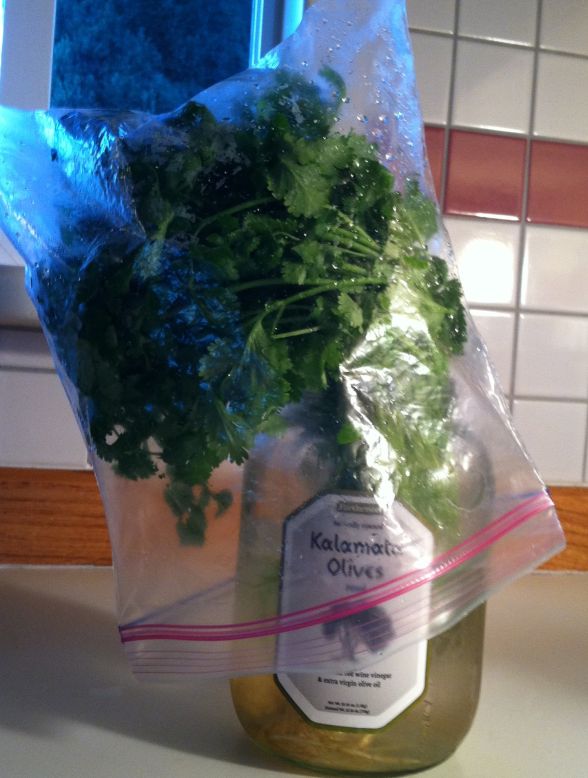
The cilantro is washed & happy in its jar, which was formerly the home of kalamata olives.
Dandelion greens {a new favorite of ours} have been cleaned and are ready for salad with mustard vinaigrette. This is my gateway recipe for mustard vinaigrette, from A Homemade Life, by Molly Wizenberg. I love this book, and her blog Orangette. I highly recommend that you stop by when you have a minute; you will be happy you did. She tells great stories and her recipes are wonderful.
Mustard Vinaigrette {from A Homemade Life}
In a small bowl, whisk together 2 tbsp Dijon mustard and 1 tbsp + 2tsp red wine vinegar. Add 3 tbsp olive oil & whisk well to emulsify {thicken}.
I actually just wing making mustard vinaigrette now; I start with a big plop of Dijon {smooth or grainy}, minced shallot, garlic {mashed to a paste with a little kosher salt} & vinegar of choice {I use Bragg’s apple cider vinegar or red wine vinegar, and occasionally I will use balsamic with a squeeze of lemon.}. Whisk together to combine and then whisk in olive oil until it is the consistency you like. If it is too sharp for your taste, add a little honey.
I steamed some asparagus, which we enjoyed with a dollop of freshly made mayonnaise, freshly ground salt & pepper.
Mayonnaise {adapted from The Best Recipeby Cook’s Illustrated}
1 egg {pasteurized if you are worried about eating raw egg}
2 tsp white wine vinegar
5 tsp freshly squeezed lemon juice {original recipe is 3 tsp}
about 2 tsp Dijon mustard {I don’t measure, but just put in a nice plop; original recipe is ½ tsp}
½ tsp salt
1 ½ cups neutral oil {I use canola}
Put egg, vinegar, lemon juice and salt in bowl of food processor. Pulse a few times to mix. Turn on the processor and drizzle in oil, until all of it has been added. My Cuisinart’s feed tube has a hole in it, so I just fill it with oil until it’s all in, and then turn off the processor. I don’t like the mayonnaise to be super stiff, so I turn off the processor as soon as all the oil is in.
There was a bit of broccoli, not your “regular” broccoli, but something like broccoli rabe, leftover in the refrigerator, so we ate it in the same way as the asparagus. Delicious!
The beets are tender now, from their time in the steamer. Not sure if I will get to it today, but I am going to make Beet Namasu. This is our new favorite way to enjoy pickled beets.
P.S. I did not get to making Beet Namasu. We went out for pizza & beer at Flatbread Pizza Company in Paia. Oh well, tomorrow is another day.
This is the reason I weigh close to 20 pounds; I lounge about most of the day!
“The ripest peach is highest on the tree.” James Whitcomb Riley
Independence Day sunset at Kamaole III Beach Park Kihei. Hope you had a great 4th! In Maui, it pretty much feels like summer all year round; we do not have to “earn” our summer, like our friends and family in the Pacific Northwest, it’s just here for us to relish. Sometimes I have to think about what time of year it is, because we don’t have the distinct seasonal changes. Flowers flourish freely, as if without effort. Fresh produce is plentiful and available whenever one wants to indulge.
I was delighted to see flats of peaches in the store the other day. I knew just what we would do with them-make peach preserves. Actually, what we make is more like a cross between peach preserves and peach sauce. Lest you think that I was going to heat up the kitchen with a pot of golden peaches bubbling away in sugary syrup, and a boiling water canner to safely preserve them, let me set the record straight. First of all, my husband is the chief preserve maker in our house. I may assist with determining doneness, or deciding if it needs a little thickener, but he is always the one that says, “Let’s make preserves!”
When we moved to Washington State, in 1988, I became a Master Food Preserver {now called Food Safety Advisor} through the County Extension Office. I learned the myriad ways of preserving food safely, and did quite a bit of preserving when we had a large garden and the time required to do it. Now, we make delicious preserves quickly and easily, in about 30 minutes. Not only are they delicious, they are healthier because you can make them with far less sugar. The only downside of preserves made this way is that they are not keepers; they need to be eaten within a week’s time.
Homemade Peach Preserves 1 quart peaches, cut into eighths {you can leave the skins on!}
1 tbsp sugar, more or less to taste
Juice from ½ a lemon, about 2 tbsp, to taste
Pinch salt, preferably sea salt
Put the peaches, sugar, lemon juice & salt in saucepan. Cook over medium low heat until it comes to a boil. When mixture boils, turn the heat down to low so you have a slow bubble. The objective is to “cook off” the water, so that the mixture thickens and becomes syrupy.
Do not cover the pan, or the water will not be able to evaporate. You want to preserve the fresh, bright flavor of the peaches, so if you cook them too long, they will taste “brown.” When the mixture has thickened, and tastes good to you, it is done. You can leave the mixture as is, or mash is with a fork to break up the larger pieces of fruit. The preserves will be thinner than store bought or traditionally prepared preserves, so if you want them to be thicker, add a cornstarch slurry {mix 2 tsp cornstarch to 2 tsp water} to thicken them up. They will thicken up a bit when they are refrigerated.
You can make preserves this way with most fruits, but be aware that each fruit differs in the amount of water and pectin, so preserves will cook up differently.
Enjoy your preserves with toast, in plain yogurt {who needs that presweetened yogurt??} or any other way you like. I have a fantastic banana muffin recipe I’ll be sharing soon that would be fantastic with some salted butter & peach preserves. Yum!
One more thing. . .
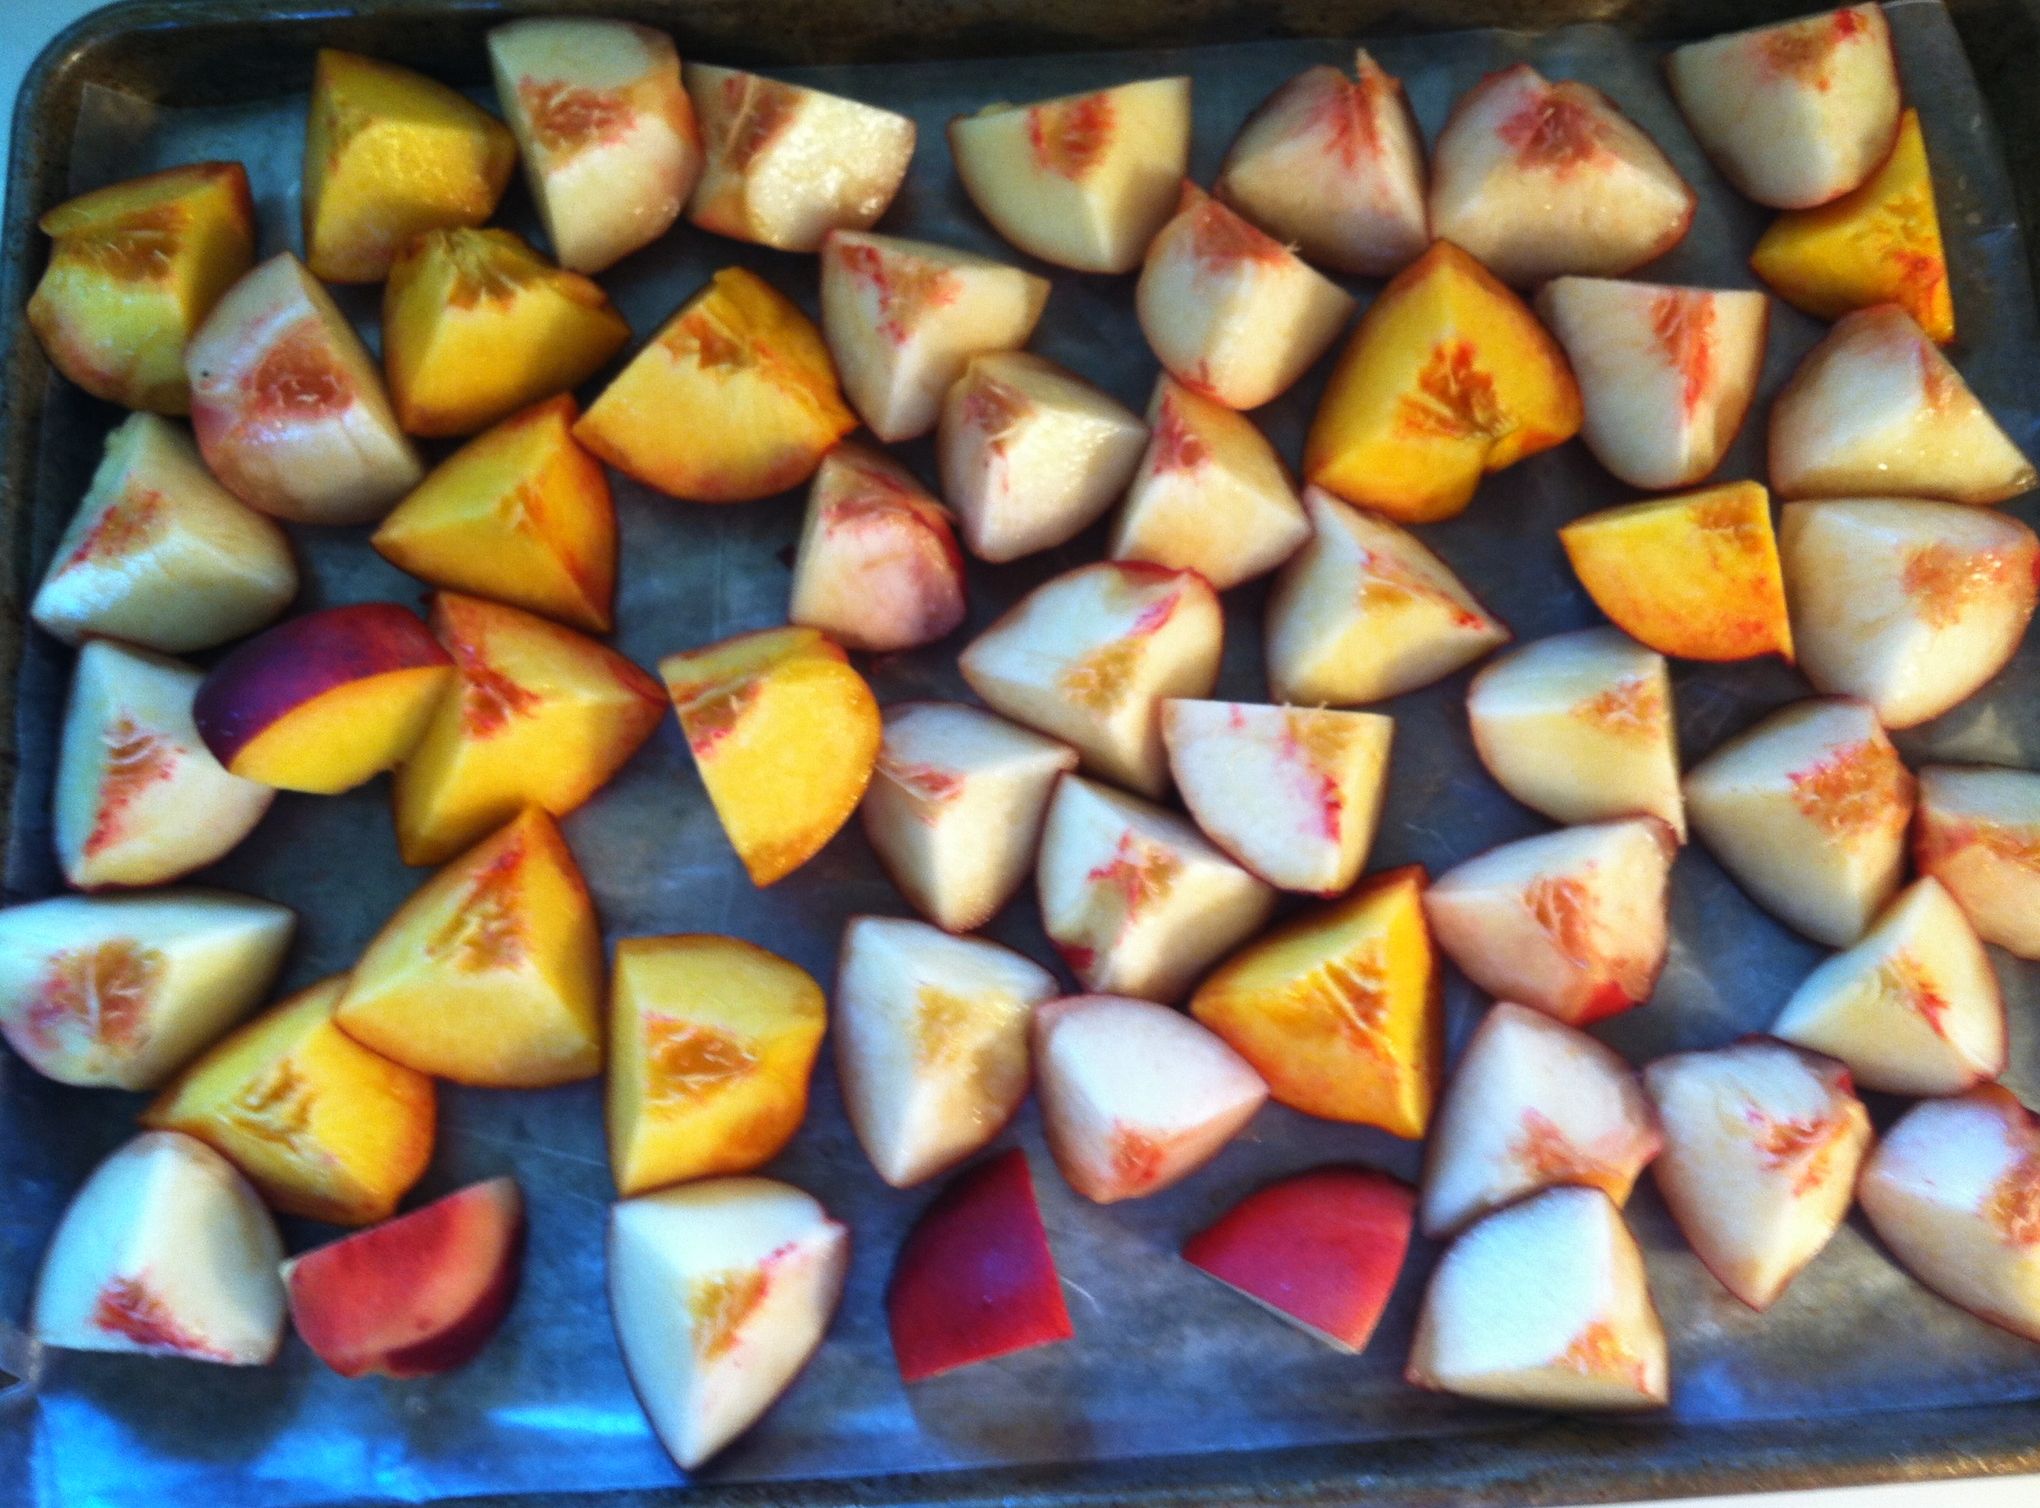
. . .you may not want to use up your whole flat of peaches for preserves. Here is what we do with them-we cut them in eighths, then put them on a cookie sheet lined with parchment or waxed paper {they will stick to the cookie sheet and be hard to remove if you don’t line it}.
Pop in the freezer until they are frozen, then bag them up. We got 2 gallons of frozen peaches from 16 peaches, so we will be enjoying sunny peach preserves in January!
“There are five elements: earth, air, fire, water and garlic.” Louis Diat
Did you know. . .
……… that garlic, also known as “stinking rose” has some great health benefits, if you prepare it correctly? If you don’t, you have tasty food, but most of the health benefits are lost. If you are going to cook the garlic, just a minor adjustment is required to preserve the benefits. You’ve probably heard of letting meat “rest” before you cut it. It’s the same thing for garlic, except the garlic rests before you cook it. Prep the garlic for your dish, and then let it hang out away from heat for at least 10 minutes. While it is resting, amazing things happen, and that is what makes garlic so good for you.
For inquiring minds who want to know, here is the science behind garlic’s health benefits. Raw garlic contains the 2 ingredients that are required to make allicin, which is the compound that makes garlic so healthy. These 2 components, alliinase and alliin, comingle when you crush, chew or mince the garlic, and then make allicin. If you heat the garlic immediately after cutting it, the heat-sensitive enzyme alliinase is destroyed, and thus no allicin will be created. Health benefits go up in smoke!
What are some of the health benefits of garlic? I could write pages on this, but will just refer you to a few resources instead. Here’s a list of some things that are good about garlic:
helps neutralize bacteria and viruses
inhibits growth of cancerous tumors and reduces the risk of certain cancers, particularly stomach cancers
reduces risk of blood clots
fights free radicals, inflammation and inflammatory conditions such as allergies
lowers blood pressure
Sources of information:
A favorite recipe of mine that uses garlic comes from The Garlic Lovers’ Cookbook {1980 The Gilroy Garlic Festival Association, Inc.}. The recipe was a recipe contest entry by Julie and Gary Crites. If you like Boursin Cheese, you will love this!
Creamy Garlic Herb Cheese
2 8-oz. packages cream cheese
1 pint sour cream
½ cup butter
3 cloves garlic, pressed
¼ cup snipped fresh chives
Mix all ingredients in blender or food processor. Chill in refrigerator for several hours. Warm to room temperature before serving with crackers or as a dip for fresh vegetables.
“One of the very nicest things about life is the way we must regularly stop whatever it is we are doing and devote our attention to eating.” Luciano Pavarotti
“One of the very nicest things about life is the way we must regularly stop whatever it is we are doing and devote our attention to eating.” Luciano Pavarotti
“One of the very nicest things about life is the way we must regularly stop whatever it is we are doing and devote our attention to eating.” Luciano Pavarotti
“One of the very nicest things about life is the way we must regularly stop whatever it is we are doing and devote our attention to eating.” Luciano Pavarotti
“One of the very nicest things about life is the way we must regularly stop whatever it is we are doing and devote our attention to eating.” Luciano Pavarotti
“One of the very nicest things about life is the way we must regularly stop whatever it is we are doing and devote our attention to eating.” Luciano Pavarotti
“One of the very nicest things about life is the way we must regularly stop whatever it is we are doing and devote our attention to eating.” Luciano Pavarotti
“One of the very nicest things about life is the way we must regularly stop whatever it is we are doing and devote our attention to eating.” Luciano Pavarotti
“One of the very nicest things about life is the way we must regularly stop whatever it is we are doing and devote our attention to eating.” Luciano Pavarotti
“One of the very nicest things about life is the way we must regularly stop whatever it is we are doing and devote our attention to eating.” Luciano Pavarotti


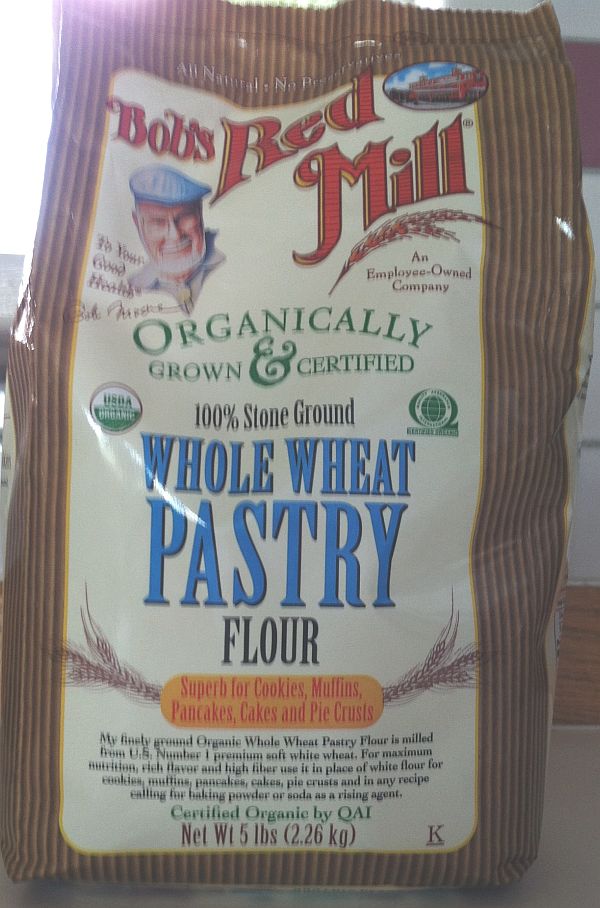

 Photo by Gena Hamshaw from