“One of the very nicest things about life is the way we must regularly stop whatever it is we are doing and devote our attention to eating.” Luciano Pavarotti
“The smell of good bread baking, like the sound of lightly flowing water, is indescribable in its evocation of innocence and delight.” – M.F.K. Fischer
This slideshow requires JavaScript.
I’ll start by apologizing for my finished bread looking burned; it was not burned. No matter how I aimed my camera, part of the loaf looked black, which is why the picture is cropped. Sometimes a photo just doesn’t do justice to its subject. Now that that is out there, let’s move on.
I love baking yeast breads because I find it relaxing and therapeutic. Not that I’m necessarily in need of therapy when I decide to bake some crusty, yeasty and delicious loaves. It’s just that it feels good to get your hands in the dough and feel the magical transformation from wet sticky dough to dough that is silky and elastic, and a pleasure to touch. Homemade bread actually engages all of your senses-
~There is the smell . . . yeasty fragrance wafting up from the bowl of blooming yeast. “Blooming yeast” sounds like a British expression; in this case it means to put the dry yeast into warm water to dissolve and begin activating, so your bread will rise properly.
~ The tactile nature of bread dough is that it goes from sticky to silky, shaggy to supple
~ Visually appealing is your bread when it emerges from the hot oven, golden and brown, like it just spent the day on a glorious tropical beach {Maui??}
~ If you were able to achieve a nice crisp crust, you will hear that crust shatter when you tear or cut into your beautiful bread. Maybe it’s the kind of crust that sends pieces of toasty shards over the edge of the counter to the floor when it’s cut.
~ Last but not least is the taste . . . yeasty, whole wheat flavor {or maybe rye} made better with thin slices of good butter. Or perhaps you have chosen a smear of fresh goat cheese, or a dip in some fruity extra virgin olive oil showered with freshly ground salt, pepper & herbs. My dear readers, it doesn’t get any better than this!
For tips on baking yeast breads {proofing the yeast, shaping the loaves, etc.} click here.
This recipe produces a bread that is dense, chewy and slightly sweet, with a crisp crust when toasted. We had a turkey sandwich on it a couple days ago, and it was most excellent.
Whole Wheat Oatmeal Honey Bread
adapted from Honey Oatmeal Bread from Bread Winners {Mel London, 1979}
*1 cup/110 grams ground oats {uncooked rolled oats processed in a food processor until you have 1 cup}
1 cup raw sunflower seeds
*I wanted my bread to taste more of oats, so one of my adaptations was to add a cup of ground oats in place of 1 cup of whole wheat flour. Feel free to use all whole wheat flour, or other flour of your choice.
Glaze: Honey
Uncooked rolled oats
In a large bowl, stir together boiling water, honey, butter, salt and rolled oats. Let stand for 1 hour.
In a small bowl, dissolve the yeast in the lukewarm water. Add to the oat mixture. Stir in the flour, 1 cup at a time and beat well. I start with the ground oats, and then add whole wheat flour until the dough is not super sticky. Stir in the sunflower seeds before the dough gets too stiff. It will be a little sticky, but that will be remedied as you flour your counter to knead the bread.
Turn out the dough onto a lightly floured surface and knead until dough is smooth and elastic {about 10 minutes}. If necessary, add enough flour to keep dough from being too sticky. Wash the big bowl you just used, rub some olive oil around the bottom and sides and add your ball of dough. Turn the dough to coat all the sides. Cover the bowl with a towel or damp cloth. Place in a warm spot and allow to double in bulk-about 1 1/4 hours. I turn on my oven for a minute or 2 to get it slightly warm, and that is where I put my dough to rise.
Turn out onto floured counter, knead for 1-2 minutes, shape into 2 loaves and place into well-greased loaf pans {9” x 5”}. Cover and place in a warm spot until almost doubled in bulk {about 45 minutes}.
Bake at 350 degrees for 40 to 50 minutes. Tops should be well browned and the bottoms should sound hollow when rapped with your knuckles. I look for a temperature of 200 degrees when I insert the instant read thermometer in the bottom of the loaf.
For a delicious glaze, brush tops of bread with honey that has been slightly warmed, then sprinkle with oats. It looks pretty with the honey & oats on top, but I must say that the oats don’t stick very well. Maybe I don’t use enough honey!
As hard as it might be, you should cool the bread completely on a wire rack before slicing. We {or I should say my husband} often finds it difficult to do this! Enjoy the rewards of your efforts!
I was nominated for my first blog award! Ada, who writes a tasty food blog called More Food, Please, nominated me for the Shine On Award. I am truly honored by her nomination. There are so many excellent food blogs; just knowing that people visit and read my blog is quite a compliment, but an award nomination makes the time I spend writing even more worthwhile. If you have never visited Ada’s blog, I encourage you to do so. She posts wonderful stories & recipes, the most recent being some exquisite and delicious {I’m sure} Rose and Lavender Macarons.
The rules are:
1. Visit and thank the blogger who nominated you.
2. Acknowledge that blogger on your blog, and link back.
3. Share seven random, interesting things about yourself.
4. Nominate up to 15 bloggers for the ‘Shine On’ Award, provide a link to their blogs in your post, and notify them on their blogs.
Here are 7 random, hopefully interesting, things about me:
* I am a huge Dr. Who fan.
* I moved to Alaska when I was 6 weeks old, and to Hawaii {Oahu} 12 years later, where I met my future husband {of 35 years!}.
* The kitchen is my favorite room in the house; I love being there.
* Food and music are my favorite topics of discussion.
* Some of my favorite musicians are, in no particular order, Underworld, Radiohead, Yeasayer, Ghostland Observatory and !!! {pronounced chk chk chk}.
* My earliest recollection of being interested in food is when I was in the fourth grade. I loved getting the cooking badge in Girl Scouts!
* Like many foodies, I enjoy a good cookbook for bedtime reading.
I have recently discovered some food blogs that I would like to nominate for the Shine On Award. I am looking forward to reading their archives and upcoming posts. You may want to check out what they are writing about. They are:
“Serve the cold potatoes for lunch the next day with a green salad, seasoned with oil and vinegar and a lot of chopped garlic.” Jacques Pepin
I hope everyone had a wonderful day yesterday, full of great food, good company and holiday cheer. You may feel the need to lighten up your eating, if you have indulged in a few too many holiday treats. If not, then you should make these potatoes soon, maybe for New Year’s Eve, a birthday dinner or some other special occasion. Otherwise, put this recipe in your back pocket for a delicious side dish. Although these potatoes have long been a family favorite, it is not a family recipe. The recipe for Gratin Dauphinois {Scalloped Potatoes in Garlic and Cream} is from the first cookbook my husband bought for me. We spent several snowy Christmases on the beautiful north shore of Lake Tahoe, and it was on one of these occasions that I received The Great Cooks Cookbook: a Good Cooking School Cookbook {James Beard, Alexis Bespaloff, Philip Brown, John Clancy, Edward Giobbi, George Lang, Leon Lianides, Helen McCully, Maurice Moore-Betty, Jacques Pepin, Felipe Rojas-Lombardi; 1974} as a gift. Look at the young Jacques Pepin!
I have made a few recipes from this book, including Edward Giobbi’s delicious lasagna that took 2 days to make {homemade marinara sauce, homemade béchamel sauce, homemade spinach noodles rolled by hand, etc.}, but the potatoes are the favorite in our family. In fact, I could never make enough potatoes for all 8 of us, so my mother-in-law gave me a baking dish that is quite a big larger and deeper than the 9” x 13” that I had been using. The recipe is really quite simple, but the results are exquisitely tasty. There is a subtle taste of garlic infused cream that makes you want to follow one bite with another. And as mentioned above, they are delicious with extra virgin olive oil {just a dribble}, red wine vinegar and chopped garlic. Yum!
Gratin Dauphinois
{Scalloped Potatoes in Garlic and Cream}
2 lbs boiling potatoes {5-6 cups, sliced}-I usually use Yukon Golds
1 lg clove garlic
2 c milk {If I am buying milk for this dish, I’ll get whole milk, but if I already have 2%, I will use it. They are still delicious!}
1 1/2 c heavy cream
3/4 tsp kosher salt
1/2 t freshly ground white pepper {You could use black pepper, but you will see black specks in your potatoes. I can live with that, but I usually have a little bag of white peppercorns on hand. I simply empty my pepper grinder into a little bowl, put the white peppercorns in the pepper mill and grind away. Then put the black peppercorns back into the mill.}
1 tbsp butter
1/2 c grated Swiss cheese {about 2 ounces}-I always use Jarlsberg or Gruyere since we always have one of these in the refrigerator.
Peel the potatoes, wash and dry thoroughly. Slice the potatoes fairly thin-1/8” thick. I use my Cuisinart 3mm slicing blade. Do not soak the potatoes in water or they will lose the starch needed for the dish to be smooth.
Peel the garlic; crush it with the broad side of a knife and chop it very fine. It should have the consistency of a puree. In a large heavy saucepan, combine the potato slices with the garlic, milk, cream, salt and pepper. Bring to a boil over medium heat, stirring with a wooden spoon to prevent scorching {and the mixture can scorch very easily}. As the liquid gets hotter, the mixture will thicken slightly; remove from heat.
Preheat oven to 400 degrees. Butter a shallow glass baking dish {I use 9” x 13”} about 1 1/2” deep, and pour in the potato mixture. Sprinkle cheese all over the top; place dish on a cookie sheet to catch any spills and to allow more even transfer of heat. Bake for about 1 hour, until potatoes are golden brown and tender when pierced with the point of a knife. Let rest for 15”-20” before serving.
“Food is our common ground, a universal experience.” James Beard
A few months ago, I thought it would be fun to write a series of posts, during the holidays, with some suggestions for gifts/stocking stuffers for the foodies on your list {including yourself of course!}. Well, it comes as no surprise to me that the train has left the station and I am late {yet again} in bringing this idea to fruition. For example, I make fruitcake every year for my mom and aunt. The recipe states that the cakes should be made around Thanksgiving so that they will be boozy, ripe and ready to eat by Christmas. I was thinking about said fruitcakes around Thanksgiving, had all the ingredients out in plain sight, but the fruitcake ingredients have not yet turned into fruitcakes. After I go swimming this morning, the afternoon’s project will be fruitcake . . . . . after lunch, of course. As far as gift ideas for my readers, consider them gift ideas for any time of the year. I certainly don’t need a holiday to buy myself something special for my kitchen!
But first, a friend mentioned that my most recent post listed all the ingredients for Date Walnut Cinnamon Bread by weight, specifically in grams. Sorry about that! I just updated the post to include measurements by volume, so now you can run to your kitchen and bake this scrumptious {and easy} bread.
And now, on to the gifts. . .
1} Digital Scale– I have cooked without a scale for many more years than I have cooked with a scale, but now I cannot imagine not having one. A scale offers ease and accuracy in cooking, and baking in particular. It seems logical to think that if you measure 3 cups of flour, they will all be identical; no, they probably won’t be identical, and could be off by an amount significant to whatever you are preparing. Professional bakers measure ingredients by weight to be precise and accurate, and to ensure consistent results. In addition to being more accurate, measuring ingredients by weight is faster, and there aren’t lots of measuring cups to wash. Cooks Illustrated likes this one {www.cooksillustrated.com}: OXO Food Scale model # 1130800.
2} Penzeysgift certificate or collection or herbs/spices- I love Penzeys! They have an extensive catalog of herbs, spices and delicious blends. Penzeys offers friendly, quick service and their products are high quality. Some of my favorite Penzeys’ products are: Penzeys Extra Fancy Vietnamese Cassia Cinnamon {make this into cinnamon sugar to top your Date Walnut Cinnamon Bread}, Shallot Pepper, Sunny Paris Seasoning {yummy on popcorn!}, French Grey Salt and Dried Jalapenos {better than red pepper flakes on pizza and spaghetti!}.
3} Silicone Spatulas– Cooks Illustrated likes this one and this one. The beauty of cooking with a silicone spatula is that they withstand very high temperatures, so your food is not laced with melted plastic.
4} Salt– A selection of different salts is tasty and fun.
Kosher salt– Use kosher salt for cooking & baking. It is easy to find at most grocery stores. Many cooks have a little bowl of kosher salt by the stove because it is easy to pick up a “pinch of salt” with your fingers. It dissolves into food quickly so you can add it and taste for seasoning without waiting.
Fleur de Sel {salt}- After reading David Lebovitz’s blog post about his favorite fleur de sel {means “flower of salt” in French}, I got on line with Amazon straight away & bought some. It is delicious! Lest you think that if you’ve tasted one salt you’ve tasted them all, be assured that there is a distinct difference between salts. Fleur de sel is not a cooking salt, but a finishing salt that you might sprinkle on a salad, steak, vegetables, or perhaps mix with some unsalted butter for a delectable spread for some warm yeasty bread.
Maldon Salt– Maldon salt is another finishing salt, and is great on Mocha Truffle Cookies and Salted Chocolate Chip Cookies. I have also made herb butter with Maldon salt, which makes a delicious herby, buttery spread with a few crunchy flakes of salt here and there; fantastic on a great piece of bread!
6} Salt Grinder– My mom & dad gave us salt and pepper grinders for Christmas one year, many moons ago, and we wouldn’t think of using sprinkle salt and pepper. The taste of freshly ground salt and pepper is far superior to table salt and pepper that has been pre-ground so that it becomes a rather tasteless black dust after a while. Once you get used to freshly ground salt, or one of the other specialty salts, iodized table salt will taste harsh and medicinal, and you will wonder why you ever put it in your food. The salt grinder that we have used for quite a few years now is a Unicorn. It has no metal parts to corrode, which can be a hazard of salt grinders. It works well and is easy to fill.
7} Books
Vegetable Literacy {Deborah Madison}-This is my latest purchase from my favorite cookbook author. Her recipes are delicious, uncomplicated and well-written. In my opinion, if you love good food, you cannot go wrong with a book by Deborah Madison.
The Flavor Bible: The Essential Guide to Culinary Creativity, Based on the Wisdom of America’s Most Imaginative Chefs {Karen Page, Andrew Domenburg}- This excellent reference book gives cooks ideas on what flavors work well together. What acid works best with arugula? What are the best herbs to use to jazz up your polenta? What flavors work well with the chanterelle mushrooms you just bought {lucky you!!}? The Flavor Bible has these answers and more. The book is arranged by categories such as season, cuisine, ingredients, flavorings, tastes {i.e. sour, bitter, etc.}, oils, peppers, salts and more. There are no recipes in the book, but limitless ideas for making food the best it can be.
A Homemade Life {Molly Wizenberg}- I bought this book to take on a trip to visit my family on Oahu, when we were still living in Washington State. Once I started reading, I could not put this book down. I read Molly’s stories and recipes all the way across the Pacific Ocean. Molly is a wonderful writer; you can also check out her blog Orangette, which I love.
My Berlin Kitchen {Luisa Weiss} – I just bought this at Costco and am almost finished with it. Luisa is the author of The Wednesday Chef, another of my favorite food blogs. Her book is a lovely read, a very personal memoir with recipes.
A few tidbits about cranberries. . .
~ The cranberry is native to North America.
~ Cranberries bounce because of air pockets inside the fruit. They are also called bounceberries.
~ If you were to string all of the cranberries harvested in North America last year, it would reach from Boston to Los Angeles more than 565 times!
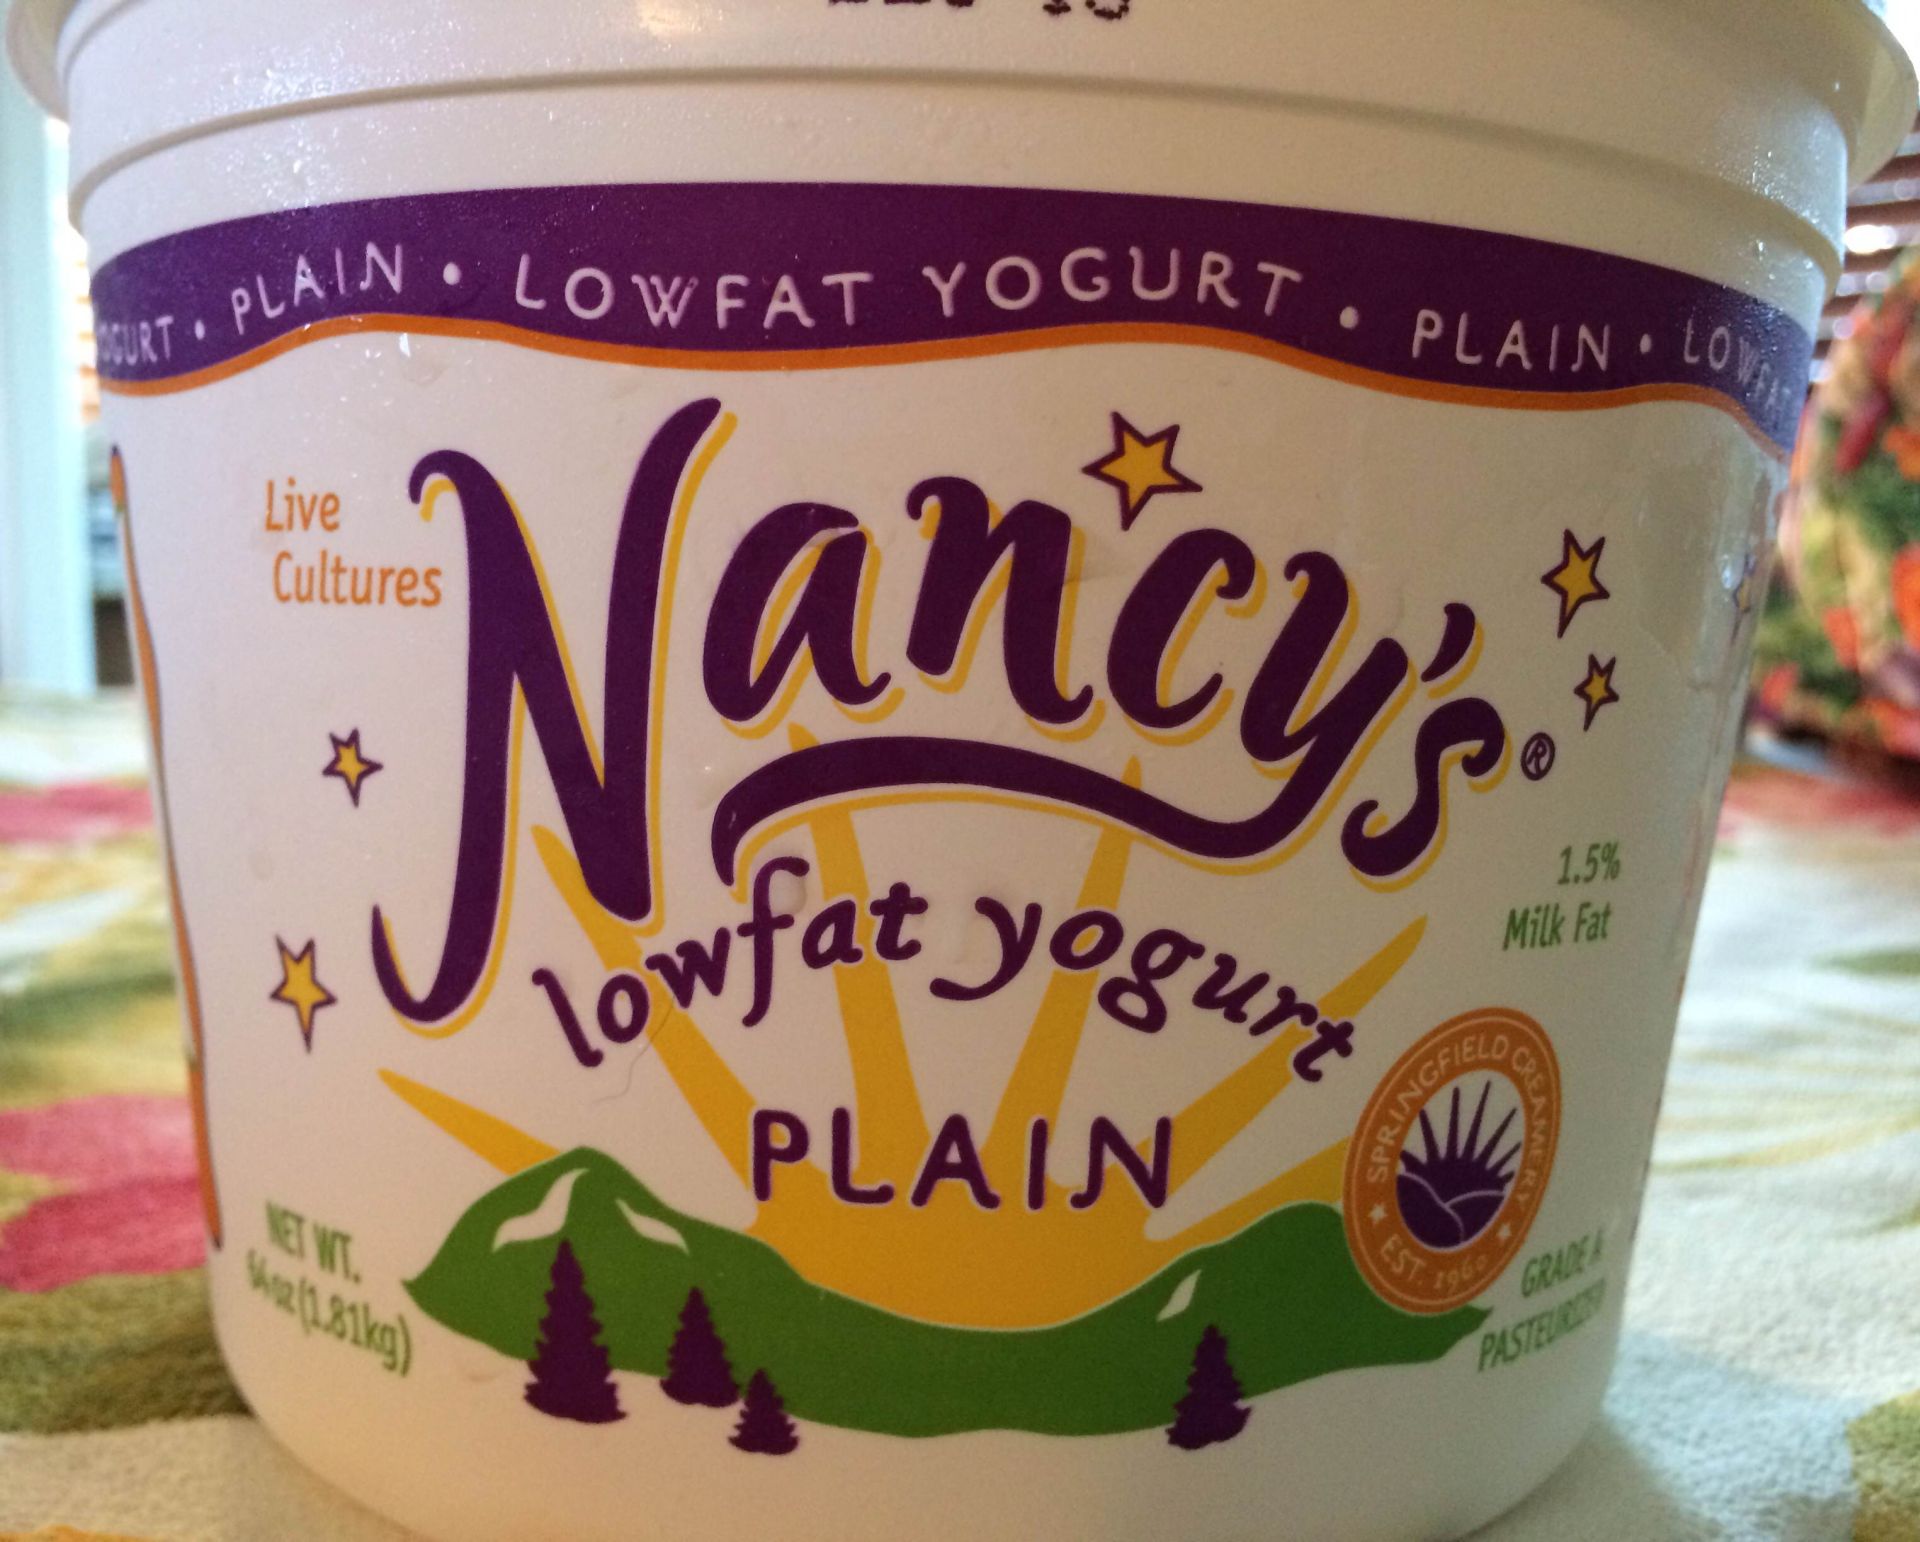
Some time ago, I posted a few ways that we like to eat plain yogurt. Cranberry season is here, which means we can swirl some raw cranberry orange relish into creamy plain yogurt for a delicious breakfast treat. Topped with walnuts & a sprinkling of raw cacao nibs, it makes a great breakfast with a piece of toast and some tea. As I mentioned in a previous post, our favorite yogurt is Nancy’s.
Nancy’s Plain Yogurt
When you open up a new yogurt, stir it well until all the lumps are out and it is super creamy. Add whatever you like to make a healthy and delicious breakfast.
Plain Yogurt with Cranberry Orange Relish & Broken Walnuts
You could stop with the cranberry orange relish {recipe here} and walnuts, or do as I did and sprinkle a few raw cacao nibs over the top. In one fell swoop, you can boost the taste & the nutrition of your creamy bowl of yogurt. What a deal!
Try some raw cacao nibs on your bowl of yogurt!
I enjoy having some toast with my yogurt. It adds somewhat of a “savory” bite to counter the yogurt’s sweetness, even though this yogurt isn’t super sweet, since it only contains a bare minimum of sugar. I wrote about this bread before, but it’s worth revisiting. It is simple to make & tasty to eat.
Date Walnut Cinnamon Bread with Star fruit
Better eat it quickly, because the butter is almost melted! I prefer my butter sitting on top in cold, thin slices. Mmmmmm! This bread is just about as good as cinnamon rolls, but a lot easier and quicker to make. With the cranberry orange relish, more fruit isn’t really required, but the star fruit makes a pretty addition to the plate. Aren’t they cute? Star fruit is a tropical fruit whose season runs from July-February in the U.S. It is a good source of Vitamin C, potassium and fiber. According to Food Chemistry, star fruit is a good source of antioxidants, particularly the kind found in green tea and red wine.
1 1/4 cups / 300 ml warm water (105-115F) 2 teaspoons active dry yeast (one packet)
1 tablespoon runny honey
1 cup/140 grams whole wheat flour
1 cup/100 grams oats
1 cup/125 grams unbleached white flour
3 tsp cinnamon
1 1/2 teaspoons fine grain sea salt
5 dates, snipped into small pieces
1 cup broken walnuts
2 tablespoons butter, melted, for brushing {you probably won’t need it all}
In a medium bowl, sprinkle the yeast onto the warm water and stir until the yeast dissolves. Stir in the honey and set aside for a few minutes, until the yeast blooms and swells a bit – 5 – 10 minutes.
In the meantime, mix the flours, oats, salt, cinnamon, dates and walnuts in a large bowl. Add the wet mixture to the dry and stir very well.
Brush a 9” x 5” loaf pan {8 cup} generously with some of the melted butter. Turn the dough into the tin, cover with a clean, slightly damp cloth, and set in a warm place for 30 minutes, to rise.
Preheat the oven to 350F / 180C, with a rack in the middle. When ready, bake the bread for 35-40 minutes, until golden and pulling away from the sides of the pan. I finish things up by leaving the bread under the broiler for just a heartbeat – to give the top a bit deeper color. Remove from oven, and turn the bread out of the pan quickly. Let it cool on a rack so it doesn’t steam in the pan. Serve warm with butter.
“If you’re busy, never cook for one meal; always cook for two or three. Put it in the freezer, but it doesn’t have to encore in the same form.” Lynne Rossetto Kasper
Kula Black Raspberries
Who knew? Not me. I had no idea that some nice farmer is growing black raspberries, on Maui, for our eating pleasure {in November!!!}. My husband purchased these beauties at the Upcountry Farmers Market. What a pleasant surprise!
Luscious Fresh Berries
Black Raspberries with Cream & Powdered Sugar
We love fresh berries with a dribble of heavy organic cream and a flurry of powdered
sugar. . .pure bliss.
Unlike other easier to eat berries, cranberries elicit strong opinions from those who either love them or loathe them. We happen to enjoy cranberries, and have a few favorite ways to use them. I should say that I am talking about fresh cranberries, not the dried ones. We do like dried cranberries, but they are not the same healthy powerhouse as the fresh variety.
Fresh Cranberries
Once the berries are dried, the sugar and calorie content skyrocket. Fresh berries are only available a few months of the year, so if you want them year round, you will need to buy them now and squirrel them away for another day. We like to rinse fresh cranberries in a colander, blot them dry and then put them on a parchment-lined sheet pan for a short stint in the freezer; this will prevent them from freezing into a solid block of cranberries, which will not be user friendly. If you do not have parchment paper, a flexible cutting board works well, but I do not recommend using waxed paper, as it tears easily from being wet and it will be harder to remove the frozen berries. Once the berries are frozen, pop them into a freezer bag and enjoy them whenever you like, in breads, cookies, hot cereal, smoothies or relish.
Ready for the freezer!
One of our favorite cranberry recipes is for fresh cranberry orange relish. We also like cooked cranberry relish, but this is what we make most often. We have significantly reduced the sugar for our tastes, but you can certainly adjust it for yours. I enjoy this relish the most on plain yogurt {yum!} with big pieces of walnuts. It is also good to have a spoonful on a green salad, or with any traditional cranberry-friendly foods.
Cranberry Orange Relish
Fresh Cranberry Orange Relish
adapted from Superfoods Rx.: Fourteen Foods that will Change Your Life {Steven Pratt, M.D. and Kathy Matthews}
12 ounces fresh or *frozen cranberries, rinsed and drained
1 unpeeled orange {preferably organic}, washed, cut into eighths and seeded
1/3 cup sugar {the original recipe calls for 3/4 cup}
Put the cranberries, orange slices and sugar into a food processor. Process until everything is evenly chopped. Chill until ready to eat. *If you use frozen cranberries, partially thaw them before processing, or you will end up with a big cranberry orange ice ball.
The relish gets better as it sits and the flavors mingle.
Makes about 3 cups
Kale Salad with Cranberry Vinaigrette
We enjoyed several kale salads last week, all of them with cranberry vinaigrette. The tart-sweet of the vinaigrette pairs perfectly with kale’s bitterness and the creaminess of fresh goat cheese. A few other ingredients make this salad a winner. Not to mention the fact that the dressing is a gorgeous hue of creamy cranberry pink. It looks kind of like raspberry gelato. I apologize for the lack of photo-we ate all the dressing.
Kale Salad with Cranberry Vinaigrette I made several versions of this salad recently, this being the most elaborate with the addition of canned tuna.You can put in whatever you like, but I think the most important additions are the goat cheese {for creaminess} & the toasted walnuts {pair excellently with the goat cheese and cranberries, and for a toasty CRUNCH}.
Kale, enough for 2 salads, washed, dried well & torn into bite-size pieces
Thinly sliced sweet onion {or red}
1 avocado
1 can tuna {we use Wild Planet}; optional Fuyu persimmon, washed and thinly sliced {I don’t peel them, but you can if you like.}
6 cherry tomatoes, halved
Toasted walnuts
Fresh goat cheese, crumbled
Cranberry Vinaigrette {recipe below}
Put the kale into 2 bowls and dribble with enough dressing to moisten. Top with onion, avocado, tuna {if using}, tomatoes, crumbled goat cheese and walnuts. Put a ring of persimmon slices around the edge of the bowl. Add a grind of salt & pepper then top with dressing.
2 servings
Cranberry Vinaigrette 2/3 cup fresh or frozen cranberries
2 tbsp sugar
1/2 cup white wine vinegar
1 teaspoon Dijon mustard
1/4 cup freshly squeezed orange juice (or tangerine juice)
3/4 cup extra virgin olive oil
1/4 teaspoon kosher salt
1/4 teaspoon black pepper
Combine cranberries, sugar, and vinegar in a small saucepan over medium heat. Cook about 5-10 minutes, or until the cranberries pop. Remove from the heat and let cool. Pour cooled cranberry mixture into a blender or food processor and process until smooth. Add the mustard and orange juice and blend. With the motor running, stream in the olive oil. Season dressing with salt and pepper.
Makes about 2 cups dressing
Did you know that. . .
Fresh cranberries:
* are low in calories {44/cup}
* are high in fiber
* are low in sugar
* aid in the prevention of urinary tract infections {UTIs} by preventing bacteria from sticking to the urinary tract lining
* are high in phenols which are plant chemicals known to be highly protective against many health problems {i.e. toxic to cancer tumor cells}
* helps to prevent bacterial adhesion to teeth and the stomach lining, preventing dental plaque and ulcers, respectively
Information from: The 150 Healthiest Foods on Earth {Jonny Bowden, Ph. D., C.N.S.}
It’s a fact. . .I am behind. I am behind in my blogging and I am behind in the online class I am taking {HarvardX: SPU27x Science & Cooking: From Haute Cuisine to Soft Matter Science}. In addition, I am under the weather. But it’s not being under the weather that has caused me to be behind; I have no good excuse for that, other than the fact that time gets away from me. It always has, and I suspect it will continue that way into the foreseeable future {my husband certainly thinks so}. I have not worn a watch since I stopped teaching in June of 2011, and I like it that way. I love days when I could care less about what time it is, which are the 5 days a week that I do not go to work. When I have something going on, I check the clock periodically, but other than that, I like just being present in the moment.
Since I am “lying low” around the house for a few days as I get well, I am going to try and do some catching up. Yesterday, I finished up the lectures on the concept of elasticity {measured by determining how a food resists compression-think overcooked tough steak compared with rare tender steak}, which was the topic 2 weeks ago. Today, I am hoping to start watching the lectures on diffusion and spherification, the topics from last week. Before next Tuesday, when the new lectures are posted, I need to view the lectures on this week’s topic of heat transfer. Of course, I also have labs and homework to get done! Where did the time go, and why did I let myself get behind? This class is quite interesting, but the science is not for the faint at heart. Many moons have passed since I’ve thought about physics and chemistry concepts and equations; yikes!
I have a number of favorite ingredients, one of which is Parmesan cheese. Like I mentioned in a previous post, I only consider fresh Parmesan that you grate yourself {Parmigiano Reggiano, Pecorino Romano, etc.}. The stuff in the cylindrical green can just doesn’t cut it for me.
It doesn’t take long to grate up some fresh Parmesan and then pop it into a container to use on all kinds of foods. You can use a hand grater, box grater or food processor. It’s great on all kinds of salads, pasta, pizza, etc.
Recently, we have gotten into Caesar salads, which of course include Parmesan cheese. I have several Caesar dressings that I like, none of which come from a bottle. One dressing, the one I’m going to share with you today, is from Alice Waters’ book The Art of Simple Food: Notes, Lessons and Recipes from a Delicious Revolution. The other recipe, which I haven’t made for quite awhile, I will share once I have made it again. Of course, we enjoy Caesar salads with romaine, which is traditional, but Caesar dressing is also great on kale. Without further adieu, because I have a lecture to watch on diffusion and spherification, here is one of my favorite recipes for Kale Caesar Salad.
Kale Caesar Salad
1 bunch kale, stemmed, well washed and dried
Caesar dressing
Croutons for garnish
Caesar Dressing {from The Art of Simple Food: Notes, Lessons and Recipes from a Delicious Revolution}
Mix together:
1 tbsp. red wine vinegar
1 tbsp. fresh lemon juice
2 garlic cloves, pounded to a puree
2 tsp chopped salt-packed anchovies {about 2-3 filets}
Salt
Freshly ground black pepper
Whisk in:
1/4 cup extra virgin olive oil
Right before serving, grate:
1/2 Parmesan cheese {about 1 ounce}
Whisk into the dressing:
1 egg yolk
Add a small handful of the grated cheese and whisk until thick. Taste for salt and acid with a piece of kale. Adjust the seasoning as needed. Put the kale in a large bowl, pour three quarters of the dressing over the salad and toss. Taste and add more if needed. Add most of the rest of the grated cheese and toss lightly. Arrange the salad on plates. Garnish with the last of the cheese, croutons and a grind of pepper. Serve with a wedge of fresh lemon.
Croutons {homemade croutons are immeasurably better than store bought}
Toss about 20 small bread cubes {about 1/2 inch square} with 1 1/2 tbsp. extra virgin olive oil and a little salt. Spread on a baking sheet and toast in a 350 degree oven for 10-12 minutes, or until golden brown, stirring occasionally for even browning.
Notes:
* I use anchovies packed in a jar, which I think would be less salty than the salt-packed ones. I have never tried salt-packed anchovies. I sometimes rinse sardines and then blot them dry to reduce their saltiness.
* If you prefer not to use raw egg in your dressing, you could use a pasteurized egg. I’ve used pasteurized eggs before with success.
* Always use freshly squeezed lemon juice. Avoid the bottled stuff, which is light years away from tasting like fresh.
* For croutons, I always use whatever whole grain bread I have on hand. May as well make the croutons as healthy as a crouton can be!
“Fermented foods help people stay healthy,” Sandor Katz author of New York Times best-selling book “The Art of Fermentation.”
Before we get to the heart of the matter of cultured foods, here is a photo of yesterday’s sky. I was at the pool and the sky was so beautiful I had to take a picture. The picture doesn’t do it justice, but you get the idea.
My husband and I do a good job of learning about what constitutes a healthy lifestyle in terms of eating and exercise, and then we implement what we have learned to the best of our abilities. Our latest foray into healthy eating is fermented {cultured} foods. Please understand that in no way do I consider myself an expert on cultured foods; I am far from an expert, and know just enough to be dangerous. We have been eating cultured foods for years, because we enjoy them, but have intentionally added more into our diet because of the health benefits. Here are some of our favorite cultured foods, all of which we buy at Mana Foods, for those of you on Maui: ~ Yogurt– Nancy’s Yogurt {contains 11 different culture strains} has been a staple for more than a decade. ~ Sauerkraut and Fermented Pickles- We have recently started purchasing sauerkraut that is raw and unpasteurized, so that the beneficial microbes are available to us. One of our favorite brands is Sonoma Brinery. Farmhouse Culture makes fantastic sauerkraut as well. I LOVE their Smoked Jalapeno Kraut; I don’t find it at all smoky, but perfectly spicy! My husband prefers the Ginger Beet flavor, which I also like, but not as much as the Smoked Jalapeno. Both of these companies offer excellent products that are reasonably priced. If you want sauerkraut, these are a must try! ~ Kombucha– We drink a little kombucha most days. Our kombucha comes from Maui Kombucha. ~ GoodBelly Probiotic Drink– This is a delicious nondairy nectar-like drink. My favorite flavor is Mango. If you sign up for their Goodbelly Challenge, they will email you some coupons! ~ Sour Cream- We often spoon a bit of cultured sour cream on our quesadillas. Sour cream is always a yummy addition to a spicy dish. ~ Tempeh– Tempeh is a fermented soy product from Indonesia. Our current favorite way to eat tempeh is seasoned with freshly ground salt and pepper and sautéed in a bit of coconut oil until golden brown. Eat with ketchup and you have something that resembles French fries. A heavy drizzle of Sriracha Sauce is a great addition, if you like a little mouth burn, like I do. We also make a delicious sandwich that we call a “TLT” meaning Tomato, Lettuce and Tempeh. It is fantastic on toasted ciabatta bread. Our tempeh is in the freezer until we are ready to eat it, and then it thaws very quickly. ~ Miso- I like kale salad with Outstanding Miso Sesame Dressing. There is also miso soup, which is delicious!
Here are a few of the cultured foods we’ve enjoyed in the last few days:
This slideshow requires JavaScript.
Tempeh Sautéed in Organic Coconut Oil
Slice tempeh into approximately 1/2 inch slices. Spray skillet {we use cast iron} with pan spray, then melt about 1 tbsp. of coconut oil. When the oil is hot, add the tempeh slices. Season with freshly ground salt and pepper to taste. Sauté, turning occasionally, until golden brown. Serve hot with ketchup and Sriracha Sauce, or whatever you like.
This slideshow requires JavaScript.
Yogurt with Pineapple, Peach and Cranberry Preserves
Put some yogurt in a bowl, and top with homemade preserves, and your choice of any or all of the following toppings: unsweetened coconut, maple syrup {the real stuff please, preferably Grade B}, good quality honey, cinnamon, cacao nibs, nuts, hemp seeds, ground flax seeds, Buckwheat Chia Crunch or anything else you’d like.
Pineapple, Peach and Cranberry Preserves
**This is really more of a guideline than a specific recipe. You can adjust everything to your taste, including changing the fruits to what you have available.
1 Maui Gold pineapple
1 quart chunked fresh or frozen peaches
2 cups fresh or frozen cranberries
1 cinnamon stick
approximately 1 tbsp. good quality honey
Juice of 1/2 a juicy lemon
Grind of salt
Get a Maui Gold pineapple if you can {we buy ours at Costco, maybe Mainland Costco sells them also-I think they do}, otherwise a “regular” fresh pineapple will do. Cut up the pineapple into chunks {see previous pineapple blog post}. Put all of the pineapple chunks into a wide-mouthed saucepan {for better evaporation of the liquid}. Add 1 quart of peach chunks {we used the peaches we froze in August} and 2 cups fresh or frozen cranberries. You can certainly use a different berry if you are not a cranberry fan, but you can’t really identify them as cranberries as far as taste goes . Squeeze half a lemon and add the juice, and then throw in a cinnamon stick and a grind of salt. Spoon in some good quality honey to taste. We used about 1 tbsp. Bring to a boil, and then turn down the heat and simmer on low until thickened. The timing will depend on how juicy your fruit is. The preserves will thicken as they cool.
These preserves are meant to be made and eaten within a week or so; they are not preserved, so will not keep.
These preserves also taste great with one of our new favorite breads, from 101 Cookbooks. I have made several of her bread recipes, and we have loved them all.
Photo from 101 Cookbooks
Easy Little Bread from 101 Cookbooks 1 1/4 cups / 300 ml warm water (105-115F)
2 teaspoons active dry yeast (one packet)
1 tablespoon runny honey
1 cup / 4.5 oz / 125 g unbleached all-purpose flour
1 cup / 5 oz / 140 g whole wheat flour
1 cup / 3.5 oz / 100 g rolled oats (not instant oats)
1 1/2 teaspoons fine grain sea salt
2 tablespoons butter, melted, for brushing
In a medium bowl, sprinkle the yeast onto the warm water and stir until the yeast dissolves. Stir in the honey and set aside for a few minutes, until the yeast blooms and swells a bit – 5 – 10 minutes.
In the meantime, mix the flours, oats, and salt in a large bowl. Add the wet mixture to the dry and stir very well.
Brush an 8-cup loaf pan {9″x5″} generously with some of the melted butter. Turn the dough into the tin, cover with a clean, slightly damp cloth, and set in a warm place for 30 minutes, to rise.
Preheat the oven to 350F / 180C, with a rack in the middle. When ready, bake the bread for 35-40 minutes, until golden and pulling away from the sides of the pan. I finish things up by leaving the bread under the broiler for just a heartbeat – to give the top a bit deeper color. Remove from oven, and turn the bread out of the pan quickly. Let it cool on a rack so it doesn’t steam in the pan. Serve warm, slathered with butter.
“There are only ten minutes in the life of a pear when it is perfect to eat.” – Ralph Waldo Emerson
Ralph Waldo Emerson’s thoughts on enjoying the perfect pear may be true for raw pears, although I think his window is a little narrow. My new favorite way to enjoy pears is roasting them, which I will tell you about in a moment.
I try to walk most days, and enjoy listening to podcasts on my iPhone while I walk. I subscribe to a number of podcasts, several which have to do with my favorite subject-food. Here are some I highly recommend:
These podcasts are all hosted by Lynne Rossetto Kasper, who is an American food writer and radio journalist out of Minnesota.
The Splendid Table– hour long program which is “public radio’s culinary, culture and lifestyle program which celebrates food and its ability to touch the lives and feed the souls of everyone.” Key 3– a series of discussions with great cooks about the 3 techniques or recipes that they think everyone should know How to Eat Supper/How to Eat Weekends– short shows {around 10 minutes or less} based upon the 2 books
After I baked a couple batches of Mocha Truffle Cookies Saturday, I turned off the oven and popped in some fruit. “What’s that?,” you say. Putting the fruit in after the oven is turned off? Yes indeed! I popped some pears into the oven for about 50 minutes, and what emerged was tender, juicy fruit ready to eat in a variety of ways. Look at the gorgeous browning that occurred in that short period of time.
The first time I tried this, I roasted Bosc pears and Granny Smith apples, thinly sliced. My husband thought they needed a little something extra, so he drizzled just a bit of local honey over the fruit, and a touch of freshly ground salt. As most of us know, a little salt complements the sweetness of fruit. I sprinkled the fruit with sliced almonds after it came out of the oven, and we enjoyed it with some dark chocolate. Delicious! I have also just put the fruit in with no extras, and that’s good too. Plain yogurt is excellent topped with roasted fruit, nuts, cinnamon and a sprinkle of cacao nibs.
I got the idea for roasting with the oven off from the podcast How to Eat Weekends {episode from 6 October 2011}. If you listen to the podcast, you will hear about many other foods that you can roast, but I haven’t tried anything other than apples and pears {yet!}. The beauty of this method is that it is energy efficient, it is tasty and you can use fruits or vegetables that may not have stellar flavor if eaten raw {think tomatoes, apple or pears that may be a little mushy, etc.}. I hope you will listen to this podcast and then try roasting some of your own fruits and vegetables. It is quick, easy and delicious!
Roasted Pears
Line a sheet pan with parchment paper and fill with thinly {about 1/4 inch} sliced pears. Slide into the oven after you’ve turned off the heat and let the fruit “roast” for about 50 minutes. You can drizzle the fruit with honey and sprinkle with a little salt and nuts if you like. I didn’t put the nuts on before roasting, but think I will start doing this. Enjoy plain {warm or cold}, with dark chocolate or over ice cream.
Just for fun-perhaps you will find your city in this list of culinary winners from Saveur Magazine.
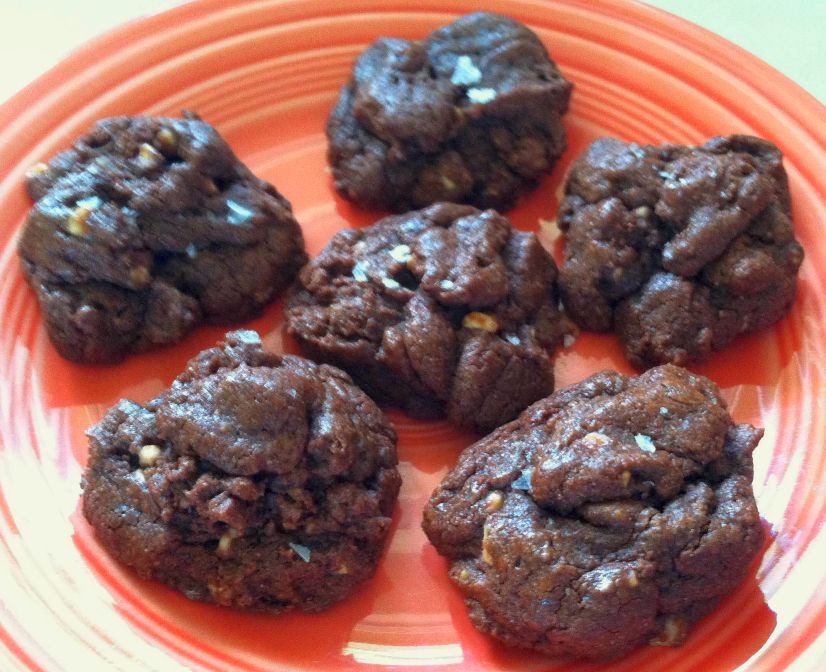
“These are decadent!” a comment from one of my coworkers
It’s been a long day, so this will be a quick post. I took these cookies to work today, & they were a hit. These cookies are great if you…
… are craving cookies.
… are craving chocolate or mocha.
… need a quick dessert to take to a potluck.
… want to surprise your friend with cookies.
… you had a light dinner and feel like a little dessert.
… you get the idea!
Mocha Truffle Cookies
1/2 cup unsalted butter 1/2 cup chocolate chips {I use Ghirardelli 60% Bittersweet} 3 tsp instant coffee {I use 2 packets Starbucks Via} 2/3 cup granulated white sugar 2/3 cup packed light brown sugar 2 eggs, lightly beaten 2 tsp vanilla extract 2 cups whole wheat pastry flour 4 tbsp plus 4 tsp unsweetened cocoa powder 1/2 tsp baking powder 1/4 tsp kosher salt 2/3 cup Heath Bits ‘o Brickle Toffee Bits Maldon salt {optional, but a delicious addition}
In a large microwave safe bowl, melt butter & chocolate chips; stir until smooth, and then stir in coffee and stir until dissolved; let cool for 5 minutes. Add sugars, eggs and vanilla. Combine the flour, cocoa, baking powder and salt; add to chocolate mixture and mix well. Stir in toffee bits.
Drop by rounded tablespoonfuls about 2 inches apart {I prefer to weigh my cookie balls, making them 1 1/4 ounces each.} onto a baking sheet sprayed with nonstick spray, or lined with parchment or Silpat. Sprinkle a pinch {2-3 flakes per cookie} of Maldon salt flakes on top of cookies.
Bake cookies at 350 degrees for 8-10 minutes, or until edges are set. Cool for 1 minute on the cookie sheet, and then remove to a wire rack to cool completely. Makes about 24.
Notes: ~ To melt butter and chocolate chips, I microwave on 50% power for 1 minute, stir and then do another minute at 50% power. Microwaves vary, so your timing may be different. ~ Add chopped nuts if you like. ~ You can adjust the coffee up or down to your taste. ~ Don’t overbake! I take the cookies out of the oven when the edges are set {slightly firm}. The middle will be soft {that’s where the “truffle” part comes in}. ~ You can freeze the cookies. They are particularly delicious if you take them out of the freezer and wait for a couple of minutes before eating. Their texture is dense, fudgy and GOOD!
“One of the very nicest things about life is the way we must regularly stop whatever it is we are doing and devote our attention to eating.” Luciano Pavarotti
“One of the very nicest things about life is the way we must regularly stop whatever it is we are doing and devote our attention to eating.” Luciano Pavarotti
“One of the very nicest things about life is the way we must regularly stop whatever it is we are doing and devote our attention to eating.” Luciano Pavarotti
“One of the very nicest things about life is the way we must regularly stop whatever it is we are doing and devote our attention to eating.” Luciano Pavarotti
“One of the very nicest things about life is the way we must regularly stop whatever it is we are doing and devote our attention to eating.” Luciano Pavarotti
“One of the very nicest things about life is the way we must regularly stop whatever it is we are doing and devote our attention to eating.” Luciano Pavarotti
“One of the very nicest things about life is the way we must regularly stop whatever it is we are doing and devote our attention to eating.” Luciano Pavarotti
“One of the very nicest things about life is the way we must regularly stop whatever it is we are doing and devote our attention to eating.” Luciano Pavarotti
“One of the very nicest things about life is the way we must regularly stop whatever it is we are doing and devote our attention to eating.” Luciano Pavarotti
“One of the very nicest things about life is the way we must regularly stop whatever it is we are doing and devote our attention to eating.” Luciano Pavarotti