Maui Girl Cooks

“One of the very nicest things about life is the way we must regularly stop whatever it is we are doing and devote our attention to eating.” Luciano Pavarotti


5 Comments

Restaurants of Maui-Nuka

Welcome to . . .

Nuka Sign  
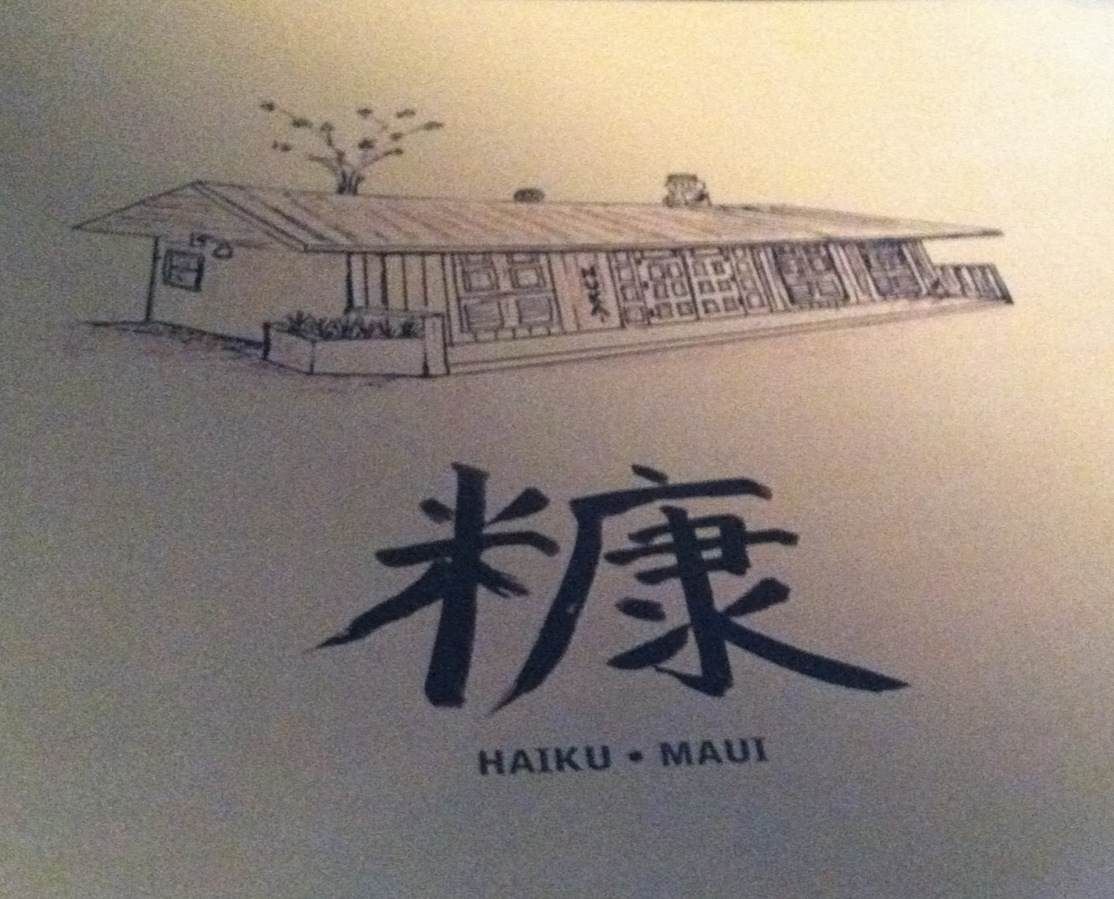
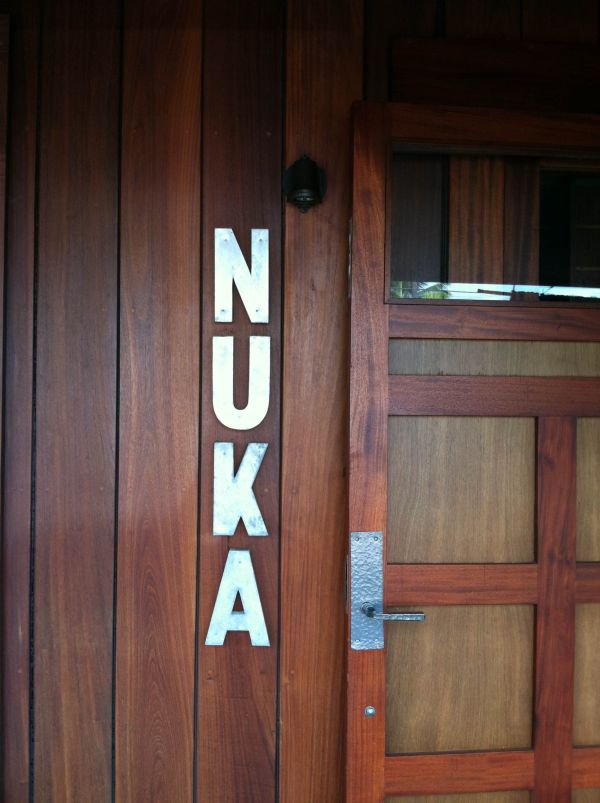
When we go out to eat, it is usually to enjoy a meal that we would not prepare at home.  We love the food we make at home, so don’t go out very often.  There are a few restaurants on Maui where we look forward to dining, and we visited one of them tonight.  It is relatively new, opening on March 22, 2013, and is located in Haiku.  This gem of a restaurant is called Nuka, and we love it.  We have eaten at Nuka about 8 times now, and have not been disappointed once.   

The owners did a beautiful job of designing a space that is visually beautiful and comfortable for our dining pleasure.  From the Venetian plaster walls to the artwork to the stunning bathrooms, Nuka just feels good.  The servers are attentive and helpful if you are looking for a recommendation, or need help making up your mind.  And let’s not forget the food, which is amazing.  The food is delicious and exquisitely presented.       

Nuka Menu

Before I tell you what we ate, I should say something about the way we like to order our food.  When we go out for a nice meal, we never order everything at once.  When all the food comes out at more or less the same time, your dining experience can be quicker than it should be.  We like to order one thing, and while we enjoy our first dish, we ponder over the menu and decide what to order next.  Doing this allows us to have a leisurely dinner, rather than a quick one.  Now, on to the food!

Baked Mussels  We started with one of our favorite dishes, Baked Mussels in Dynamite Sauce.  I have no idea what is in Dynamite Sauce, but the name is certainly apropos; it is a dynamite sauce.  The mussels were cooked perfectly, leaving them hot, tender and moist.  It is a rich dish, but not overly rich; I could have easily eaten the entire order myself.  There were four mussels, but I forgot to snap a picture until we had each eaten one. 

Nasu Miso Eggplant  Next we had the Nasu Miso Eggplant, which is half a small eggplant topped with sweet miso and broiled.  Even if you don’t care for eggplant, you may enjoy this dish.  It does not have any of the bitterness that can be present in eggplant.  It is slightly sweet from the miso, with a little crunch from sesame seeds sprinkled on top.  Yum!

Nuka Bowl with Wild Salmon  Our next dish was another favorite of ours called Nuka Bowl with Shio Koji Salmon.  At the bottom of the bowl is the most exquisite tasting rice, freshly milled in house.  It is a mouthwatering dish.  The rice is artfully topped with bean sprouts, thin cucumber slices, purple cabbage, shredded carrot, basil, fresh mint, crushed peanuts and sprinkled with a delicate sesame lime dressing.  The Nuka Bowl is a work of art and scrumptious.  Our salmon was meltingly tender.

Ahi Tataki  The Ahi Tataki was not only stunning to look at, but delicious as well.  The ahi was seared and sliced and then dressed with sesame oil and ponzu. 

Asian French Fries  Nope, we aren’t done yet!  We have never had French fries in a Japanese restaurant, and this is the first time we tried them at Nuka.  Very tasty indeed.  These are Asian French Fries with furikake and wasabi aioli.  Like all the best fries these fries were light, crispy and tasty with a dip in the aioli. 

And. . . last, but not least. . .   DESSERT!

Double Scoop  When you go to Nuka, you must save room for the house made ice cream.  You get two scoops of the same flavor, or two different flavors-green tea and black sesame are the choices.  The ice cream is served with fresh mint and two chocolate “cigars.” 

Whether you live on Maui or are a visitor, I hope you will stop by Nuka.  It is a fabulous dining experience that you will appreciate, if you enjoy great food, excellent service and a beautiful setting.  The prices are reasonable too!  If you don’t want to wait, you should get there early; they open at 4:30 and can be full by 6:00, with a line out the door.  Don’t say I didn’t warn you!

View from the car Haiku to Paia  This is the view from the car going from Haiku to Paia.  Gorgeous!


3 Comments

“Reach as high as you can, and then reach a little higher.  There you will find magic and possibility.  And maybe even cookies.”  Marc Johns

If you have ever landed at an airport in Hawaii, one of the first things you probably noticed while walking through the naturally air conditioned part of the airport, is the balmy air and the sweet scent of tropical blossoms.  I love that!

large jasmine treeI am fairly certain that this tree is responsible for the sweet scents of jasmine flowers wafting into our house.  Sometimes the fragrance floats in on gentle trade winds, and other times on blustery winds that are commonly felt {and heard} in Pukalani.  A little jasmine aromatherapy while you are washing dishes or on a walk is a pleasant reminder that you live in paradise!

Jasmine

Sauteed Green BeansI made these green beans last night. . .they are. . .in a word. . .amazing.  There is a high probability that I will never, ever steam green beans again.  Unless the planets line up just so, I will probably never, ever blanch and then sauté green beans again.  I sautéed my beans in a smidgen of Organic Valley Pasture Butter {1 tbsp to be precise}, in my trusty cast iron skillet, over medium high heat.  I stirred them around until they started to sizzle and develop a tasty char, and then covered them for about 5 minutes, until they were perfectly cooked.  Into the pan went a minced clove of garlic and some crunchy fleur de sel.  The result was a mélange of delicious flavors from the butter, the perfectly cooked beans, crispy garlic bits and crunchy salt.  These beans were polished off quickly, and will be made again and again.

Last week, I made these delicious cookies to take to work.  I had a whole plateful of them. . .apricot bars topped with sliced almonds and sprinkled ever so lightly with gold pearl dust powder. . .on a coral plate. . .they looked gorgeous.  And guess who forgot to photograph them for her blog?  Didn’t even occur to me until I was washing my empty plate.  So 3 days later, I made them again, and took them to work {the people who were there both days were happy!}.   I decided to carry them in the 8″x8″ dish I made them in, for easier transport; not as pretty as a coral plate for sure.  So I took a few out and put them on a coral plate to photograph.  This picture does not do them justice, and for that I apologize, but I assure you they are quite spectacular to eat.  Next time I make them, I will repost this recipe with a beautiful picture of these cookies in all their splendor.  Hmmm, when should I make them again?

apricot bars

Apricot Bars

About 18 graham crackers
1/2 cup milk
1/3 cup water
1/2 cup brown sugar
6 tbsp butter
1 cup graham cracker crumbs from about 8 full sheets
3/4 cup sliced almonds
1 cup unsweetened coconut flakes {shreds will work, but I like flakes better}
3/4 cup chopped apricots

Line the bottom of 8 or 9 inch square baking pan with graham crackers. You can put 3 full sheets in one direction, and then fill the remaining space with however many crackers will fit.

Combine milk, water and brown sugar in a small saucepan. Cook over low heat, stirring until mixture comes to a full boil; remove from heat, stir in butter.  When the butter is almost melted, stir in graham cracker crumbs, sliced almonds, unsweetened flaked coconut and apricots {read a short bit about the difference between California dried apricots and Turkish dried apricots-we prefer California apricots}.  Spread hot mixture over graham crackers. Top with 9 more graham crackers. Press down until even and firm.  Top with icing, then sprinkle with sliced almonds.  I happen to have pearl dust, so sometimes I like to sprinkle a little golden shimmer over the top-very pretty.

Icing:
1 cup powdered sugar
2 tbsp soft butter
½ tsp almond extract {don’t be temped to use vanilla; the almond extract makes these cookies}
About 1 tbsp milk

Beat together adding milk as needed. Sprinkle with sliced nuts if desired. Chill until firm.  These cookies improve with age, so don’t gobble them up too early.  Cut into small squares.

Reading: 
Vegetable Literacy {Deborah Madison}
Eating on the Wild Side {Jo Robinson}
Yes, Chef! {Marcus Samuelsson}

Musically Speaking-On the Playlist:
Alt-J

Matthew Dear
Underworld
Jaguar Ma


1 Comment

“Lettuce is like conversation; it must be fresh and crisp, so sparkling that you scarcely notice the bitter in it.”  Charles Dudley Warner

Red Leaf  LettuceRed Loose-leaf Lettuce

Did you know. . .

. . . . . .that all lettuces are not created equally?  More on that in a second.

We are quickly approaching Saturday, and that means getting creative to eat all the fruits and vegetables from last week’s farmers market.  We have half of this glorious head of red leaf lettuce left.  It is happy lettuce.  Why is my lettuce happy?  We’ll get to that in a moment.  But first, a little background.  I am reading an interesting book called Eating on the Wild Side by Jo Robinson.  You may think that it sounds like a book that Euell Gibbons might have penned; Gibbons was an authority on noshing on wild foods, but Robinson puts a different spin on eating “wild.”  Robinson discusses how many nutrients have been bred out of the foods we eat to make them more palatable {i.e. sweeter, less bitter}.  She also talks about which varieties are the most nutritious and how to prep, store and eat them.  It isn’t the kind of book that requires you to sit down and read it cover to cover, although you could do that.  To me, this is a great reference book that should be on the bookshelf of everyone who wants to eat food that is as healthy as possible.  And now, back to those happy leaves of lettuce.  According to Robinson, there are 2 rules of thumb for selecting lettuce with the highest phytonutrient content.  The first is color.  You may think that the deep, dark green romaine that you have been eating is the best, but indeed it is not.  Lettuces that are red, purple or reddish-brown are the richest in phytonutrients.  The second factor is even more surprising.  Would you have ever guessed that lettuces whose leaves are loosely arranged on the head would be more nutritious than those that are tightly compacted?  Not me for sure.  Well, it turns out that the leaves that are exposed to the sun’s damaging UV rays produce antioxidants, which are a kind of “sunscreen” for the plant.  Because a loose-leaf head of lettuce has many leaves exposed to the sun, more of the leaves produce the phytonutrients that are so good for us, and we benefit when we eat them.

Now that you know what to look for in a head of lettuce, I’ll tell you why my lettuce is happy.  It has been properly prepared so that it will retain and even increase its nutritional value.  Robinson states that when you get your lettuce home, you should pull the leaves off and soak them for 10 minutes in very cold water.  The leaves’ temperature will drop, which slows down the aging process.  Soaking them will help to maintain crispness.  After soaking, spin or towel dry them thoroughly {I could not live without my salad spinner}; moisture on the outside of the leaves invites decay-you want the water inside the leaves.

Red Leaf Lettuce Cleaned and Bagged

Label the pin-pricked bag and you can reuse it for the next head of lettuce.

Tear up the leaves before bagging them.  What’s that you say?  Tear up the leaves now, not when I make a salad?  Apparently, another way a plant defends itself {against gnawing animals, for instance} is by producing phytonutrients to “fend off the intruder.”  The antioxidant value of the lettuce is doubled by tearing up the leaves prior to storage {the tearing being like the animal gnawing the leaves}.  Place the greens in a Ziploc bag and prick it 10 {quart size bag}-20 {gallon size bag} times with a needle or pin.  The reason for the pinpricks is for the exchange of oxygen and carbon dioxide; the lettuce does not stop respiring {breathing} on harvest.  If you seal it up in a bag, then it uses up all of the oxygen and the carbon dioxide level rises, and it will die from lack of oxygen.  If you leave the lettuce in the open, then it respires too quickly, and uses up its stored sugar and antioxidants, making them unavailable for you. Prepare your lettuce correctly and eat within a few days for best quality.   And enjoy that salad knowing that you have done everything you can to make it more nourishing!

Champagne vinaigrette. . .it sounds so elegant.   As a kid, I loved Girard’s Champagne Dressing; not so much now, because I don’t buy prepared salad dressings.  They are full of ingredients that aren’t necessary for good dressing and they are expensive.  Homemade salad dressings are so much better than prepared dressings, and I always have the ingredients to make some kind of dressing, even if it is just extra virgin olive oil and vinegar {or other acid}.

Salad with Grapefruit and Blue Cheese

We had this salad for dinner tonight.  The salad was composed of the red leaf lettuce, grapefruit sections {supremes to be exact}, red onion, toasted walnuts and blue cheese.  I didn’t actually whisk together a vinaigrette, but simply showered the salad with freshly ground salt and pepper, then drizzled it with Champagne vinegar and extra virgin olive oil.  Yum!  It was not only beautiful but delicious as well.


2 Comments

“The secret of good cooking is, first, having a love of it… If you’re convinced that cooking is drudgery, you’re never going to be good at it, and you might as well warm up something frozen.”  James Beard

Hummus

If you think you don’t like hummus, perhaps you have only had store bought varieties, too stiff and poorly seasoned.  I must admit, I haven’t tasted much packaged hummus; there probably are some good ones, however, I  prefer to make my own hummus from freshly cooked garbanzo beans.  Of course, you can use canned beans, but I have found them to be a little more al dente than I like.  They are best when they are nice and soft, ready for a whirl in the food processor with garlic, olive oil, lemon, tahini and seasonings. The beans take awhile to cook, but it isn’t hands-on time, so you can be doing whatever you like while they simmer away on the stove. For me, cooking a pot of beans is kind of therapeutic, like making risotto, kneading bread or watering plants.  Homemade hummus isn’t difficult to prepare and the results are worth any effort required. People are favorably impressed if you show up at a potluck with a gorgeous platter of hummus with tasty garnishes {especially if you make homemade pita bread!}.  As promised in my last post, here is my hummus recipe.

Hummus 

1 ½ c cooked garbanzo beans {I always cook my own, because they are much better, but you can use canned.}
3 cloves garlic, minced
Scant ¼ c tahini
2 tbsp extra virgin olive oil {I use quite a bit more, for a smooth & silky texture.}
Juice of 1 lemon
1 tsp kosher salt

 Puree all ingredients in the blender or food processor until really smooth.  I like to spread it out on a platter and drizzle extra virgin olive oil over it.  Sprinkle with chopped tomatoes, kalamata olives and cilantro {any or all are good}.  Eat with pita bread, or whole wheat flour tortillas that you brush with olive oil, cut into eights and then bake at 350 until semi-crisp.  Also good with fresh fennel Fennel Bulb or sliced cucumbers.


Freshly Cooked Garbanzo Beans

1 cup garbanzo beans, cleaned & soaked {you don’t have to soak them, but they will take longer to cook}
Aromatics: 1 onion, quartered, 2 parsley sprigs, 4 garlic cloves
1 tbsp extra virgin olive oil
6” piece of kombu, or a few pinches asafetida, optional {I love to eat the cooked kombu}
1 ½ tsp salt

Cover garbanzo beans with 2 quarts fresh water & add remaining ingredients.  Simmer until completely tender, but not mushy.  I start checking at around 45”.  Let the beans cool in the broth.

Wilted Dandelion & Arugula with Walnuts & Beets

We enjoyed the plate of hummus with homemade pita bread and this salad of Wilted Dandelion Greens & Arugula with Walnuts & Beets.  Dandelion greens and arugula are supposed to very good for you, so we are eating them regularly.  They are kind of bitter, which is what makes them good for you.  When you eat them with something sweet like beets, it somewhat neutralizes the bitterness, and they are quite tasty prepared this way.  This recipe is adapted from Deborah Madison’s excellent cookbook Vegetarian Cooking for Everyone {I love this book!}

Wilted Dandelion Greens & Arugula with Walnuts & Beets

Dandelion greens and/or arugula, about 1/2 pound
1 large garlic clove, mashed into a paste with 1/4 tsp kosher salt
1 large shallot, minced
4 tsp sherry vinegar or aged red wine vinegar
5 tbsp extra virgin olive oil
Freshly ground pepper

Whisk together the garlic paste, shallot, vinegar & olive oil.  Heat the vinaigrette in a small skillet until it sizzles.  Pour over the greens & toss with plenty of freshly ground pepper.  Top with toasted walnuts, cooked beets & a grating of Gruyere or Jarlsberg cheese.  It’s delicious with just the cheese, but the walnuts & beets add a bit of crunch & sweetness.

The first time I made this, we were too full to eat it all at dinner.  I put the leftovers in the refrigerator, not knowing how delicious they would be cold the next day.  I think I probably like them leftover as much, if not more, than freshly made.  Who would have thought?

Aloha & Happy Cooking!


6 Comments

In honor of Julia Child, who would be 101 years of age on 15 August 2013. . .
. . .”This is my invariable advice to people: Learn how to cook- try new recipes, learn from your mistakes, be fearless, and above all have fun!”  Julia Child My Life in France 

There was some beautiful produce plus one unusual {at least for us} item at the farmers market today.

This slideshow requires JavaScript.

After work last Tuesday, we received an invitation to Kamaole 3 Beach Park for a sunset BBQ on Wednesday.  “Yes! Yes! Yes!” was the reply to the invite.  We jump at any opportunity to have a sunset beach BBQ; good friends, good food & gorgeous scenery is only a 40 minute drive away.  I made this chocolate cake to share.  The cake is delicious & quick & easy to make.  It’s not a fancy cake, but then I’m not a fancy baker.  Decorated cakes are lovely, but I am not big on decorating my cakes.

Chocolate Sheet Cake

Chocolate Sheet Cake adapted from In the Sweet Kitchen: the Definitive Baker’s Companion

Cake:
3 c flour {I use whole wheat pastry flour}
1 3/4 c sugar
1/2 c natural unsweetened cocoa powder, such as Ghiradelli or Hershey’s
2 t baking soda
1 t salt
12 T vegetable oil
2 T white vinegar
2 t vanilla
2 c cool water

Preheat oven to 350 degrees.  Add flour, sugar, cocoa, baking soda & salt to an ungreased 9”x11” baking dish.  Stir well to mix.  With the back of a spoon, make three indentations or wells in the dry mixture: one large, one medium & one small.  Into the large well, pour the vegetable oil.  Into the medium well, pour the vinegar.  Into the small well, pour the vanilla.  Pour the water over everything.  With a fork, stir the mixture until the ingredients are well-blended, making sure you reach the corners & sides to catch any dry pockets.  Do not beat this batter, but mix just until most of the lumps are smoothed out, & there are no little patches of overly thick or runny batter.  A few lumps won’t hurt, & it’s important not to overbeat at this point.

Bake for 35-40” {I always start checking at 28” so as not to overbake} or until a toothpick comes out with a few moist crumbs & the top feels springy when lightly touched.  Cool completely on a wire rack before turning out, frosting or cutting.

Frosting:
1/2 c cocoa powder
2 2/3 c powdered sugar
6T butter
4-5 T milk or water {I always use milk, or cream if I happen to have some}
1 t vanilla
Pinch of salt {brings out the chocolate flavor}

Whisk cocoa, powdered sugar & salt together. Cream butter & add powdered sugar alternately with milk.  I don’t necessarily follow the recipe exactly as far as the milk goes, but just add enough milk to get the consistency I want {I like it soft-not runny & certainly not stiff}.  Spread on cooled cake.

Pita Breads

We went to another sunset BBQ last night, but we were in someone’s condo, not at the beach.  Two of the ladies who were at the first BBQ are visiting from the Mainland, and invited us over for dinner.  I decided to make hummus {post to follow on another day} to be eaten with homemade pita bread.  I’ve made pita bread a few times and it was always tasty, but the pockets didn’t always form.  I tried a new recipe, and it worked great!  I will definitely use it again.  I used half whole wheat flour and half bread flour.  It is from The Fresh Loaf website, where there are many recipes that I will be trying.

Borscht

We love eating soup & I enjoy making soups; most of the soups I make are vegetarian.  Today I made borscht.  I’ve made it before and have wanted to make it again; I finally got to it today.  It was great for lunch.

Russian Cabbage Borscht adapted from Moosewood Cookbook by Mollie Katzen.

1 ½ cups thinly sliced potato
1 cup thinly sliced beets
4 cups water or stock

Put potatoes, beets and water in a medium saucepan and cook until everything is tender {save the water}.

2 tbsp butter
1 ½ cups chopped onion
1 scant tsp caraway seeds
1 ½ tsp salt
1 large sliced carrot
1 stalk chopped celery
3 cups chopped green cabbage
Optional: 1 tbsp raisins
Black pepper, preferably freshly ground
¼ tsp dried dill weed
1 tbsp + 1 tsp apple cider vinegar
1 tbsp + 1 tsp honey
1 cup tomato puree {I pulsed a 14 1/2 oz. can of tomatoes in my food processor}

Melt the butter in a large soup pot and add the onions, caraway seeds and salt.  Cook until onion is translucent, and then add carrots, celery and cabbage.  Add the cooking water from the beets & potatoes, and cook, covered, until all the vegetables are tender.  Add potatoes, beets and all remaining ingredients.

Cover and simmer slowly for at least 30 minutes.  Taste and correct seasonings.

Serve topped with sour cream or plain yogurt, extra dill weed and chopped fresh tomatoes.

Note: The next time I make this soup, I am going to chop the beets and potatoes instead of slicing them.

Take some time to prepare & enjoy delicious food.

Bon appetit!


Leave a comment

Waiting for Flossie

We don’t get a lot of rain where we live in Pukalani, so today’s rain was welcome. The morning sky was a mix of blue, gray clouds & sun breaks; the wind was soft. Big winds are a frequent occurrence in Pukalani, winds so big it’s a wonder that plants have any foliage & that any of us have a hair left on our heads. But they aren’t the sustained winds that come with a storm. We are waiting for Flossie, the Tropical Storm that is currently headed for Maui, to arrive. Right now, the rain is falling a little harder & the palm fronds are swaying gently. A few birds are chirping here & there, but we aren’t hearing the usual afternoon bird symphony of chirps & tweets. We hear an occasional cock-a-doodle-doo from a neighborhood chicken.

We spent the morning preparing for Flossie. The smart thing to do if you think you may lose power is to make some food so you are ready if it happens. Having lived in the Pacific Northwest for over 20 years, we are experts at getting ready for a power outage; we experienced many. A big difference is that when the power goes out on Maui, it isn’t freezing cold outside. We have plenty to eat, so I just prepared a few things to make our day just a little tastier. I made cornbread using Bob’s Red Mill Blue Cornmeal, which I hear is more nutritious than yellow cornmeal, these oatmeal muffins and Passato of Vegetables , one of our favorite soups {good hot or cold}. Today is cool enough to enjoy the soup hot, and warm enough to eat it cold, should we be sans power. Fingers crossed that the power stays on!

Blue Cornbread {adapted from Moosewood Cookbook}
1/4 cup honey
1/4 cup melted unsalted butter
1 cup buttermilk
1 large egg
1 cup blue cornmeal {of course you can use yellow}
1 cup whole wheat pastry flour
2 tsp baking powder
1/2 tsp baking soda
1/2 tsp kosher salt

Whisk together honey, buttermilk, egg & butter. In a large bowl, whisk together the dry ingredients. Add wet ingredients to dry & mix well.

Bake in a greased 8″x 8″ pan at 425 degrees for 18 minutes or until toothpick comes out with a few moist crumbs. I love it with butter & molasses.

Blue Cornbread

More rain has arrived, along with thunder! And now there is lightning! Time for hot soup.


2 Comments

“Life is uncertain.  Eat dessert first.”  Ernestine Ulmer

I saw some beautiful flowers on my walk today, & couldn’t resist photographing & sharing them with you.  My walk was enjoyable as always, and warm, because I didn’t leave until a little after 7:00 am.  The sun doesn’t take long to “warm up” in Hawaii; it pretty much makes its appearance & is hot right off the bat.  If you want a cool walk, you need to leave before the sun peeks over Haleakala, or after it dips behind the West Maui Mountains.

Sunset from Bedroom Window

If you have visited Maui, or live here, you know that there are chickens all over the place.  I have seen some beautiful chickens here, but the family I saw on today’s walk are about the homeliest bunch I’ve encountered.

Fowl

Truth be told, I am more excited about what I made after I returned from my walk.

I made this. . .

This is a fantastic way to end a walk on a hot day!

This is a fantastic way to end a walk on a hot day!

Oops…I was so anxious to eat my dessert that I forgot to snap a photo until these two bites were left!  Side-by-side with ice cream, I could certainly tell the difference.  All by itself, I don’t need ice cream.  We always have a stash of frozen bananas, so this is a breeze to make {& eat}.

Banana Mocha Peanut Butter Soft Serve

2 frozen bananas, sliced
1 tbsp. crunchy peanut butter
1/2 tsp instant coffee {I use Starbucks Via}
1 tsp cocoa {I use Dagoba unsweetened with bits of unsweetened chocolate}
1 tsp vanilla
Pinch of kosher salt
1/8 cup roasted, unsalted peanuts
20 dark chocolate chips {or your favorite}
Splash of milk, dairy or otherwise, if you need it for blending

I used my Cuisinart Mini-Prep food processor for this recipe.  Put the bananas, peanut butter, coffee, cocoa, vanilla & salt into the processor.  Process until the mixture starts to become creamy; you may need a little liquid to get it going.  I used a little of my homemade almond milk.  Add in the peanuts & chocolate chips & blend until they are somewhat chopped up, but not totally.  Eat right away, or freeze.  I prefer eating it right away, or freezing for just an hour or 2.

Serves 2 {or 1 if she doesn’t feel like sharing}

Bon Appetit!

Life is too short to eat mediocre bread, and there is a lot of it out there.

4 Comments

Bread baked and cut final

One of life’s great pleasures is the aroma of yeasty bread dough in the oven, transforming itself into a beautiful, delectable, crusty loaf of bread.  If you have never baked homemade yeast bread, you are in for a treat.  It really doesn’t take a lot of time; you can have delicious bread from start to finish in 3 hours or less, depending on the bread.  Much of that time is rising time, so you can be doing something else, like making soup or salad to accompany your freshly baked bread.

It isn’t just the smell that is enticing though.  Bread dough feels good in your hands.  Not so much at the beginning, when it is a sticky, shaggy mass of dough…

Rough shaggy dough final

but when your mindful kneading transforms it into a silky, supple ball of dough, it is a pleasure to behold.  I find kneading bread to be therapeutic and calming.

Kneaded bread final

I have been making yeast breads by hand for many years, although I am certainly not an expert on the subject.  I will say that I am not a fan of bread machines.  Perhaps I had a bad experience with one.  My mother-in-law had a bread machine when they first came out, and she made some tasty breads.  She enjoyed hers so much that she gave one to us.  I used it a few times.  It was nice to wake up to freshly baked bread courtesy of the bread machine, but it had a hole in the middle of the cylindrical loaf.  I could live with that, but the outside of the bread was slightly burned when the inside was undercooked.  So I decided to try letting the bread machine do the kneading, and I would bake off the loaf the “old fashioned” way.  Doing that deprived me of the pleasure of getting my hands into the dough and experiencing that lovely change in texture from rough to silky smooth.  Bread machine?? Not for me, thank you very much!  I gave ours away to an appreciative uncle.

This slideshow requires JavaScript.

Whole Wheat Rye Potato Bread

1 medium sized potato
reserved potato cooking water
2 packages dry yeast
2 tbsp butter, cut into small chunks
2 tbsp honey
1 tbsp kosher salt
1 cup warm milk {low fat is fine}
3-4 cups whole wheat flour
2 cups dark rye flour
3 tbsp coarse cornmeal + 3 tbsp ground flax seeds + whole wheat flour to make 1 cup
3tbsp caraway seeds {or fennel, anise or a combination of them}

Peel & dice the potato.  Cover with water & boil until potato is tender, about 15-20 minutes.  Save 1 cup of the potato water {add hot tap water if you do not have enough}.  Mash the potato & set aside.

In a large bowl, mix together 3 cups whole wheat flour, rye flour & cornmeal/flax seeds/whole wheat flour mixture.  Keep the additional cup of whole wheat flour in case you need to use it.

Pour the {not too hot} potato water in another large bowl, then sprinkle in the yeast & stir with a wooden spoon.  Add the butter, honey, caraway seeds and salt, and then stir in the mashed potato {approximately 1 cup}, warm milk & 3 cups of flour mixture.  When you add the yeast to the warm potato water, it will begin to activate.  It will begin to get bubbly as you add the remaining ingredients & will look like this. . .

Bubbly yeast final

Beat until smooth, and then add enough additional flour to make a stiff dough.  When it gets hard to incorporate any more flour with the spoon, turn the dough out on a lightly floured counter.  Knead the dough until smooth and elastic, about 8-10 minutes.  Wash the bowl in which you mixed the dough, butter it and then place the dough back in the bowl, turning to coat all sides with butter.  Cover with a clean kitchen towel & let rise in a warm place until doubled in bulk.  This should take 45-60 minutes.  I like to turn on the oven for 2 minutes, turn it off and then put my bowl of dough in the toasty warm oven to rise.  Don’t forget to turn off the oven or you will bake your bread prematurely!  I have heard that the pilot light in a gas oven has enough warmth to be a good place to let bread rise, but I have never had a gas oven, so can’t vouch for that one.

How do you know when your dough has doubled in bulk?  It is difficult to “eyeball it” so there is a little test you can use.  Poke 2 fingers into your dough after it has risen for 45 minutes; if the indentations remain, your dough is ready for the next step.  If not, cover it back up for 15 more minutes & repeat the test.

Indentation test to see if dough is finished rising final

When doubled, punch the dough down, cover and let rise again in a warm spot for 20 minutes.

Turn the dough out onto a lightly floured counter & knead for 1-2 minutes.

Now you are ready to shape your loaves!  Divide the dough into 2 equal pieces {I use my kitchen scale to do this} & shape.  You can either sculpt the dough into a loaf with your hands, or you can do it jelly roll style, as shown in the slideshow {right before the recipe}.

Note about yeast:  When you are adding warm liquids to yeast, make sure the temperature of the liquid is between 100 & 115 degrees Fahrenheit.  If your liquid is too hot, you risk killing the yeast & your bread will not rise.  Be sure to check the expiration date on your yeast to verify that it is not outdated.  It may still work. . .or it may not.

Enjoy the kinesthetic, aromatic & flavorful joys of baking your own yeast bread. . .and don’t forget the butter!


1 Comment

Amazingly Delicious Banana Nut Muffins

Banana Muffins final

If you are a banana nut bread lover, you must try these muffins.  They are dense, moist, banana-y, and just plain delicious.  I have put my own spin on them to make them healthier and even tastier than the original recipe.  The list of ingredients is perhaps a little longer than most muffin recipes, but they go together quickly, and are definitely worth your time.

As far as I’m concerned, any banana bread or muffin must contain walnuts & be eaten with butter;  preferably the bread is cool enough so that the butter just sits on top so you can really taste it.  There is something special about the flavor combination of sweet banana bread, crunchy walnuts & creamy butter.  Another “must ingredient” for me in these muffins is cacao nibs.  Cacao nibs are one of my favorite ingredients.  As you can see from the package, they are a Mayan Superfood, with antioxidants, iron & magnesium! Don’t expect to snack on them from the package, because they have no sweetening, so aren’t like popping chocolate chips.   I buy these from Amazon:

Cacao nibs are a nice addition to banana breads because they add a little punch of chocolate flavor in every bite.  What's not to like about that?

Cacao nibs are a nice addition to banana breads because they add a little punch of chocolate flavor in every bite. What’s not to like about that?

The original recipe calls for strong coffee & suggests water if you don’t have coffee.  I highly recommend using coffee, even if you are not a coffee drinker, because it adds a layer of flavor that you can’t detect as coffee; it’s just good.  I buy the Starbucks Via packages from Costco when they go on special.

Starbucks Via fina;

Banana Nut Muffins
Adapted from http://busterbucks.hubpages.com/hub/Worlds-Best-and-easiest-Banana-Nut-Muffins

Wet Ingredients:
2 ripe bananas
1 large egg
1/3 cup melted unsalted butter
1 1/2 tsp vanilla
2 tbsp. strong coffee {you can use water, but I highly recommend the coffee}
Milk, buttermilk or coconut milk-enough to make 2 cups TOTAL wet ingredients {if you use 3 bananas you may only need a few tablespoons; if you use one banana, you may need to add 2/3 cup or more}

Dry Ingredients:
1 1/2 cups whole wheat pastry flour
1/2 cup sugar
1/2 cup flaked unsweetened coconut
1 tbsp. ground flax seed {preferably grind your own from whole flax seeds}
2 tbsp. hemp seeds
2 tbsp. raw cacao nibs
1 tsp kosher salt
1/2 tsp baking soda
1/2 tsp baking powder
1/2 tsp cinnamon
1/8 tsp ground nutmeg {I use whole nutmeg, freshly grated on a rasp.  Definitely worth it!}
1 cup broken walnuts

Preheat oven to 350 degrees.  Be sure to put the muffins in a fully preheated oven.

In a small bowl, put all of your wet ingredients-make sure you mash the bananas thoroughly with a fork.  Stir in the egg with the fork, and then add the remaining wet ingredients.

In a large bowl, thoroughly mix your dry ingredients.  I always put the measured baking soda & baking powder in my hand & smash any lumps; it’s not pleasant to bite into a lump of baking soda in your muffin.

Add the wet ingredients to the dry ingredients.  Stir gently {12-14 quick strokes}.  Do not over mix-this will result in tough muffins.  Who wants tough muffins?  There may be a few streaks of flour but that is ok.

Spray your muffin tins with coconut oil spray {or Pam}, or grease them with butter.   Lightly spoon in your batter {don’t pack it in}.  You can fill the tins up to the top.

Put the muffin tin into the preheated oven & bake for 20 minutes {I always start checking at 18 minutes}.  They are done when a toothpick comes out with a few moist crumbs.

Leave the muffins in the tins for 5-10 minutes, and then remove them to a wire rack.  Enjoy with butter!

Here are a few other ingredients I like to use.

Penzeys Nutmeg2

Hemp Seeds

Whole Wheat Pastry Flour

Penzeys Cinnamon final


1 Comment

Homemade Almond Milk

Why should you bother making homemade almond milk?  Because it doesn’t contain any of the additives or weird ingredients found in packaged almond milk & is delicious, healthy & simple to make. A regular blender can be used to whip up this luscious milk, so what are you waiting for?

I’ve been following Gena Hamshaw’s fabulous blog called Choosing Raw-Vegan & Raw Recipes {even though I am not vegan, nor do I adhere to a raw diet}, and have been contemplating making homemade almond milk for some time.  I finally took the plunge & made 2 batches & am thrilled with the results!  The only ingredients needed to prepare this delicious vanilla almond milk are almonds, water, agave nectar & vanilla.  The first batch was served up unstrained, in all its textural {read fibrous} glory-it was very tasty but I decided to strain the second batch & I am glad I did.  The resulting milk was smooth,  creamy & delicious.  I used cheesecloth, because I always have cheesecloth on hand.  A nutmilk bag is probably in my future though, because it can be washed & reused.    So far, the only thing I’ve used my almond milk for was chocolate milk, using Dagoba Unsweetened Cacao with Bits of Unsweetened Chocolate-very tasty!

almond-milk-026-500x375    Photo by Gena Hamshaw from www.choosingraw.com.